Moto E6 is a Budget variant mobile with 2 GB RAM and Qualcomm SDM435 Snapdragon 435. But the processor is Octa-Core processor, and It comes with Near Stock Android Pie 9.0 version. Moto Firmware is not heavily customized like other manufacturers. So, We can use this mobile for regular usage. The Regular method for updating your mobile is using Software update in settings. But, If you moved to other regions, Or You have rooted mobile, you will not get the official updates from Moto. In those situations, you can use this manual method. The Below method is for Unlocked International variants. Don’t use this method on carrier locked devices. Below I Listed three ways to flash the firmware. Based on your need, you can choose one.
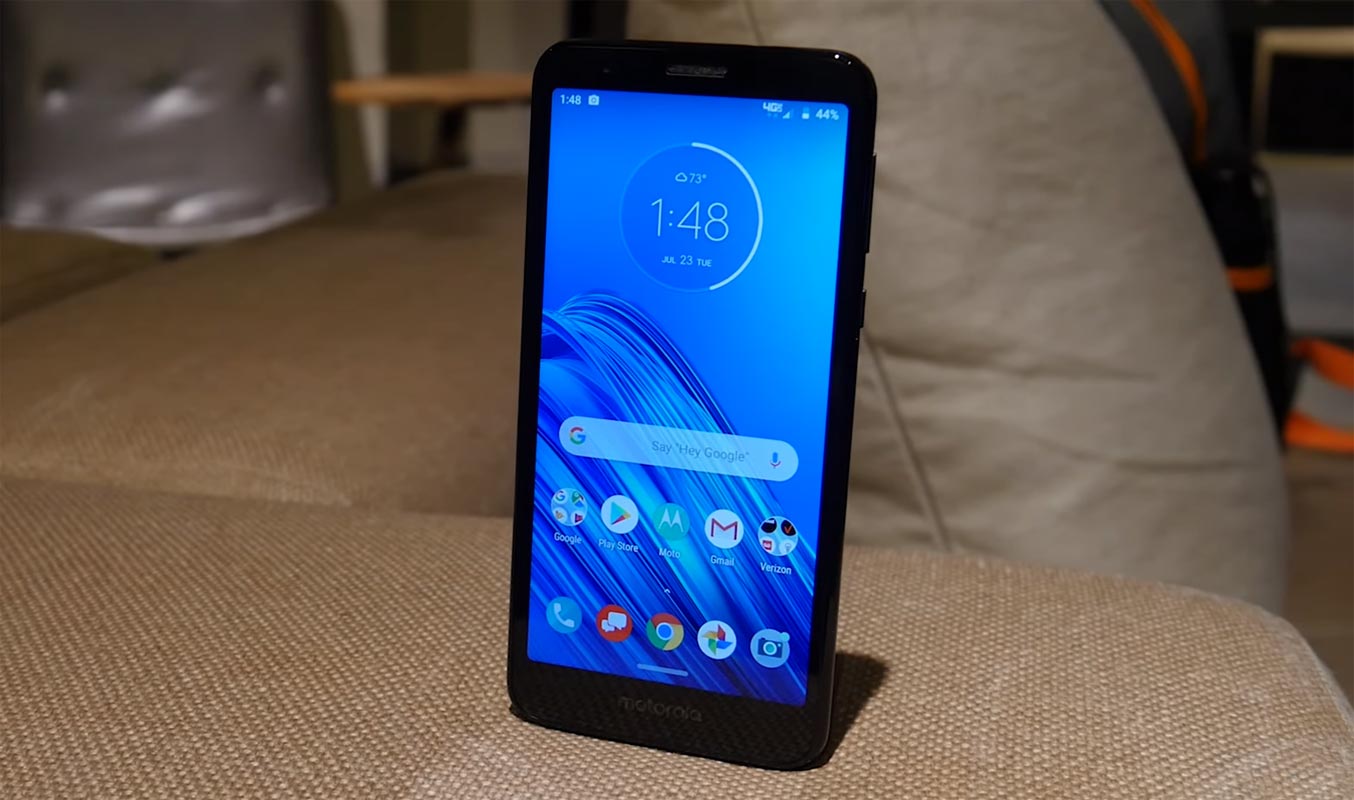
Android Pie 9.0 Firmware Flash- Moto E6
Official OTA Method
If you’re going to update a security patch to the current month. Don’t go for the manual method. Try this Automatic method.
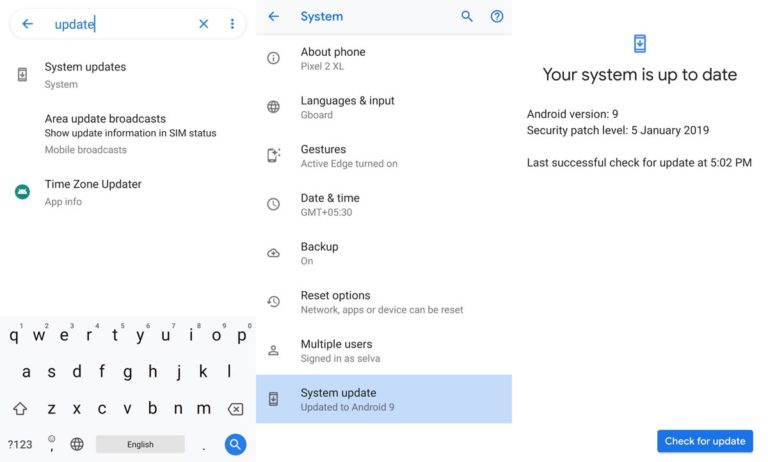
The process is straightforward and simple;
-
Go to your device setting menu and scroll down to the bottom
-
Tap on “Software Update”
-
You may have to refresh the page to start the OTA upgrade process.
Manual Method (International Variant)
Note
- Check Your Device Mobile No. If you flash Different model number, you will lose some features based on your region.
- Battery Percentage Above 50.
- Backup Your Device.
Download Firmware
- Download Motorola E6 Pie firmware.
Using Internal Memory Method
This method doesn’t require PC support, download, and installs within your mobile. It will work only if you have Stock Oreo firmware installed in your mobile. If you are already using Custom OS move to the next method.
- Copy downloaded firmware to your mobile, Rename it to Blur_Version.zip and copy it to your Internal Root Memory. Copy>> Internal memory. Don’t put in any folder and Don’t change the name of the file.
- Now Go to settings >> Apps and Notifications >> Show all apps >> Show system apps.
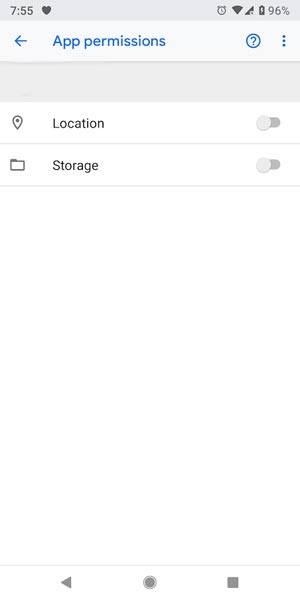
- Go to Motorola Update service >> Permissions >> Enable Storage permissions. After enabling this permission. Now update as usual OTA Method.
-
Go to your device setting menu and scroll down to the bottom
-
Tap on “Software Update”
-
You may have to refresh the page to start the OTA upgrade process. Instead of download from Server, this update process will update from your Internal memory.
Using ADB and Fastboot method
This method requires PC support; You can also use this method to use Stock ROM If you are using Custom ROMs.
-
Download and install the Moto USB driver to your computer system.
-
Also, download the ADB drivers. Install it in your PC.
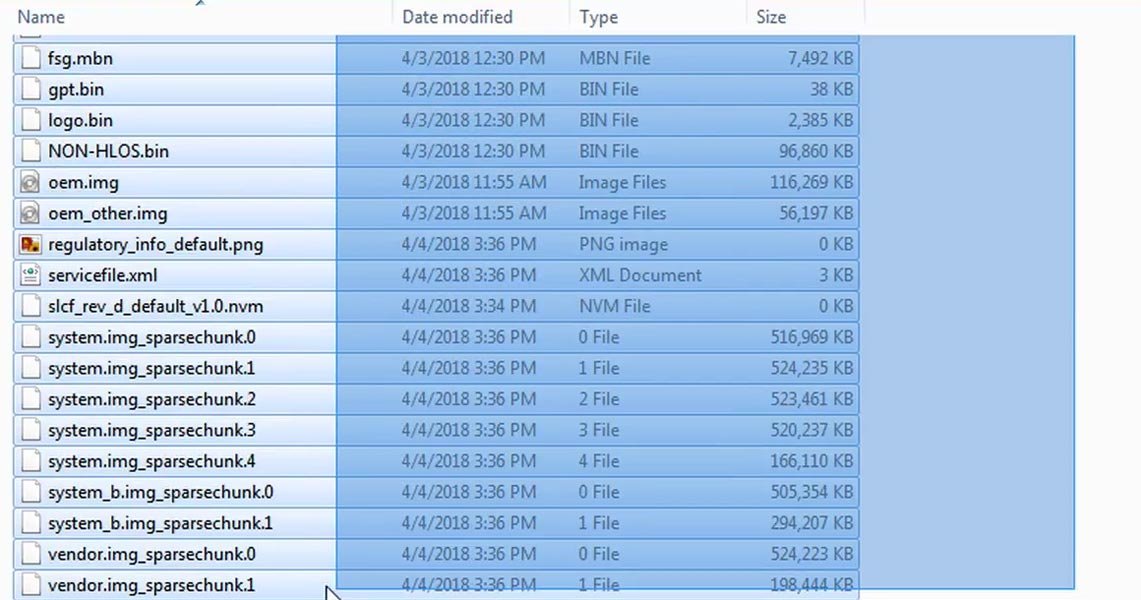
- Copy your downloaded firmware to PC and Extract all the files from the .zip. Copy those files to the folder where you installed ADB and Fastboot.
- Switch off your device. Then, enter into Fastboot mode. To do this- Press and hold down the Volume Down + Power buttons at the same time for some time.
-
Press the Volume Up button to continue when you see the warning message.
-
Now, connect the Moto E6 mobile to the computer via USB cable.
-
Launch the fastboot on your computer. Open a Command prompt on your PC and type below command.
- fastboot devices
- It should display the connected devices. If you didn’t get the device, restart the command prompt and Disconnect and Connect your Moto E6. If you are detected type below commands.
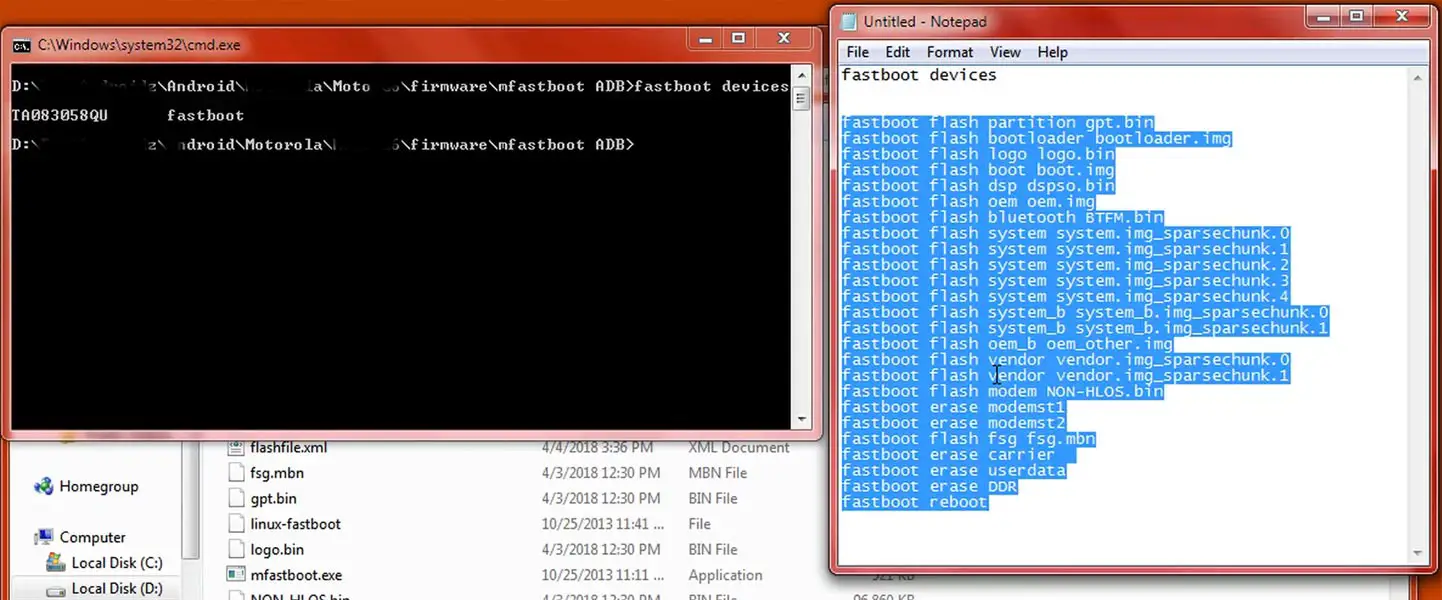
- For your comfortable use, I added all the commands in the text Document so that you can easily paste in your Command Prompt. Download Moto firmware flash commands.txt.
- You don’t have to type every command. Copy all the commands and paste in the command prompt. It will execute the commands one by one.
- Wait for the process to complete. After the process complete, It will boot into your flashed OS.
RSD Lite Method
This method can be used to flash firmware if you are using Custom ROM or a rooted device like that. You need a PC for this process. If you already rooted or have Custom OS, your bootloader is unlocked. But if you relocked your bootloader, you should unlock the bootloader. After unlock, Follow below steps one by one carefully.
Unlock Bootloader using ADB and Fastboot
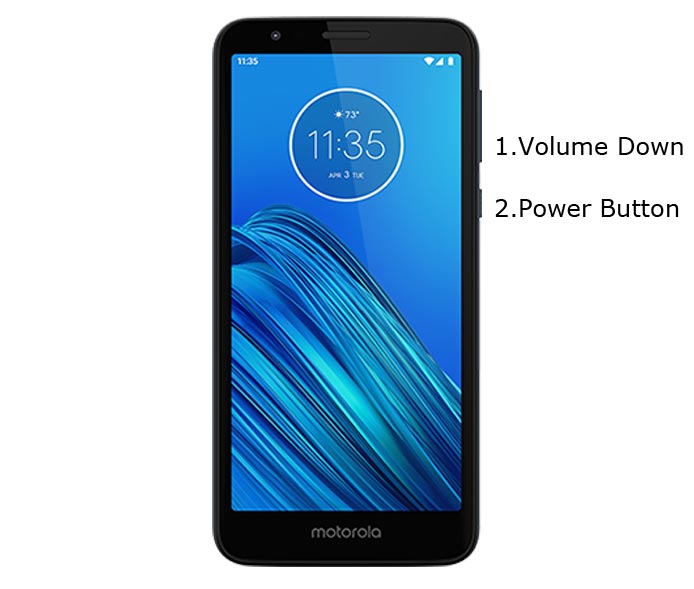
- Switch off your device. Then, enter into Fastboot mode. To do this- Press and hold down the Volume Down + Power buttons at the same time for some time.
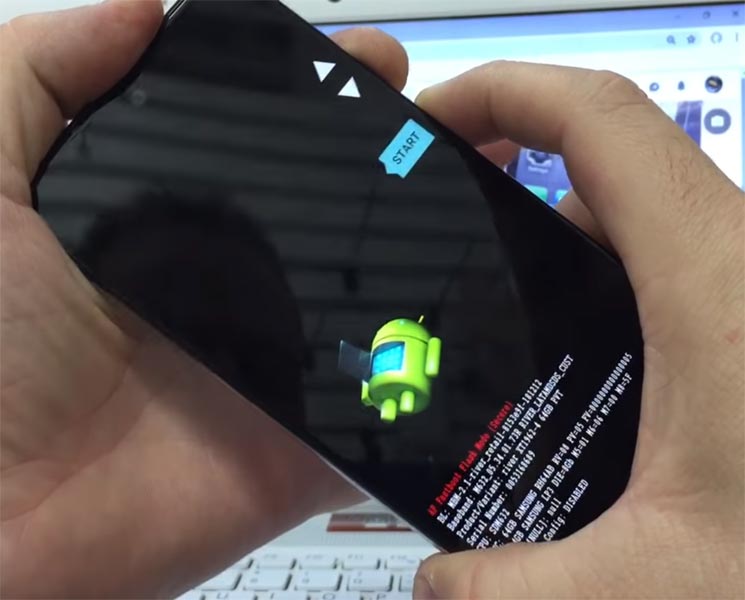
-
Press the Volume Up button to continue when you see the warning message.
-
Now, connect the Moto E6 mobile to the computer via USB cable.
-
Launch the fastboot on your computer. Open a Command prompt on your PC and type below command.
- fastboot devices
- It should display the connected devices. If you didn’t get the device, restart the command prompt and Disconnect and Connect your Moto E6. If you are detected type below commands.
- fastboot oem get_unlock_data
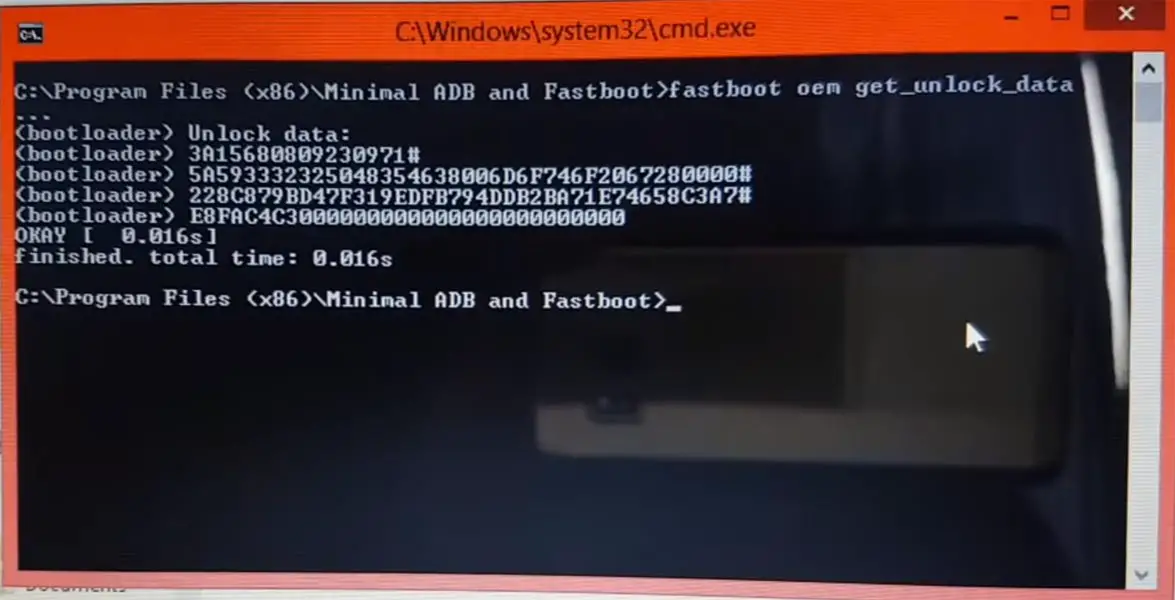
- Hit enter, you will get some unlock data. Copy those codes and remove <bootloader> Prefix from those lines and copy them into one single line.
- Go to Official Moto Unlock Page. Log in with your moto account and in the Box, Paste those codes and Check the unlock Bootloader Status. If you get, Yes you can unlock, You can request unlock Key from Moto.
-
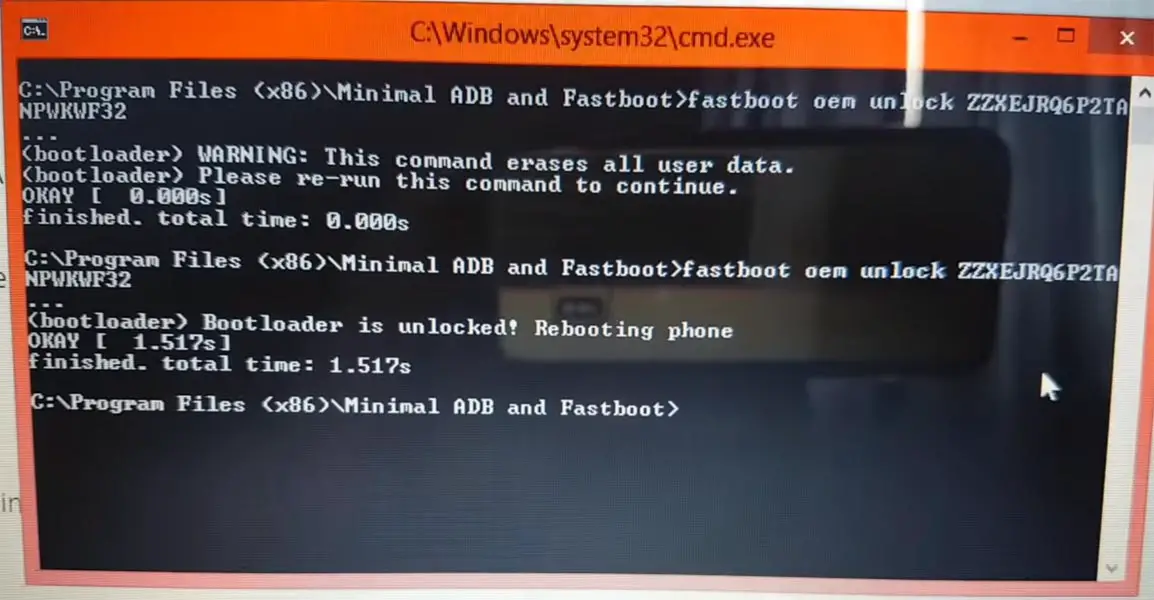
After the process completes, you will get 20 Digit to unlock key in your email. Now type the following command to unlock bootloader on your device.
- fastboot oem unlock UNIQUE CODE
-
You should type this code two times and Hit enter to unlock your device successfully. After the successful unlock your device will automatically reboot to the standard OS.
- Check again enable “Developer Options,” then go to the “Developer Options” and enable USB Debugging Mode, OEM Unlock and Enable the “Advanced Reboot.” Sometimes they disabled themselves after the boot.
Flash Firmware using RSD Lite
-
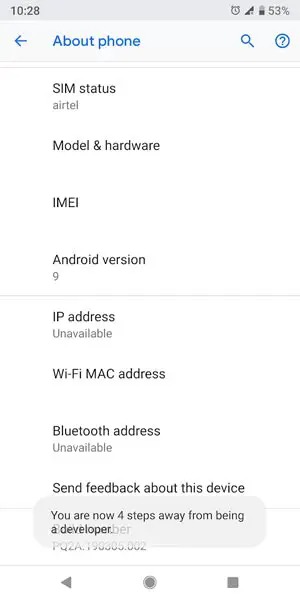
Enable USB Debugging Mode and OEM Unlock; you’ll find these options at Settings >>> Developer options. If you didn’t see the developer options on your settings menu, then go to about >>> build number; click on the “Build Number” row for about ten times continuously to activate “Developer Option” on your device.
- Download Motorola USB driver and install it in your PC.
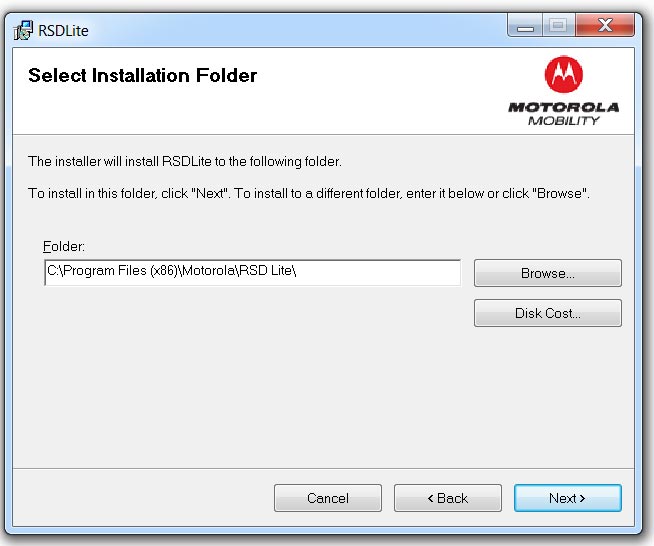
- We are using third party software flashing. Download RSD Lite and install this also in your PC.
- Connect Your Mobile With the PC Using USB Cable.
- Switch off Your Mobile and Enter into Fastboot Mode->Press and Hold Volume Down+ Power Button.
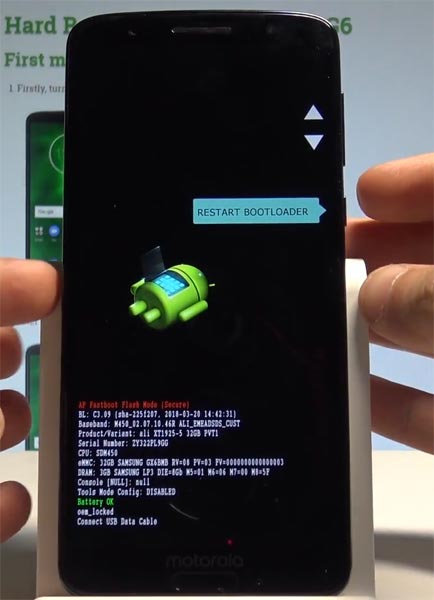
- Release all the keys when you enter into Fastboot mode.
- Now Launch RSD Lite Select Your Downloaded Firmware Using this “…” The symbol in the RSD Lite.
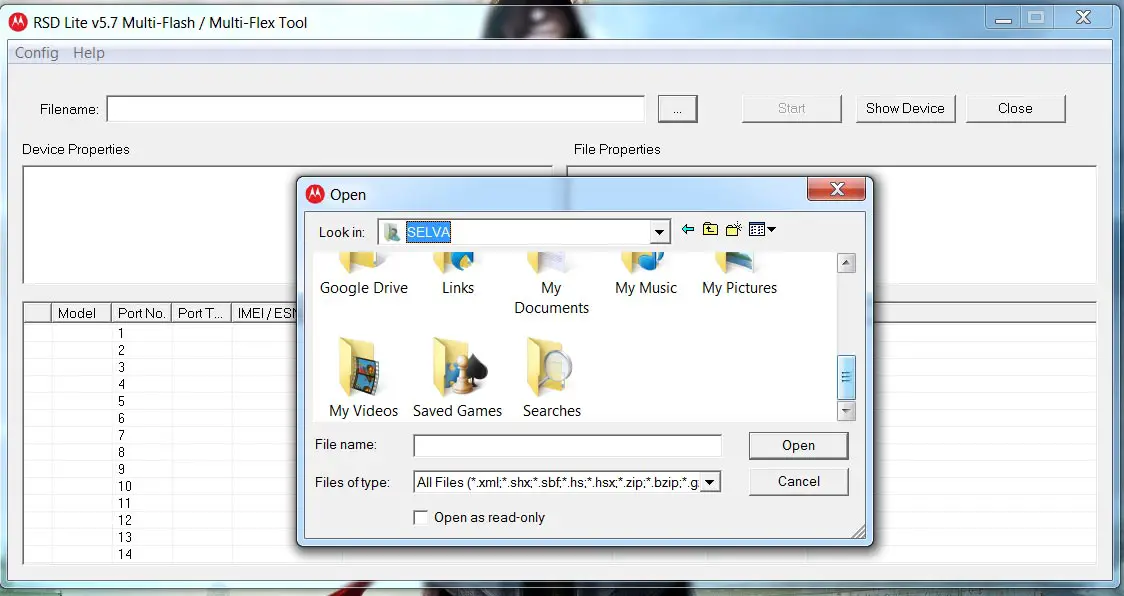
- It Will Asks For the Unzip Just Select Uncompress.
- Check With Your Mobile Details.
- Now go to Your Mobile Press Volume Down Key And Select AP Fastboot. Make Sure that USB Connected Message is Display(Transfer Mode: USB Connected).
- Now Select the Start in the RSD Lite Wait For the Process to Complete, Your Mobile Will Reboot After the Process Completion.
- You can Check the Firmware Details->Settings->About->Version.
Motorola E6 Pie 9.0 Features
Main Feature
- Upgrade system from Android Oreo to Android Pie
Gesture Features
- Swipe up for recent apps
- Swipe tray up for the app tray
- Single tap to return home
- Long press to activate Google Assistant
- Swipe left to go back
- Swipe right to flip between the last two apps
Notifications
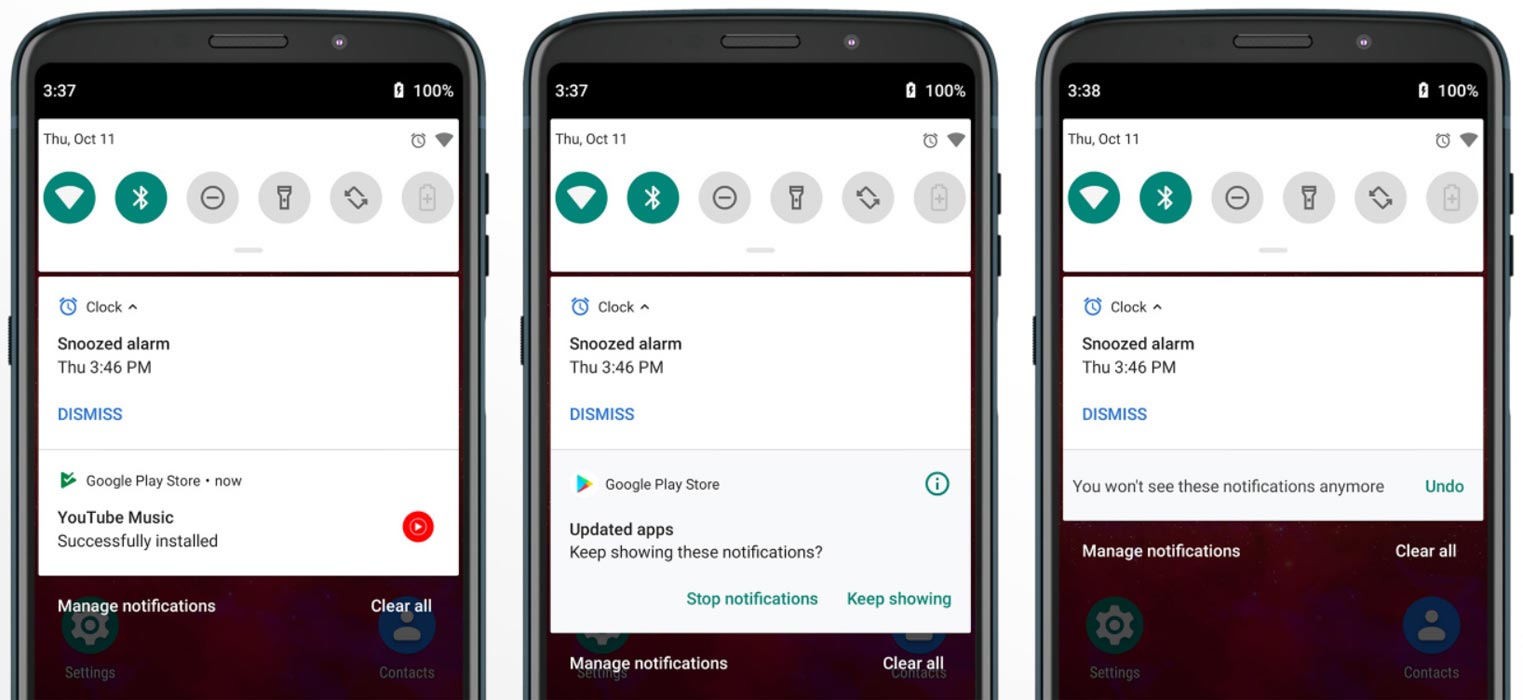
- Now you can disable some unwanted notifications based on your explicit frequent. If you clear notifications without reading for some specific apps, based on your usage, the system will ask to disable for the separate app.
Adaptive Brightness
- Based on the environment, your device can automatically adjust the Brightness. To enable this go to Settings >> Display >> Adaptive Brightness
Battery Manager
- If you enable Battery manager, you can restrict apps that use unwanted power in the background.
Easy Screenshot in Power Button
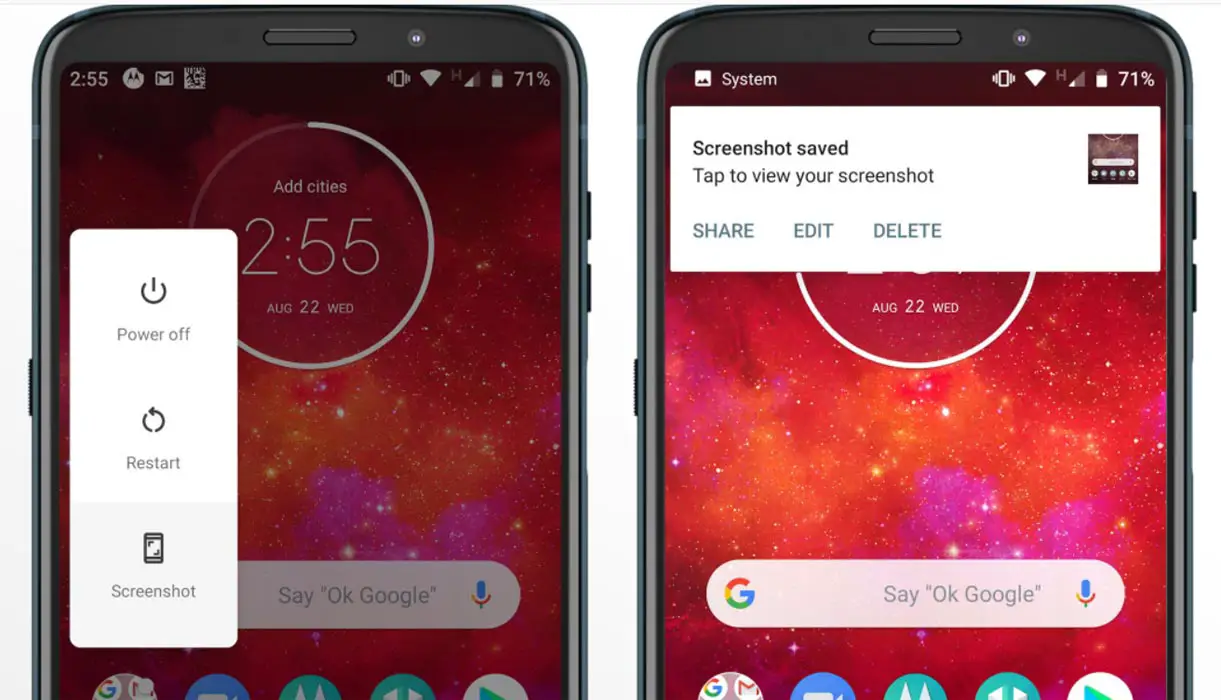
- Now you can easily take a screenshot using Power Button. Press Power Button >> Screenshot.
Other Features
- Added LTE+LTE (Dual Volte) feature
- Added Panorama feature for the camera
- Some Camera improvements
- Easy Volume Controls
Wrap Up
If you are in Stock firmware, Use Internal Memory method. It is comfortable and safe; You can update like a Regular OTA Update. But if you were already using Custom OS or Rooted devices, You can try RSD Lite Method or Fastboot. Don’t download any third party apps; sometimes, it may trigger the updates process. There are a lot of new Gestures available in this Update, try them also. In my opinion, Moto near Stock Android is better to compare with some other Custom Skin OS. So try to use this OS instead of a Custom OS. But the decision is your choice…:)

Selva Ganesh is the Chief Editor of this Blog. He is a Computer Science Engineer, An experienced Android Developer, Professional Blogger with 8+ years in the field. He completed courses about Google News Initiative. He runs Android Infotech which offers Problem Solving Articles around the globe.


Leave a Reply