Samsung Galaxy J5 model released with J7 2015 Model for compact size. It also comes with 1.5 GB RAM but with Quad-core processor. Some of the users still use this phone. But if you use still now, you know you have to wait for 1-2 seconds for every process. You can optimize your mobile by free up some bloatware and hibernate, or you can use lite weight ROMs. For installing custom ROMs, you have to root your mobile. Follow below steps carefully to process this.

Why you should Root Samsung Galaxy J5 SM-J500F
Until you root your J5 device, there are quite a lot of actions you can never do on the smartphone. Also, you’re limited to how you can customize the device. Yes, with just 1.5 GB RAM, you are restricted. Albeit, once your Galaxy J5 is rooted, then, you have unlimited access to do whatever you wish to do with the device within its hardware limits. Most interestingly, you’ll be able to delete/uninstall all bloatware apps installed by the OEM and free up your internal memory space. There are many advantages you enjoy when you root your Android device.
How to root Samsung Galaxy J5?
Luckily, your Samsung Galaxy J5 comes with a flexible bootloader. This means that the smartphone (Galaxy J5) can be easily rooted. Also, the device can accept to install TWRP recovery or any other custom recovery file/app alike.
TWRP recovery is a custom recovery file which must be installed on Samsung Galaxy devices because you can root them successfully. In this article, we explained the easiest method to follow and install TWRP recovery on Galaxy J5. However, the tool required for rooting this device is the SuperSu Beta App.
With the help of TWRP Recovery, you can quickly flash the latest version of SuperSu into your J5 to gain root access. Before sharing the tutorial, you may want to know that, with the TWRP recovery present on your device, you can easily install any custom ROM or firmware. Does it seem complicated? Relax, everything will be explained succinctly in bullets.
Things to check out for;
-
Check your device model number.
-
Make sure your device battery is charged above 50%
-
Backup your current files and data, just in case (save them on external storage).
Pre-Requirement Steps

-
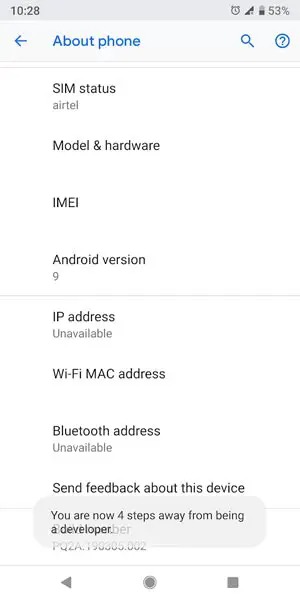
Enable USB Debugging Mode and OEM Unlock in your mobile. To do this; go to settings >>> about >>> Tap on the “Build Number” 7-10 times consistently to enable “Developer Options,” then go to the “Developer Options” and enable USB Debugging Mode and OEM Unlock. There is no complicated process in the J5.
-
Download and install the Samsung USB driver to your computer system.
-
Also, download the ODIN software. Select above Oreo version in the ODIN list. Install ODIN in your PC.
- Download SuperSu.Zip and Copy it to Your Phone Memory.
-
Download and save the TWRP File / CF-Auto-Root .tar file. We can’t flash the .img file using ODIN. Choose any one between TWRP or CF-Auto-Root, Don’t flash both files.
Flash TWRP/CF-Auto-Root using ODIN

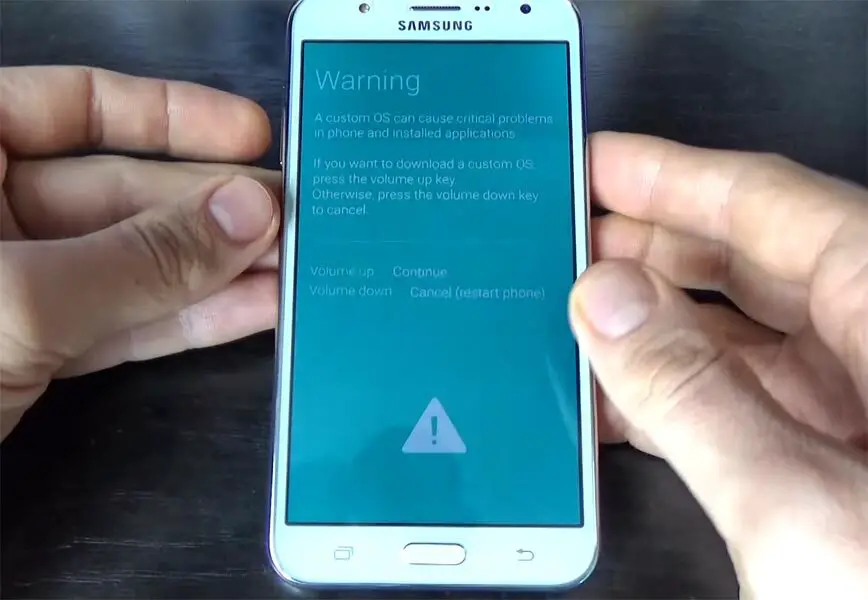
- Restart the device. Then, enter into Download mode. To do this; press and hold down the Volume Down + Home+ Volume Up buttons at the same time for some time.

-
Press the Volume Up button to continue when you see the warning message.
-
Now, connect the J5 mobile to the computer via USB cable.
-
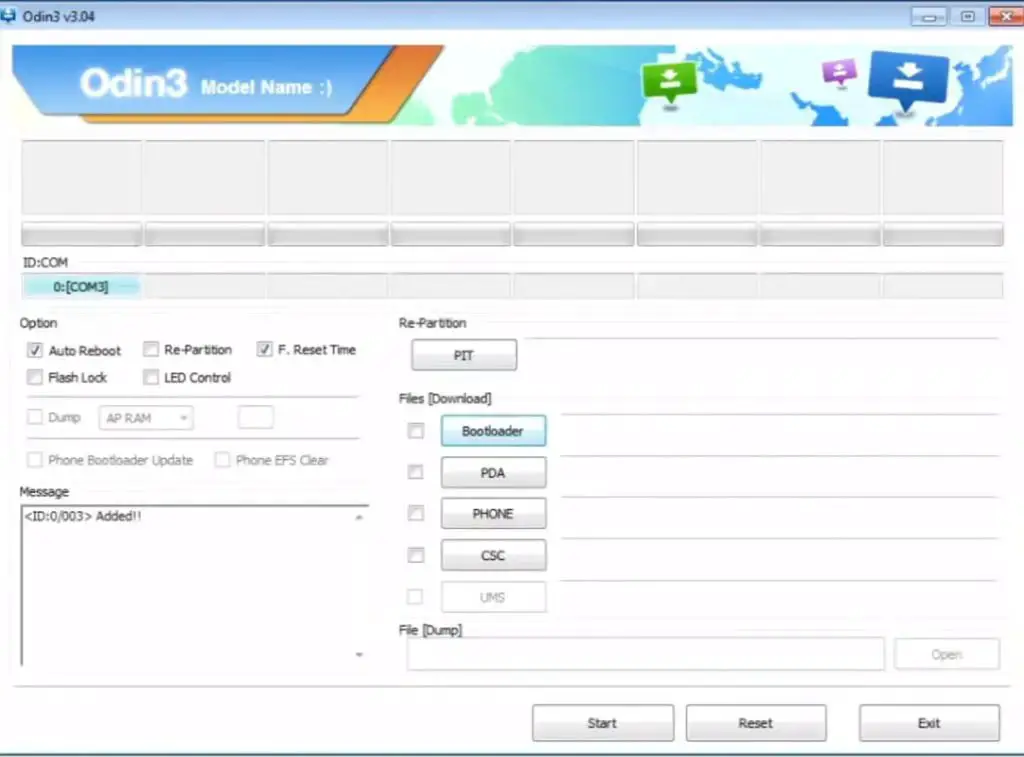
Launch the Odin app on your computer. If the device is detected by this app (Odin), it will show you a message that reads – added!!!

However, if the device is not correctly connected to the PC, you won’t see this message. So, you have to check the USB cable if it is good and reconnect the device.
-
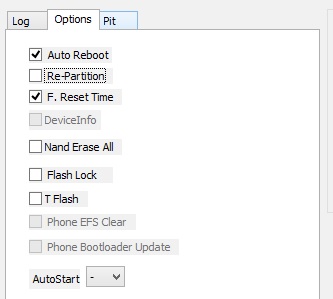
After connecting the Samsung device, click on the PDA/PA button to browse/search and get the TWRP/CF root file from where you saved it on your PC. Also, navigate to “options” and un-tick the Auto Reboot.

-
Click on “Start”
-
Once the file is loaded into the device, reboot your device.
-
Kudos, you have just Installed the TWRP/CF-Auto-Root on your Samsung Galaxy J5. If you installed TWRP, Don’t turn on your mobile. Immediately, move to SuperSu Installation steps.
Install SuperSu in your Samsung J5 using TWRP
- Follow this step only if you installed TWRP. If you installed CF-Auto-Root, you already have SuperSu on your mobile. So, you can skip this step.
- Boot it Into recovery mode->Volume Up+ Home +Power Button.
- Now it Will Boot into TWRP Recovery Mode.
- Select Wipe->Advance Wipe->Select Cache Data.
- Return to Home of TWRP select Install.
- Select SuperSu.Zip.
- After the Installation Reboot Your Mobile.
- Now You Can Find the SuperSu in your Mobile Applications.
Install Magisk in your Samsung J5
However, the SuperSU app will appear among your installed app so you can manage Root permissions. If you wish, you can install Magisk Manager APK to manage Superuser Permissions. Just download and install Magisk manager app as you do for Normal APK files.
What More?
That’s all you Rooted your Samsung Galaxy J5 2015 Model. If you face any issue or you confused with any steps, comment below, We will try our best to help you.

Selva Ganesh is the Chief Editor of this Blog. He is a Computer Science Engineer, An experienced Android Developer, Professional Blogger with 8+ years in the field. He completed courses about Google News Initiative. He runs Android Infotech which offers Problem Solving Articles around the globe.


Leave a Reply