
Switching ecosystem components or streamlining your digital workspace often requires moving critical data between platforms. Moving your data from Samsung Notes to Google Keep allows you to access your reminders, checklists, and brainstorming sessions on any non-Samsung device, including Windows PCs, iPhones, and standard Android interfaces. Because these two applications utilize completely different cloud infrastructures—Samsung Cloud versus Google Drive—there is no single, native “one-click” synchronization button to link them.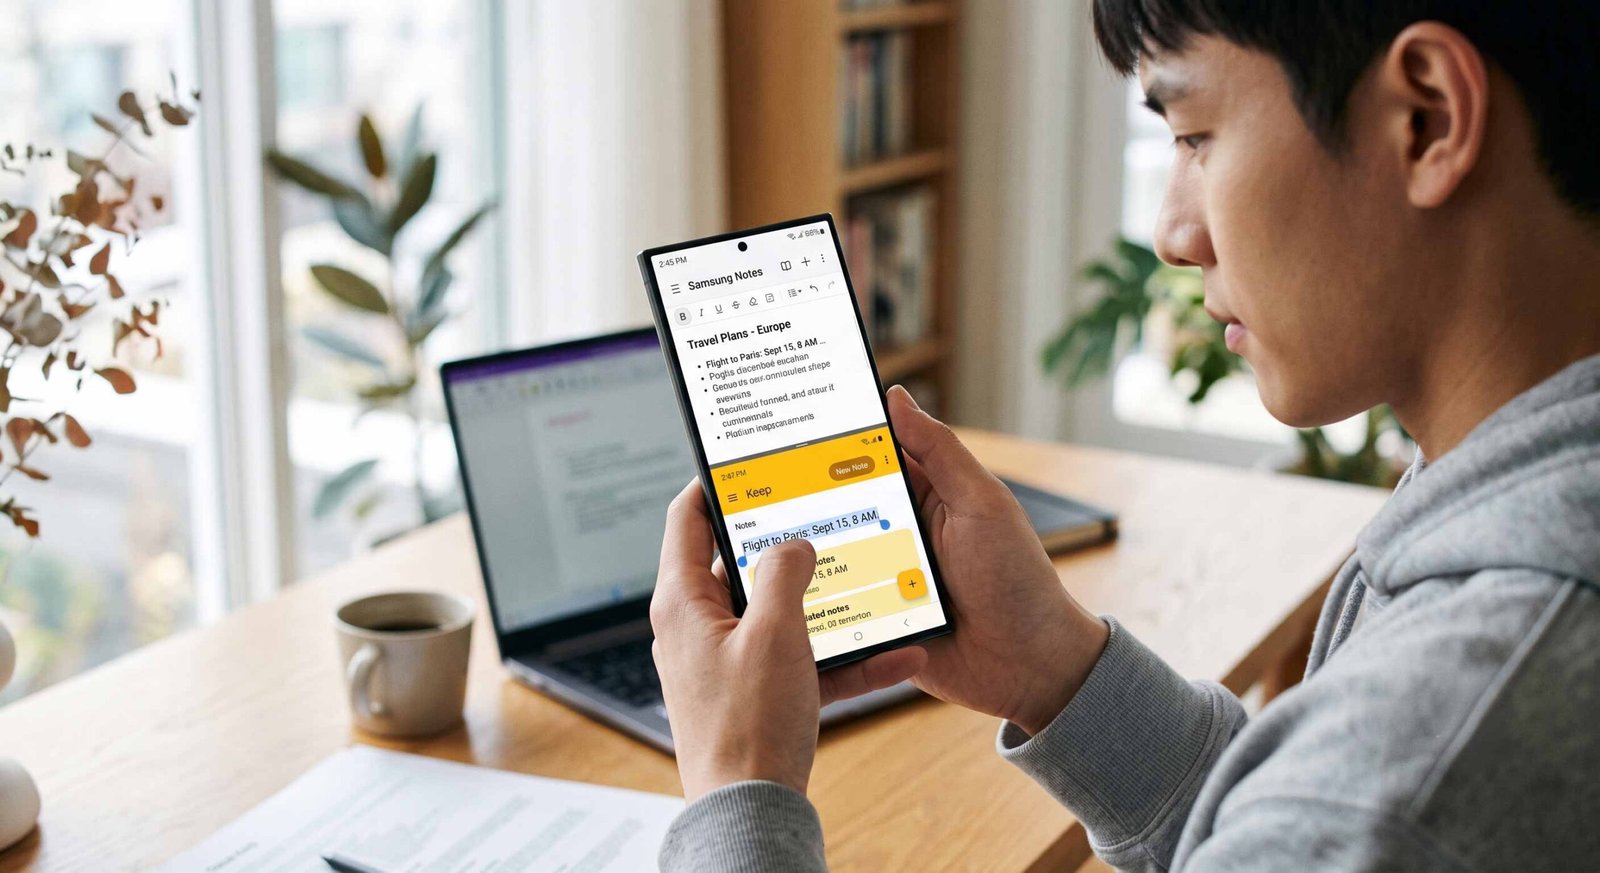
We have designed this comprehensive guide to walk you through the most efficient manual and semi-automated methods available to successfully migrate your entire note library without losing your formatting or media attachments.

Why Migrate From Samsung Notes to Google Keep
While Samsung Notes offers robust stylus support and advanced PDF annotation tools, it remains heavily locked into the Samsung hardware ecosystem. Google Keep offers cross-platform accessibility that ensures your notes are instantly available via any web browser, Chrome extension, or iOS device.
Google Keep simplifies the organizational layout by utilizing a fluid card-based system, labels for dynamic filtering, and color-coding, making it an ideal choice for quick-capture ideation and rapid task management. Transitioning your database ensures you are never restricted to a specific smartphone brand to read your own data.
Method 1: The Official Android Share Sheet Mechanism
The most reliable way to preserve text formatting and transfer images simultaneously is by using the built-in Android share functionality. This method treats each note as an individual entity and pushes it directly into the Google Keep ecosystem.
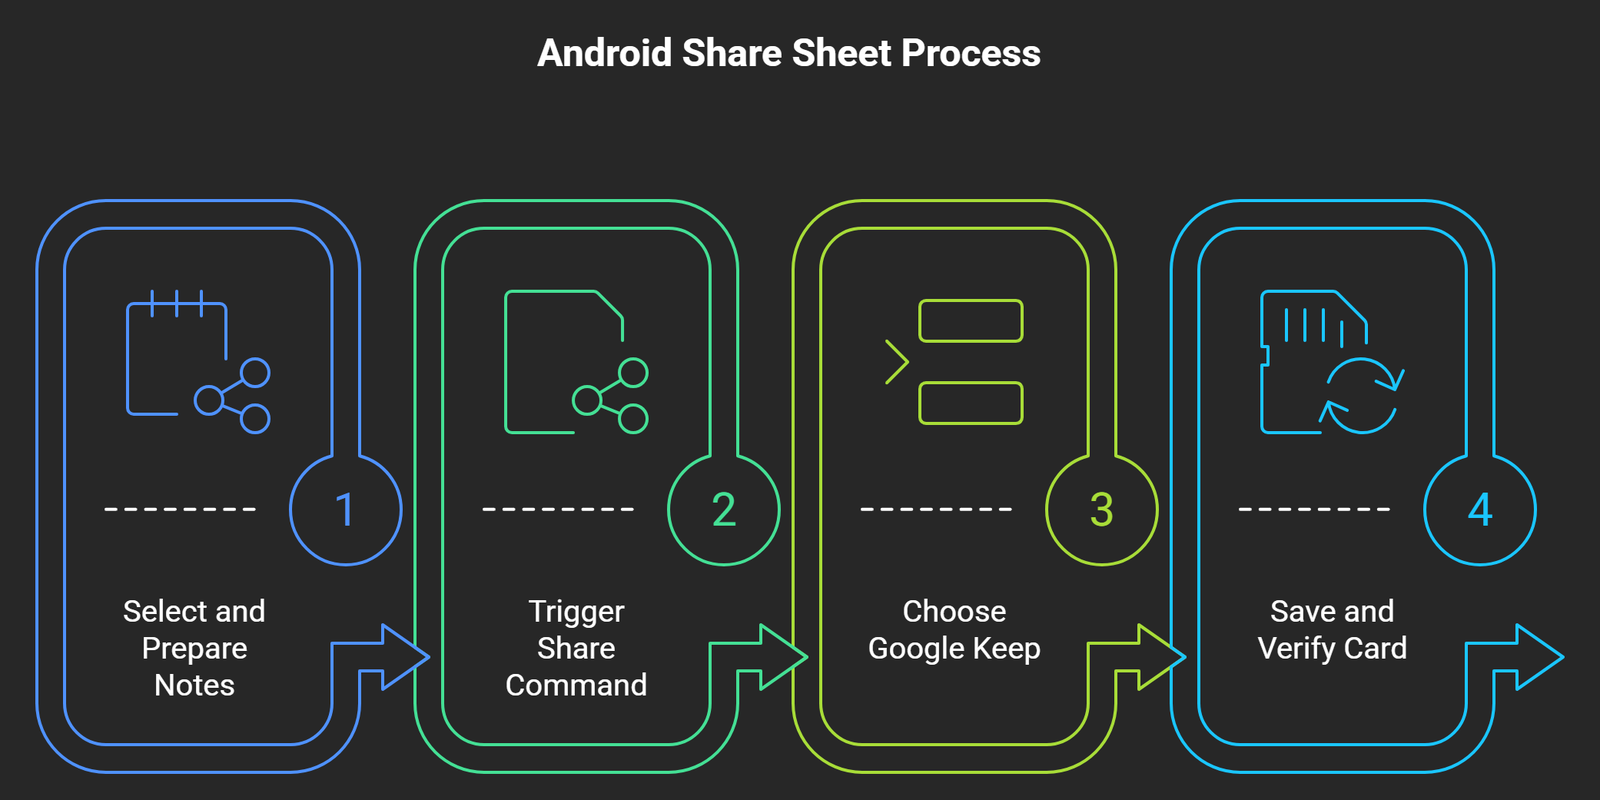
Step 1: Select and Prepare Your Notes
Open the Samsung Notes app on your Galaxy device. Navigate to the specific folder or category containing the data you wish to move. Long-press on a single note to activate the selection checkboxes. If you want to transfer multiple notes, tap the individual items to highlight them.
Step 2: Trigger the Share Command
Look at the bottom navigation bar and tap the Share button. A pop-up menu will appear asking you to choose the file format. For standard notes containing text, bullet points, or checklists, select text only. If your notes contain heavy sketching or inline photos, select Image or Samsung Notes file (.snb) depending on your target destination, though text only or image works best for Google Keep.
Step 3: Choose Google Keep as the Destination
The native Android Share Sheet will slide up from the bottom of your screen. Scroll through the grid of available applications until you locate the Google Keep icon (often labeled as “Keep Notes”). Tap it.
Step 4: Save and Verify the Card
A small Google Keep preview window will overlay your current screen. Here, you can optionally assign a specific Google account, add a title, or apply a pre-existing label. Tap Save in the bottom right corner of the pop-up. The data is instantly pushed to the Google Cloud.
Method 2: The Samsung Notes Web App to Google Keep Browser Workflow
If you have a massive library consisting of dozens of detailed documents, performing the transfer on a desktop computer using a mouse and keyboard is vastly superior to tapping a mobile screen repeatedly.
Step 1: Access Samsung Notes on Windows
To view your Samsung Notes on a PC, you must utilize the official Samsung Notes application for Windows 11. If you are using a non-Samsung laptop, you can still install this app via the Microsoft Store by using command-line bypasses or linking your Samsung account to the Microsoft To Do or OneNote integration via the phone settings. Ensure your phone has completed a full backup to the Samsung Cloud so the desktop app reflects your current data.
Step 2: Open Google Keep in a Side Window
Launch your preferred web browser and open keep.google.com. Sign in using the primary Google account associated with your smartphone. Arrange your desktop screen so that the Samsung Notes Windows application occupies the left half of your monitor and the Google Keep web interface occupies the right half.
Step 3: Copy and Paste Efficiently
Click on a note in the Samsung application, press Ctrl + A to highlight the entirety of the text, and press Ctrl + C to copy it. Move your cursor to the Google Keep browser window, click on “Take a note…”, and press Ctrl + V to paste the contents. This method guarantees that no background formatting strings disrupt the clean layout of your new Google Keep cards.
Method 3-Leveraging Google Assistant for Hands-Free Note Migration
For short, actionable items like shopping lists, daily agendas, or quick reminders, you can utilize voice-to-text workflows to replicate information without typing or navigating deep menus.
- [Samsung Notes Screen] ➔ [Share Sheet] ➔ [Select Keep Notes] ➔ [Cloud Sync Complete]
Step 1: Read and Dictate
Open the target note on your Samsung device so it is clearly visible. Activate your device’s voice assistant by saying the wake phrase or holding the power button.
Step 2: Direct the Assistant
Speak clearly to the interface: “Hey Google, create a note.” When the assistant prompts you for the content, read the details directly from your open Samsung Note. The assistant will transcribe the spoken words directly into a new Google Keep card tied to your master account.
Managing Images and Attachments During Transfer
One limitation of cross-platform migration is that inline images embedded inside Samsung Notes can occasionally detach when shared purely as text. To prevent losing your visual assets, follow this strategic approach:
- Extract Images First: Open the note in Samsung Notes, tap the embedded image, and select Save to Gallery.
- Share as Image Type: When using the share sheet method detailed in Method 1, select image instead of text. This converts the entire note page into a high-resolution graphic file that Google Keep saves as an image note.
- Use Keep OCR Feature: Once the image note lands in Google Keep, open it, tap the three-dot menu icon, and select Grab image text. Google’s optical character recognition engine will instantly extract all text from the image and paste it neatly below the graphic.
Organizing Your New Google Keep Workspace
Once your data successfully migrates to the Google framework, it will initially appear as a disorganized wall of uncolored notes. You must implement systemic organization immediately to maintain high productivity.
Utilize Color Coding for Visual Hierarchy
Assign distinct colors to your notes based on their urgency or category. For example, make all business or professional notes blue, personal thoughts yellow, and urgent financial checklists red. This allows your eyes to scan your dashboard instantly.
Implement Nested Label Systems
Google Keep does not use traditional folders; instead, it relies on labels. You can simulate folders by using a strict naming convention. Create labels like Project/Alpha, Project/Beta, or Personal/Fitness. Tapping a label in the left-hand sidebar instantly filters out the noise of your general feed.
Frequently Asked Questions
Can I transfer all my Samsung Notes to Google Keep at once?
No, there is no bulk native sync feature between these platforms. You must select notes individually or in small batches using the Android Share Sheet to move them over securely.
Will my drawings from the S-Pen remain editable in Google Keep?
No, vector drawings created with the S-Pen will be converted into flattened static images when shared to Google Keep. They will no longer be editable stroke-by-stroke.
Do I lose my note tags when migrating?
Yes, internal tags created within Samsung Notes do not translate to Google Keep labels. You must manually re-assign labels once the notes arrive in Keep.
Is there a character limit for notes inside Google Keep?
Google Keep notes have a technical limit of roughly 20,000 characters per note. If you have exceptionally long documents in Samsung Notes, you may need to split them into multiple parts.
Can I access my migrated notes on an iPhone?
Yes, once your data is saved in Google Keep, downloading the official Google Keep app from the iOS App Store gives you immediate access to all your notes.
Why are my checkboxes not showing up in Google Keep after copying?
Standard text copy-pasting strips formatting. If you copy a checklist from Samsung Notes, you must tap the “+” icon inside the Google Keep note and select Show checkboxes to reformat the plain text lines into interactive list items.
Does Google Keep support audio recordings transferred from Samsung Notes?
No, the audio files embedded in Samsung Notes will not play inside Google Keep. You must export the audio files separately to Google Drive and link them within your note text.
Can I lock my migrated notes in Google Keep with a password?
Google Keep does not currently support individual note locking via biometric passwords. To protect sensitive data, you must rely on your overall device lock screen security.
Will deleting a note in Samsung Notes remove it from Google Keep?
No, once the data is shared or pasted into Google Keep, the two files exist completely independently in their respective clouds. Deleting one will not affect the other.
How do I ensure my notes sync across all my devices?
Open your Android settings, navigate to Accounts and Backup, select your Google account, tap Sync account, and ensure the toggle for Keep Notes is switched on.

Selva Ganesh is a Computer Science Engineer, Android Developer, and Tech Enthusiast. As the Chief Editor of this blog, he brings over 10 years of experience in Android development and professional blogging. He has completed multiple courses under the Google News Initiative, enhancing his expertise in digital journalism and content accuracy. Selva also manages Android Infotech, a globally recognized platform known for its practical, solution-focused articles that help users resolve Android-related issues.




I needed a cross-platform solution because I often switch between devices. These migration steps give me a practical way to move my notes safely.
The guide made the Android Share Sheet method very easy to follow. My first Samsung Note transferred to Google Keep without any confusion.
This process is more manageable now that I understand there is no direct cloud-to-cloud sync. I will move my priority notes first and organize them with labels.
The FAQ covered several issues I was wondering about before migrating. The sections on passwords, audio, and checkboxes were especially useful.
I tested the copy and paste method with a detailed note on Windows. The text moved cleanly and was easy to reorganize in Google Keep.
The instruction to save embedded images to the Gallery first is practical. I will use that for notes containing photos I cannot afford to lose.
Moving reminders across devices is my main goal with this transfer. Google Keep’s browser access is a big advantage for my workflow.
I had assumed S Pen strokes would stay editable in Keep. The explanation about flattened static images cleared up that confusion.
The Google Keep preview step helped me add titles during transfer. This made the imported cards much easier to identify later.
I like that the guide includes a method for both phone and desktop users. The phone share method is quick, while the PC workflow suits bigger migrations.
The character limit information was useful because I have some very long Samsung Notes. I will split those documents into smaller Keep notes.