Samsung Galaxy J3 2016 is a Low-End phone with Minimum Specs for regular usage. So, If you sue it as a daily device, you can experience a lot of issues like Slow response, Lag, Some times Restarts like that. If you use it for gaming, After playing 1-2 Hours, you can experience a lot of freeze issues. The problem is Custom Skin OS will consume a lot of resources compared with the Stock Android. So, If you ask me Should I root? I will Say if you have some skills in Flashing techniques. If you are a regular user, You should learn About rooting, and If you feel you need this, you can proceed to the following Steps. Using ODIN is not hard like Commands. It is Easy for standard unlocked Bootloader devices.
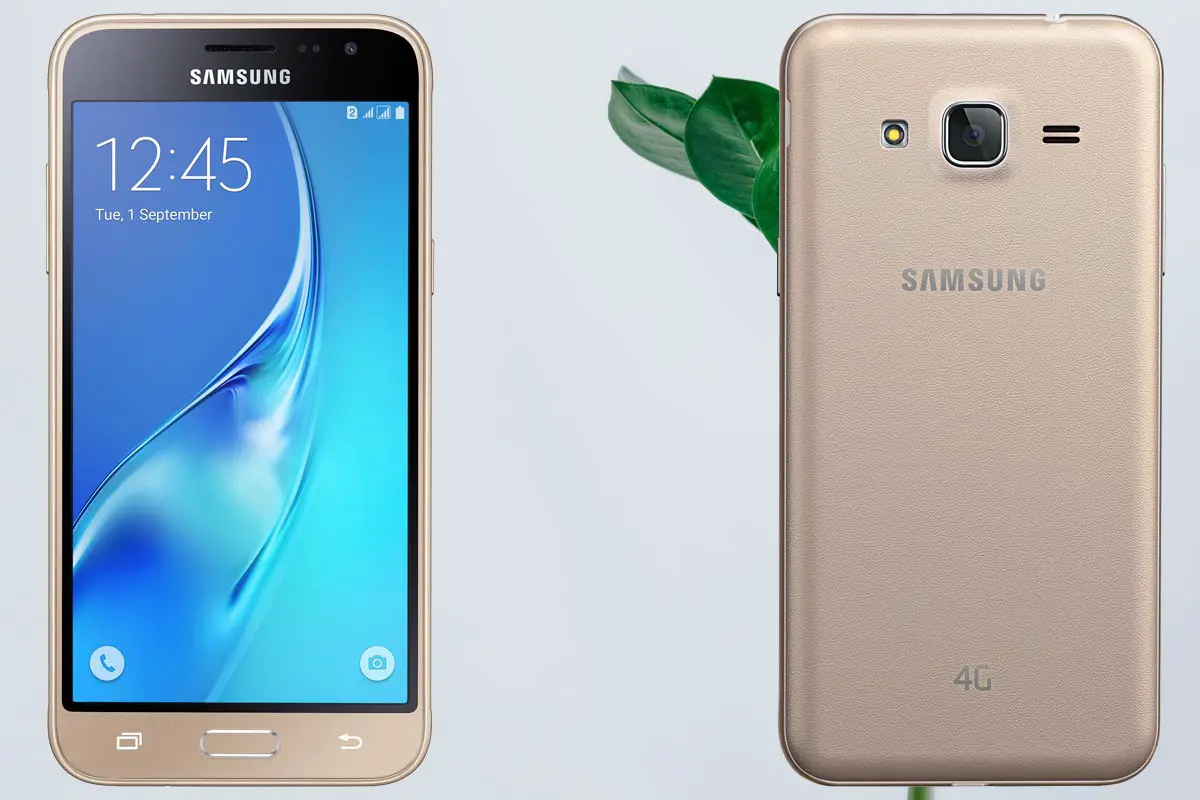
Table of Contents
Why should you Root Samsung Galaxy J3 2016?
You have only 2 GB of RAM. It is not enough for Normal usage. Samsung stopped updates for your device and also your warranty is expired, So there is no giveaway here. It has a Mid-Range Exynos 3475 Quad-Core processor. If we optimize correctly with correct Custom OS after rooting, we can see some Improvements. So, after rooting, I can expect Lag free experience? Probably. Also if we hibernate and eliminate a lot of unwanted apps, and optimize some apps, your device is hardware limited. But, within these limits, we can enhance the performance by 30-40% compared with your old usage. If you use Lite weight Custom ROMs, you can expect a 50-60% improvement in performance based on what custom OS you are choosing.
How to Root Samsung Galaxy J3 2016 ( SM-J320F / SM-J320FN / SM-J320G / SM-J320Y )
Samsung Galaxy J3 2016 comes with a flexible bootloader other than Verizon devices. Verizon devices come with locked Bootloader. This means that different smartphone variants can be easily rooted. Also, the device can accept to install TWRP recovery or any other custom recovery file/app alike.
TWRP recovery is a custom recovery file which must be installed on Samsung Galaxy devices because you can root them successfully. In this article, we explained the easiest method to follow and install TWRP recovery on Samsung Galaxy J3 2016. However, the tool required for rooting this device is the Magisk App.
With the help of TWRP Recovery, you can quickly flash the latest version of Magisk into your Samsung Galaxy J3 2016 to gain root access. Before sharing the tutorial, you may want to know that, with the TWRP recovery present on your device, you can easily install any custom ROM or firmware. Does it seem complicated? Relax, everything will be explained succinctly in bullets.
Things to check out for;
-
Check your device model number.
- Select TWRP Based on the mobile model number.
-
Make sure your device battery is charged above 50%
-
Backup your current files and data, just in case (save them on external storage).
Pre-Requirement Steps
-
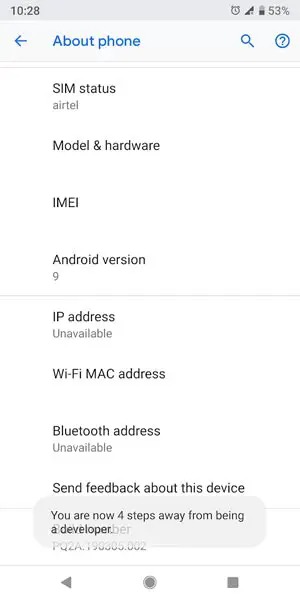
Enable USB Debugging Mode and OEM Unlock in your mobile. To do this; go to settings >>> about >>> Tap on the “Build Number” 7-10 times consistently to enable “Developer Options,” then go to the “Developer Options” and enable USB Debugging Mode and OEM Unlock. There is no complicated process in the Samsung Galaxy J3 2016.
-
Download and install the Samsung USB driver to your computer system.
-
Also, download the ODIN software. Select the above Oreo version in the ODIN list. Install ODIN on your PC.
- Download Magisk.Zip (Latest Version) and Copy it to Your Phone Memory.
-
Download and save the TWRP File. Please select the correct model number TWRP file.
- When the above TWRP files, doesn’t work for you, then you can try with below Generic file for SM-J320.
Flash TWRP using ODIN
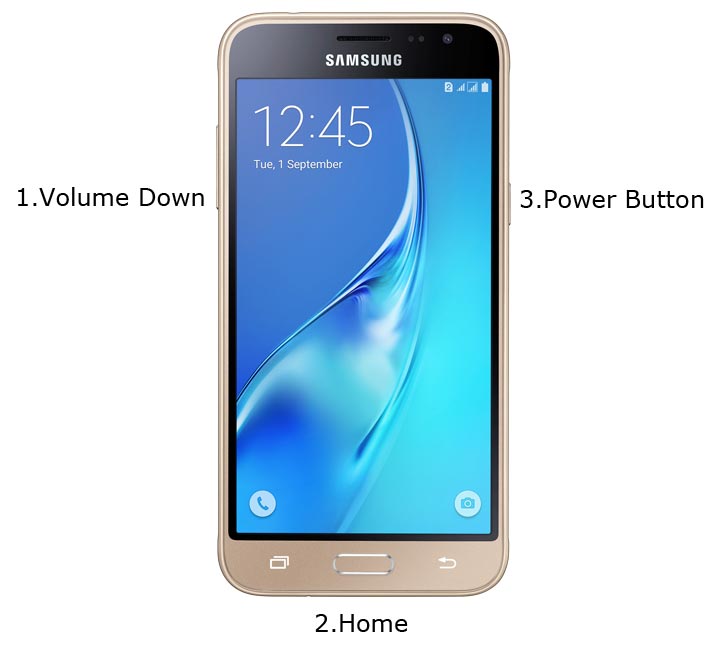
- Restart the device. Then, enter into Download mode. To do this; press and hold down the Volume Down + Home+ Power buttons at the same time for some time.
-
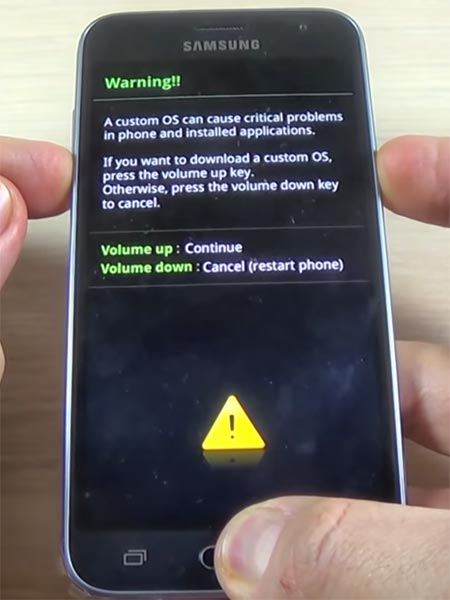
Press the Volume Up button to continue when you see the warning message.
-
Now, connect the Samsung Galaxy J3 2016 mobile to the computer via USB cable.
-
Launch the Odin app on your computer. If the device is detected by this app (Odin), it will show you a message that reads – added!!!
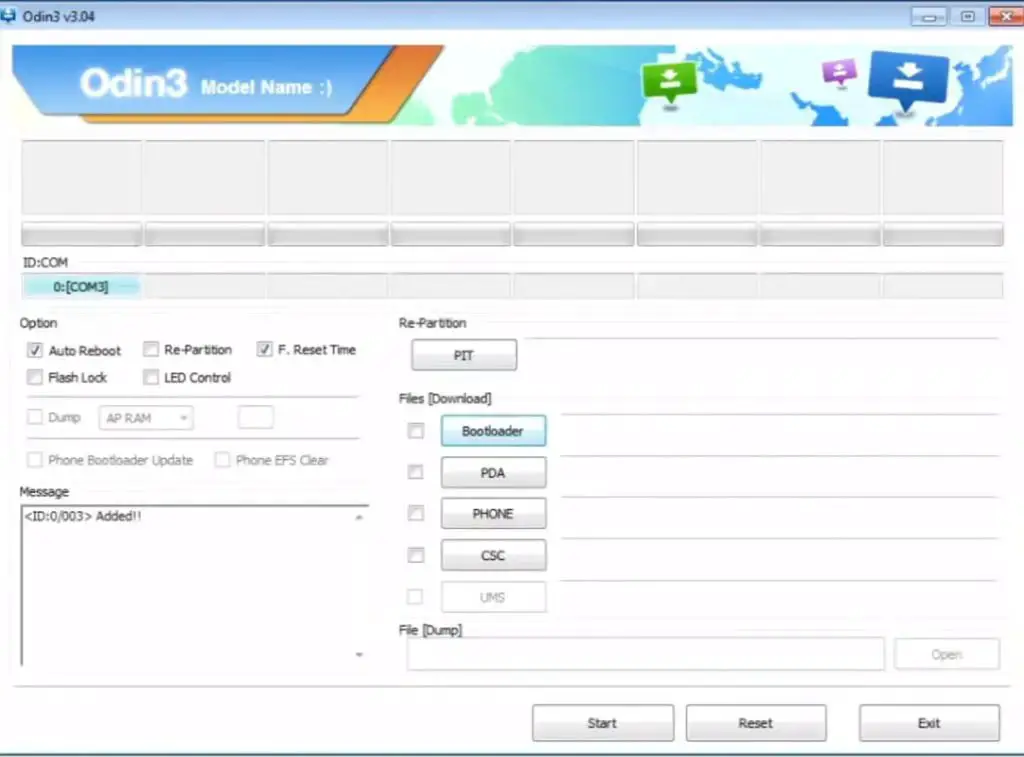
However, if the device is not correctly connected to the PC, you won’t see this message. So, you have to check the USB cable if it is reasonable and reconnect the device.
-
After connecting the Samsung device, click on the PDA/PA button to browse/search and get the TWRP from where you saved it on your PC. Also, navigate to “options” and un-tick the Auto-Reboot.
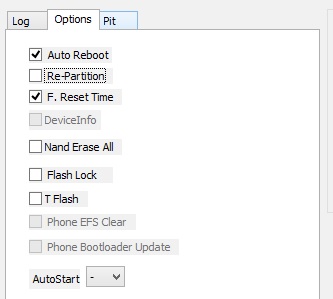
-
Click on “Start”
-
Once the file is loaded into the device, reboot your device.
-
Kudos, you have just Installed the TWRP on your Samsung Galaxy J3 2016. If you installed TWRP, Don’t turn on your mobile. Immediately, move to Magisk Installation steps.
Install Magisk in your Samsung Galaxy J3 2016 using TWRP
- Boot it Into recovery mode->Volume Up+ Home +Power Button.
- Now it Will Boot into TWRP Recovery Mode.
- Select Wipe->Advance Wipe->Select Cache Data.
- Return to Home of TWRP select Install.
- Select Magisk.Zip.
- After the Installation Reboot Your Mobile.
- You can also install Magisk Manager in your Mobile Applications. You can check the Root status, using Root Checker.
What More?
Samsung Galaxy J3 2016 is a Low-End phone; We can’t expect Massive Improvement. But, If you use Lite weight Custom Roms, you can expect a considerable performance Improvement. So, If you have little knowledge in tech, I advise you to Root and uninstall some unwanted apps. You can also flash some Custom ROMs. If you flash Custom ROM, check what is working and what is not working. It is wise to use Some Official Custom ROMs like Lineage.

Selva Kumar is an Android Devices Enthusiast, Who Can Talk and Write About Anything If You Give a Hint About the respective devices. He is a Computer Science Graduate and Certified Android Developer, Making His Career towards this Technology. He is always eager to try new Android devices — not only Software level but Hardware-level Also. Beyond this, He is a Good Swimmer, Guitarist.


Leave a Reply