• Skip to primary navigation
  • Skip to main content
  • Skip to primary sidebar
Android Infotech

Android Infotech

Android Tips, News, Guide, Tutorials

  • Applications
  • Knowledge
  • I’m Bored
  • Opinion
  • Tutorial
  • Root
  • Firmware
  • Daily Deals
Home » Root » Root Samsung Galaxy J4 SM-J400F/M Oreo using TWRP

Root Samsung Galaxy J4 SM-J400F/M Oreo using TWRP

Last updated on April 2, 2019 By Selva Ganesh20 Comments

After Good sales in Samsung Galaxy J3, J4 was released by Samsung with some specs rise like High RAM, High Battery capacity like that. Not only this specs, Instead of Snapdragon processor, Samsung also Used Exynos processor. Snapdragon processor is good. But Exynos processor always gets some Bump in Overall performance. With 2GB RAM compared with the J3 only with 1.5 GB RAM, you can see lots of performance improvements in this mobile. The Oreo OS is also optimized with this mobile. Samsung J4 still receive 60-90 Days Interval Security patch updates. It will not get Pie Update. But it will gain some minor change updates.
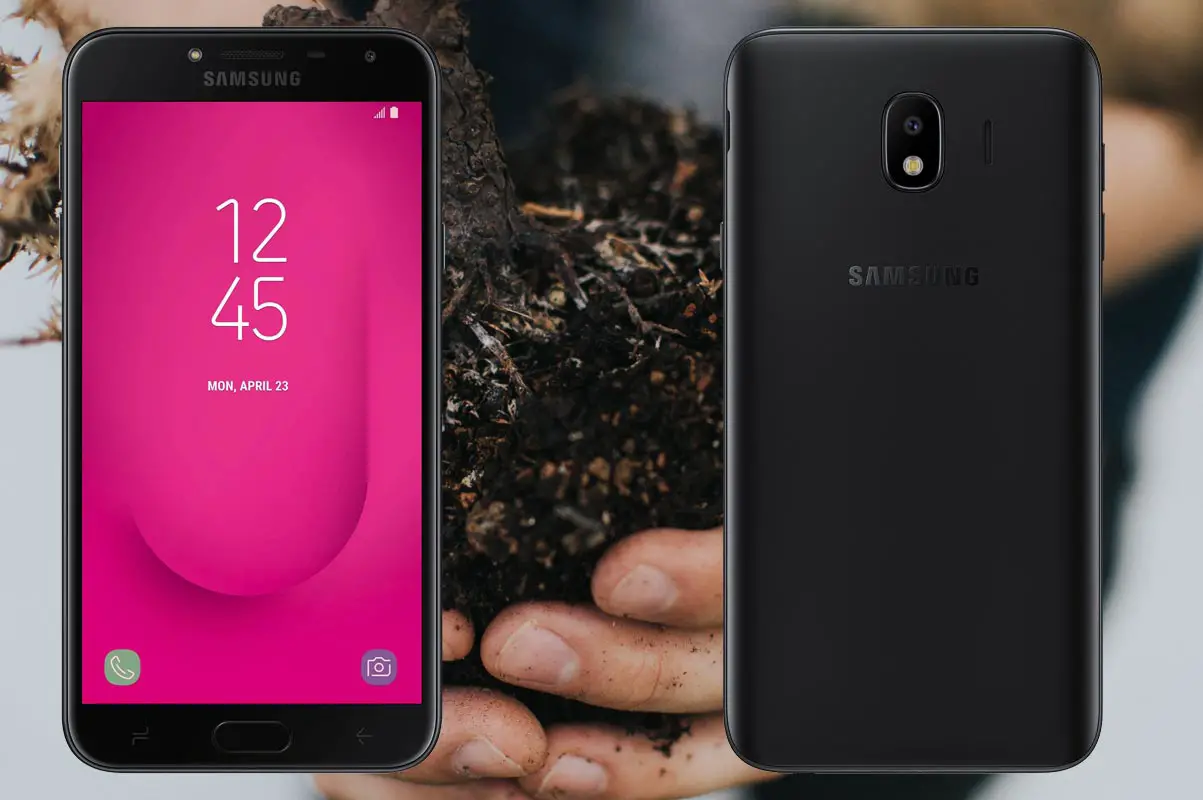
Samsung Galaxy J4 with Sand in Hand Background

Table of Contents

  • Why should you Root Samsung Galaxy J4?
  • How to Root Samsung Galaxy J4? (SM-J400F / SM-J400M)
    • Things to check out for;
    • Pre-Requirement Steps
    • Flash TWRP using ODIN
    • Install SuperSu, RMM State in your Samsung J4 using TWRP
    • Install Magisk
  • What More?

Why should you Root Samsung Galaxy J4?

In the Only situation, you want to use other Custom ROMs, or you want to use it for some High-Performance tasks. With this 2GB RAM, It can survive a lot and also it receiving regular patch updates. The example you want to play some high resource consuming games, they require 0.5-1.5 GB RAM. Yes, after you Root, you can optimize RAM, or you can use Lite weight ROMs. So, If you are clear about, Why you want to Root you can proceed this. But, If you Want to Root, Because of Everybody doing, I advice you to not to do that.

How to Root Samsung Galaxy J4? (SM-J400F / SM-J400M)

Samsung Galaxy J4 variants come with a flexible bootloader. This means that the smartphone can be easily rooted. Also, the device can accept to install TWRP recovery or any other custom recovery file/app alike.

TWRP recovery is a custom recovery file which must be installed on Samsung Galaxy devices because you can root them successfully. In this article, we explained the easiest method to follow and install TWRP recovery on Samsung Galaxy J4. However, the tool required for rooting this device is the SuperSu Beta App.

With the help of TWRP Recovery, you can quickly flash the latest version of SuperSu into your J4 to gain root access. Before sharing the tutorial, you may want to know that, with the TWRP recovery present on your device, you can easily install any custom ROM or firmware. Does it seem complicated? Relax, everything will be explained succinctly in bullets.

Things to check out for;

  • Check your device model number.

  • Select TWRP Based on the mobile model number.
  • Make sure your device battery is charged above 50%

  • Backup your current files and data, just in case (save them on external storage).

Pre-Requirement Steps
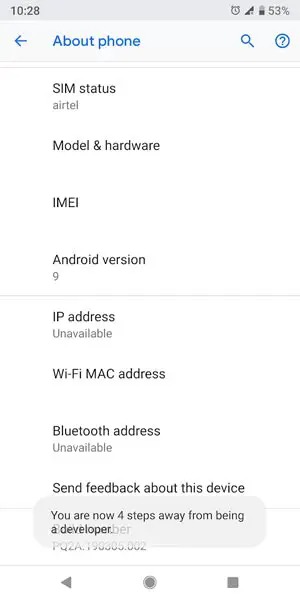
Enabling developer option

  • Enable USB Debugging Mode and OEM Unlock in your mobile. To do this; go to settings >>> about >>> Tap on the “Build Number” 7-10 times consistently to enable “Developer Options,” then go to the “Developer Options” and enable USB Debugging Mode and OEM Unlock. There is no complicated process in the Samsung Galaxy J4.

  • Download and install the Samsung USB driver to your computer system.

  • Also, download the ODIN software. Select above Oreo version in the ODIN list. Install ODIN in your PC.

  • Download SuperSu.Zip and RMM State Bypass, Copy it to Your Phone Memory. We Need to flash RMM State to avoid OEM Lock automatically in future after the Root process.
  • Download and save the TWRP File. Select Correct TWRP file from Below. This TWRPs can support Up to Oreo.

  • SM-J400F
  • SM-J400M

Flash TWRP using ODIN

Samsung J4 Download Mode


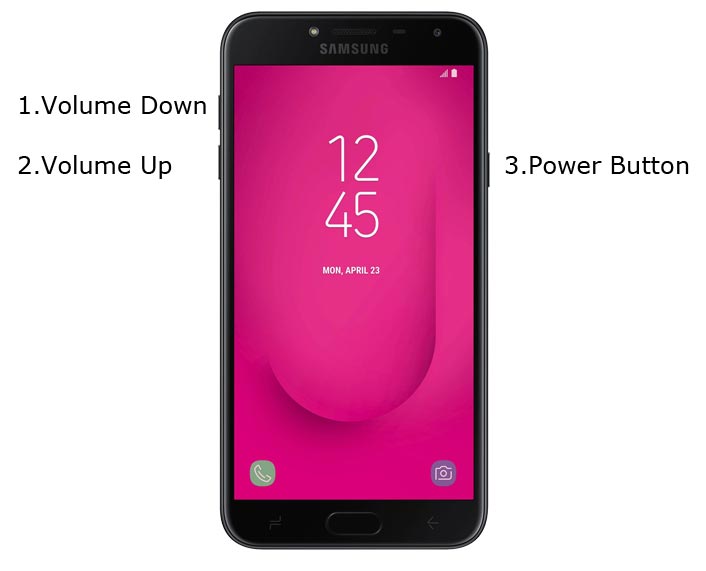
  • Connect your USB Cable with PC. Switch off your device. Then, enter into Download mode. To do this; press and hold down the Volume Down + Volume Up + Power buttons at the same time and connect your micro USB Cable.
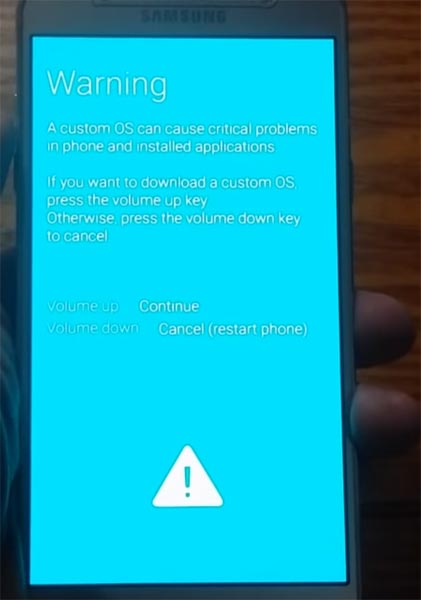
Samsung On5 Download Mode Warning Screen


  • Press the Volume Up button to continue when you see the warning message.

  • Now, connect the J4 mobile to the computer via USB cable.

  • Launch the Odin app on your computer. If the device is detected by this app (Odin), it will show you a message that reads – added!!!
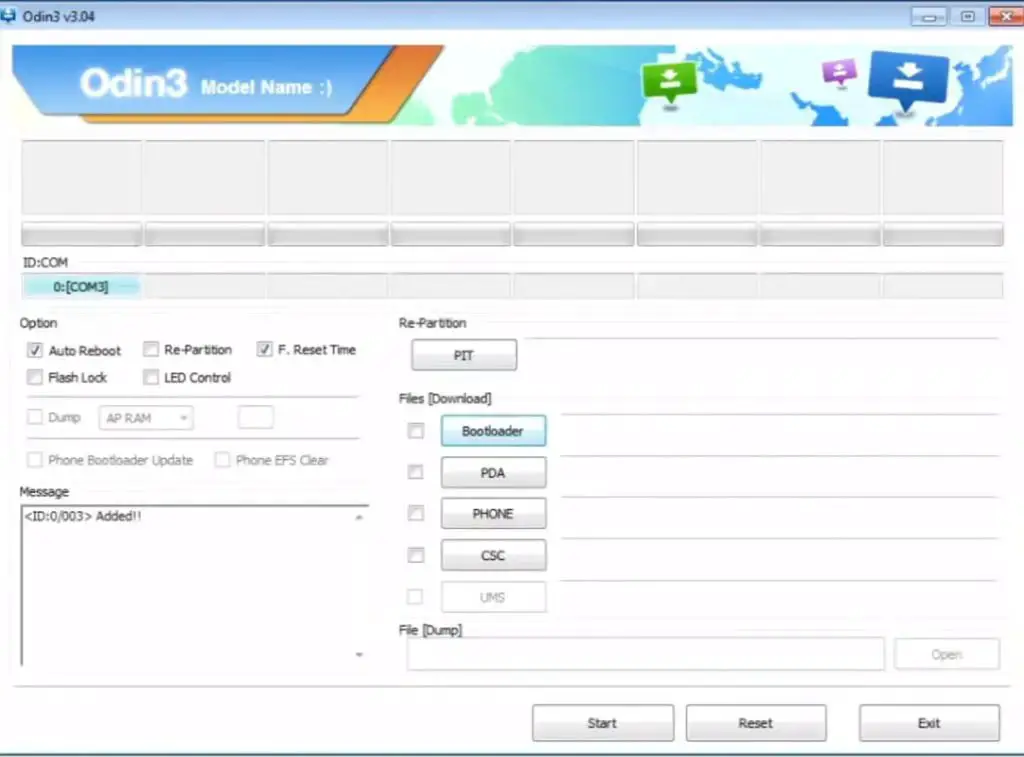
ODIN Added Message


However, if the device is not correctly connected to the PC, you won’t see this message. So, you have to check the USB cable if it is good and reconnect the device.

  • After connecting the Samsung device, click on the PDA/PA button to browse/search and get the TWRP from where you saved it on your PC. Also, navigate to “options” and tick the Auto Reboot.
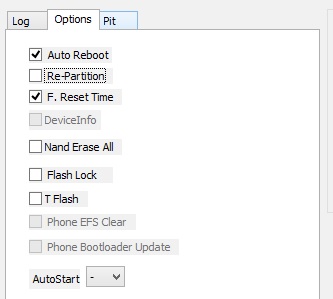
Odin Auto Reboot

  • Click on “Start”

  • Once the file is loaded into the device, reboot your device.

  • Kudos, you have just Installed the TWRP/CF-Auto-Root on your Samsung Galaxy J4. If you installed TWRP, Don’t turn on your mobile. Immediately, move to SuperSu Installation steps.

Install SuperSu, RMM State in your Samsung J4 using TWRP

  • Boot it Into recovery mode->Volume Up + Power Button.
  • Now it Will Boot into TWRP Recovery Mode.
  • Select Wipe->Advance Wipe->Select Cache Data.
  • Return to Home of TWRP select Install.
  • Select SuperSu.Zip. After Installation again Navigate to Home select Install. Select RMM State Bypass.
  • After the Installation Reboot Your Mobile.
  • Now You Can Find the SuperSu in your Mobile Applications. RMM State is used to avoid OEM Lock after rooting.

Install Magisk

However, the SuperSU app will appear among your installed app so you can manage Root permissions. If you wish, you can install Magisk Manager APK to manage Superuser Permissions. Just download and install Magisk manager app as you do for Normal APK files.

What More?

As I already mention, If you have a strong reason for rooting, go for J4 Rooting, or Else it still receiving security patch updates with optimized OS Experience. So, Don’t root your device just for testing.

Selva Ganesh

Selva Ganesh is a Chief Editor of this Blog. He is a Computer Engineer, An experienced Android Developer, Professional Blogger & addicted Web Developer. He runs Android Infotech which offers Problem Solving Articles around the globe.

Related Posts:

  • Fix Samsung Galaxy F41 SM-F415F Stuck on Boot Start screen logo
  • Fix Samsung Galaxy A50 SM-A505F/G/N/U1/YN Stuck on Boot Start…
  • Fix Samsung Galaxy A71/5G SM-A715/A716 Stuck on Boot Start Screen logo
  • Fix Samsung Galaxy Note 20 5G/Ultra SM-N981/N986 Stuck on Boot…
  • Fix Samsung Galaxy M30 SM-M305F/M Stuck on Boot Start Screen logo
  • Fix Samsung Galaxy Note 10/10 Plus SM-N970/N976/N986 Stuck on…
Share This Post:

Tagged With: Samsung

Reader Interactions

Comments

  1. Shafiquesays

    June 3, 2019 at 8:11 pm

    Can I take a backup of stock recovery?

    Reply
    • Selva Ganeshsays

      June 3, 2019 at 8:18 pm

      Using TWRP, you can. TWRP-> Backup->Select All-> Save them on External Storage.

      Reply
      • Shafiquesays

        June 5, 2019 at 9:43 pm

        As far I know TWRP will replace the stock recovery. Then how can I backup stock recovery?

        Reply
      • Shafiquesays

        June 5, 2019 at 9:47 pm

        As far I know TWRP will replace the stock recovery. Then how could I be able to backup stock recovery?

        Reply
        • Danylosays

          June 24, 2019 at 11:36 pm

          Alguém tem o TWRP do SMJ400M? Por favor, não consigo achar de jeito nenhum!

          Reply
          • Selva Ganeshsays

            June 25, 2019 at 12:49 pm

            Nós já incluímos TWRP para J400M

      • MARCOSsays

        July 12, 2019 at 10:28 pm

        TU ARCHIVO ESTA DAÑADO AMIGO SM-J400M REPARALO O SUBELO DE NUEBO AMIGO

        Reply
        • Selva Ganeshsays

          July 13, 2019 at 12:25 pm

          El archivo funciona perfectamente ahora.

          Reply
      • R.T.Usays

        August 15, 2019 at 7:16 pm

        how to install samsung usb driver

        Reply
        • Selva Ganeshsays

          August 15, 2019 at 7:24 pm

          Download Driver from the above article. Extract the file and Run As Administrator. Follow On Screen Instructions.

          Reply
  2. noobsays

    July 17, 2019 at 2:05 am

    is it working on android pie ?

    Reply
    • Selva Ganeshsays

      July 17, 2019 at 12:19 pm

      No. We are working on it. Soon We will publish for Pie version.

      Reply
      • aSDDSsays

        September 5, 2019 at 11:46 am

        i need sm j415f root file

        Reply
        • Selva Ganeshsays

          September 5, 2019 at 12:17 pm

          Your model number is J4 Plus. If you have Oreo version, you can refer below. Don’t try, if you have Pie version. We are working on Pie version. We will update soon.

          https://www.androidinfotech.com/root-samsung-galaxy-j4-plus/

          Reply
          • Ealissusays

            May 15, 2020 at 8:04 am

            Conseguiu pro j4 400m pie

          • Selva Ganeshsays

            May 15, 2020 at 9:27 pm

            Tente com o método abaixo para a versão Pie 9.0.

            https://www.androidinfotech.com/root-samsung-galaxy-j4-sm-j400f-g-m-pie/

  3. jean claude mixossays

    October 13, 2019 at 1:35 am

    how can I root j400f 8.0.0 without using a twrp file?

    Reply
    • Selva Ganeshsays

      October 13, 2019 at 11:41 am

      You can use the Magisk method. But, Compare with that method, TWRP is better.

      Reply
  4. Devine Jumahsays

    March 31, 2020 at 8:11 pm

    Hi, someone changed my IMEI number, so my phone keeps on saying not registered on the network, how can I solve this, please.

    Reply
    • Selva Ganeshsays

      April 1, 2020 at 1:16 pm

      Try with a different networks. If you get the same, contact the nearby service center. We can’t deal with the IMEI issues using the software alone.

      Reply

Leave a Reply Cancel reply

Your email address will not be published. Required fields are marked *

This site uses Akismet to reduce spam. Learn how your comment data is processed.

Primary Sidebar

Join With Us

Recent Posts

  • Soon You can control Samsung SmartThings from your Car with Android Auto
  • Download Samsung Galaxy S20 LTE SM-G980F Android 11 One UI 3.0 Stock Firmware
  • Samsung Galaxy S21 Officially launched with S Pen and No SD Card slot
  • Fix Samsung Galaxy J8 SM-J810F/G/M/Y Stuck on Boot Start screen logo
  • Root Asus Zenfone 6 Android 10 using TWRP and Install Magisk

Today Tip

Samsung SmartThings Android Auto

Soon You can control Samsung SmartThings from your Car with Android Auto

After Samsung agreed to replace Bixby with Google Assistant, They slowly accepted lots of Google … [Read More...] about Soon You can control Samsung SmartThings from your Car with Android Auto

Advertisement

Copyright © 2021 AndroidInfotech.com, All Rights Reserved, Android is a trademark of Google Inc. All contents on this blog are copyright protected and should not be reproduced without permission.

  • Subscribe
  • Sitemap
  • About Us
  • Contact Us
  • Privacy Policy
  • Disclaimer
  • Our Image License
  • Hosted on Kinsta
  • Ad Partner Ezoic