How to Install Windows 11 on Old Unsupported Devices?– If you own an older PC that doesn’t meet Microsoft’s strict requirements for Windows 11, you might feel stuck with outdated operating systems. However, Tiny11, a lightweight version of Windows 11, offers a solution. This guide will walk you through everything you need to know about Tiny11 and how to install it on unsupported devices.
What is Tiny11?
Tiny11 is a streamlined and modified Windows 11 Pro 22H2 version developed by NTDev. It’s designed specifically for older computers that cannot officially support Windows 11. By removing unnecessary components, Tiny11 reduces system requirements significantly, enabling older hardware to run the latest operating system.
Key Features of Tiny11:
- Reduced Disk Space Requirements: Requires approximately 8 GB of storage compared to 20 GB.
- Minimal RAM Usage: Runs efficiently with as little as 2 GB of RAM.
- No TPM or Secure Boot Requirements: bypass hardware constraints that block older systems from installing Windows 11.
- Essential Apps Only: Includes basic tools like Notepad, Paint, and Calculator while removing bloatware.
- Local Account Setup: Allows users to set up a local account by default.
Why Choose Tiny11 Over Standard Windows 11?
Tiny11 is ideal for:
- Older Systems: Computers that fail to meet Microsoft’s Windows 11 system requirements.
- Resource-Limited Environments: Devices with minimal storage or RAM.
- Virtual Machines: Lightweight nature makes it an excellent option for virtual environments.
However, if your device meets Windows 11 requirements, sticking with the standard version is recommended due to the reduced feature set and potential limitations of Tiny11.
What Are the Limitations of Tiny11?
While Tiny11 offers a practical solution, it’s essential to consider these trade-offs:
- No Direct Updates: Tiny11 doesn’t receive updates directly from Microsoft.
- Reduced Features: Omits some applications and services that may be essential for specific users.
- Potential Errors: As an unofficial build, occasional bugs or instabilities might occur.
Preparing to Install Tiny11
Before installing Tiny11, ensure you meet these prerequisites:
- A valid Windows 10/11 Pro product key for activation.
- A reliable internet connection.
- A USB drive with at least 8 GB capacity.
- Backup of critical data to prevent accidental loss during installation.
Step-by-Step Guide to Install Tiny11
Download the Tiny11 ISO File

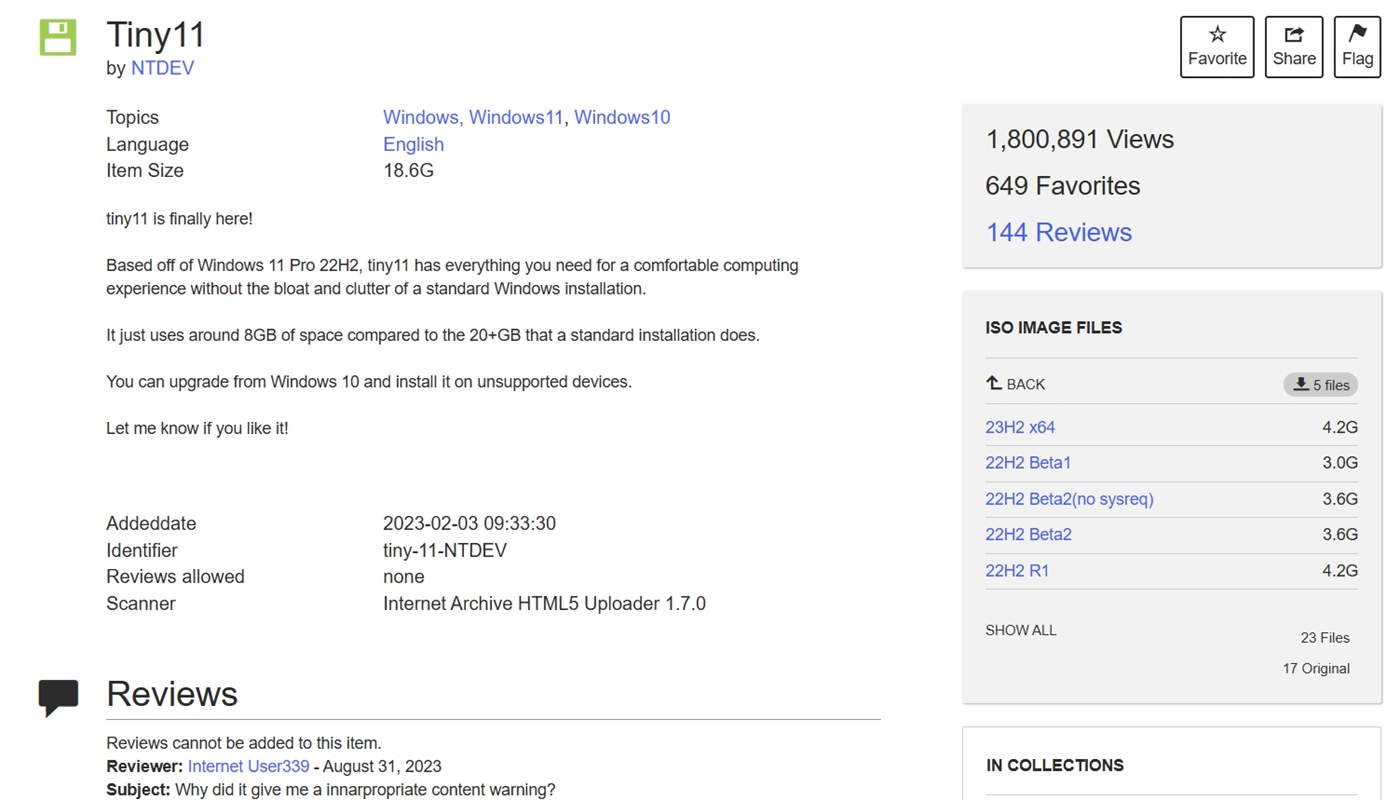
Visit the official Tiny11 page on the Internet Archive to download the ISO file. Follow these steps:
- Log in to the Internet Archive (create an account if you don’t already have one).
- Locate the tiny11(no sysreq).iso file, which removes TPM and Secure Boot requirements.
- Download the ISO file, approximately 3.6 GB in size.
Create a Bootable USB Drive
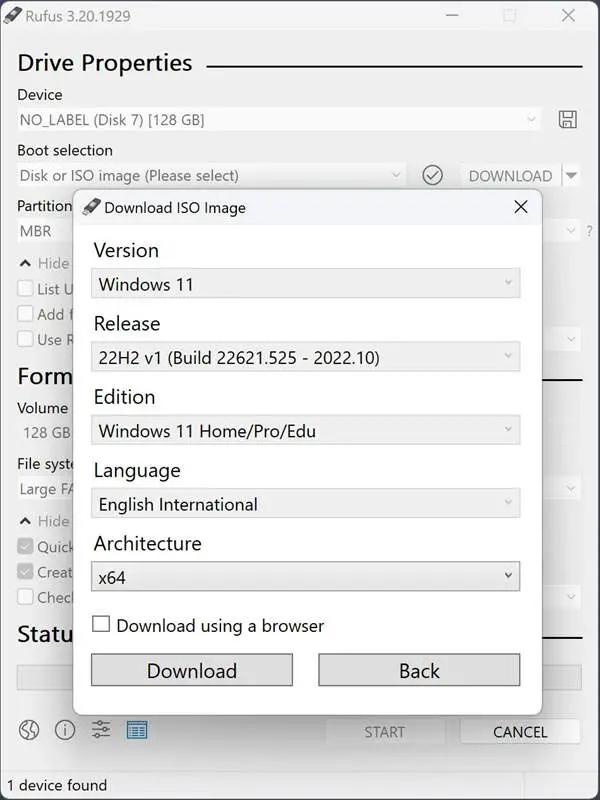
After downloading the ISO file, use a tool like Rufus to create a bootable USB drive:

- Insert the USB drive into your computer.
- Launch Rufus and select the downloaded ISO file.
- Configure the partition scheme and file system as required (usually GPT and NTFS).
- Click “Start” to create the bootable drive.
If you’re using a virtual machine, you can directly mount the ISO file instead of creating bootable media.
Adjust BIOS/UEFI Boot Settings
To boot from the USB drive, you’ll need to modify your computer’s boot order:
- Restart your computer and enter the BIOS/UEFI settings (commonly accessed by pressing DEL, ESC, F1, or F2 during startup).
- Navigate to the Boot options menu.
- Set the USB drive as the primary boot device.
- Save changes and exit the BIOS.
Install Tiny11
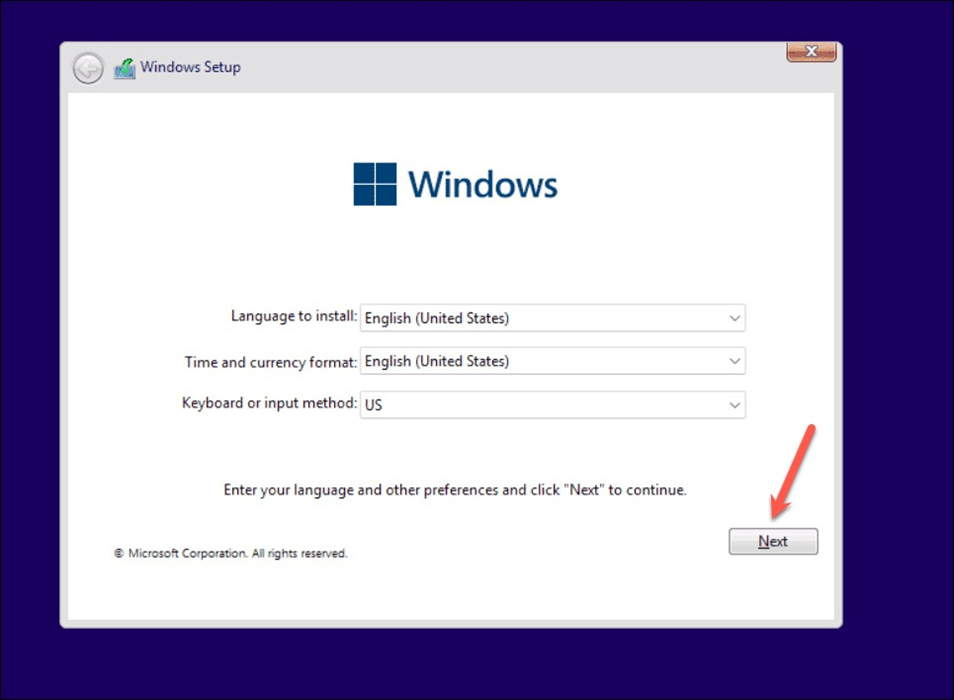
Once the system boots from the USB drive, the Windows Setup screen will appear. Follow these steps:

Step 1: Choose Installation Preferences
- Select your language, time and currency format, and keyboard layout.
- Click “Next” to proceed.
Step 2: Accept the License Terms
- Check the box to accept the Microsoft Software License Terms.
- Click “Next.”
Step 3: Select Installation Type
- Choose “Custom: Install Windows only (advanced).”
Step 4: Partition the Drive
- Select the drive or partition for installation.
- Format or create a new partition if necessary (this will erase all data on the selected drive).
- Click “Next” to begin the installation.
The installation process will take a few minutes and may involve several automatic restarts.
Complete Initial Setup
After installation, complete the following setup steps:
- Select your region and keyboard layout.
- Create a local account with a username and password.
- Configure privacy settings and other preferences.
Once setup is complete, you’ll be taken to the Tiny11 desktop.
Tips for Using Tiny11 Effectively
- Install Essential Apps: Use the Microsoft Store or transfer apps via USB to add any missing programs.
- Update Drivers: Use Windows Update to ensure your device’s drivers are up-to-date.
- Backup Regularly: Maintaining regular backups is crucial, as Tiny11 doesn’t receive Microsoft updates.
Is Tiny11 Right for You?
Tiny11 is a compelling option for older devices or virtual machines, offering a way to experience Windows 11 without hardware restrictions. However, it’s unsuitable for users who need the complete feature set or official support from Microsoft.
Wrap Up
Tiny11 revitalizes older PCs by allowing them to run a streamlined version of Windows 11, making it an ideal solution for devices that lack the specifications required for the standard version. Though it has certain limitations, Tiny11 offers a lightweight and efficient operating system, ensuring older computers can remain functional without compromising performance. Designed for unsupported devices, it strips away unnecessary features, focusing on essential functionalities to enhance usability and speed.
This guide provides a comprehensive walkthrough to download, install, and effectively use Tiny11, helping users maximize the potential of their aging hardware. By bridging the gap between modern software and outdated machines, Tiny11 empowers users to extend the life of their devices while experiencing the core features of Windows 11.

Selva Ganesh is the Chief Editor of this Blog. He is a Computer Science Engineer, An experienced Android Developer, Professional Blogger with 8+ years in the field. He completed courses about Google News Initiative. He runs Android Infotech which offers Problem Solving Articles around the globe.


Leave a Reply