As we already know, Google Pixel 4 and Pixel, 4 XL comes with a Soli chip that allows you to Control your mobile without touching it. But, Due to some reasons, This motion sensor method is not available in all countries. Using the below process, we can disable this rule and remove the restriction in Soli. Remember, Google made this rule on purpose. Any consequences that happen by doing this are entirely depending on you — this method required on Root. So, Your mobile warranty will be void. Beyond this giveaway, You bought this mobile for this exclusive feature. But, If you can’t use this feature in certain areas. It is like you pay for the food which you can’t eat. Soli has a lot of features; If you have a habit of using any one of these, Anyway If you want to it manually, It can make you uncomfortable. By using this method, you can use soli in any country.
![]()
Why should you remove Restrictions?
When you use Soli for specific purposes like Disable Alarm Clock, like that, you will be used in that in your daily life. When you suddenly can’t use this feature in some time, It will feel Uncomfortable. Mainly the Alarm Clock. As I already mentioned, You paid to use all features, not for the piece. This method needs some tech skills and root access; If you are a regular user, I advise you to don’t go for this. But, You need this feature in necessary condition, Read the guide, twice, It will give some overall ideas and how to prepare.
How to Enable and Use Soli in All Countries
We can use two methods. One is based on the ADB Commands. Or you can install the Magisk module using your Magisk Manager.
Things to check out for;
-
You should have Rooted Mobile- Root Pixel 4/XL.
-
Backup your current files and data, save them on external storage (precaution).
- Google restricted this due to some purpose. So, If you face any problem with modifications, It entirely depends on you.
Using ADB and Fastboot
-
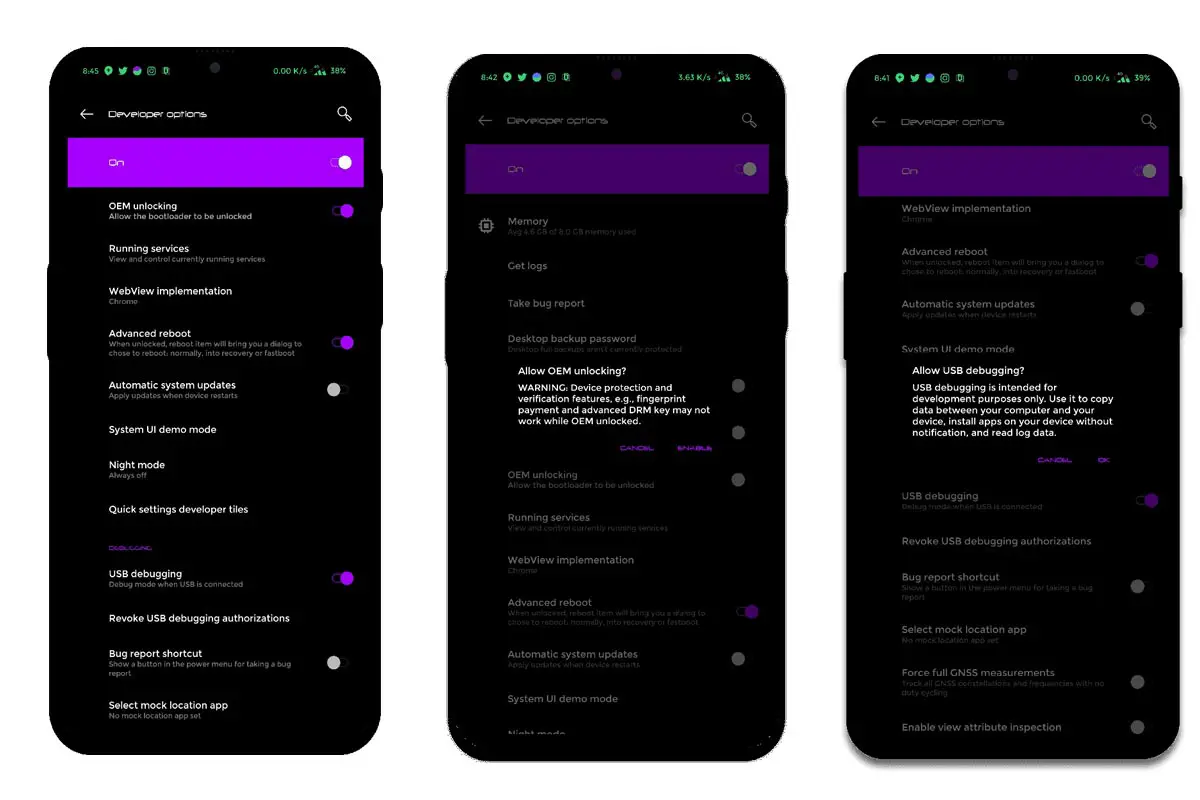
Enable USB Debugging Mode and OEM Unlock on your mobile. To do this; go to settings >>> about >>> Tap on the “Build Number” 7-10 times consistently to enable “Developer Options,” then go to the “Developer Options” and enable USB Debugging Mode, OEM Unlock. There is no complicated process in Google Pixel 4/XL.
-
Download the ADB drivers. Install it on your PC.
- Also, download the regular Partition Fastboot drivers Install It on your PC.
![]()
- Switch off your device. Then, enter into Fastboot mode. To do this- Press and hold down the Volume Down + Power buttons at the same time for some time and connect your mobile with PC.
![]()
-
Press the Volume Up button to continue when you see the warning message.
-
Now, connect the Google Pixel 4 XL mobile to the computer via USB cable.
-
Launch the fastboot on your computer. Open a Command prompt on your PC and type below command.
- fastboot devices
- It should display the connected devices. If you didn’t get the device, restart the command prompt and Disconnect and Connect your Google Pixel 4 XL. If you are detected, type below commands one by one and Hit Enter.
- adb shell
- adb shell setprop pixel.oslo.allowed_override true
- If the above command doesn’t work, type below command.
- adb shell “setprop persist.pixel.oslo.allowed_override true; setprop ctl.restart zygote”
- When you get a success message, your mobile is now configured to use any countries without restrictions.
Troubleshoot
-
When you can’t deal with the above commands, type below command. If you get “su: not found,” You didn’t Install Root access properly.
- adb shell su
Using Magisk Module
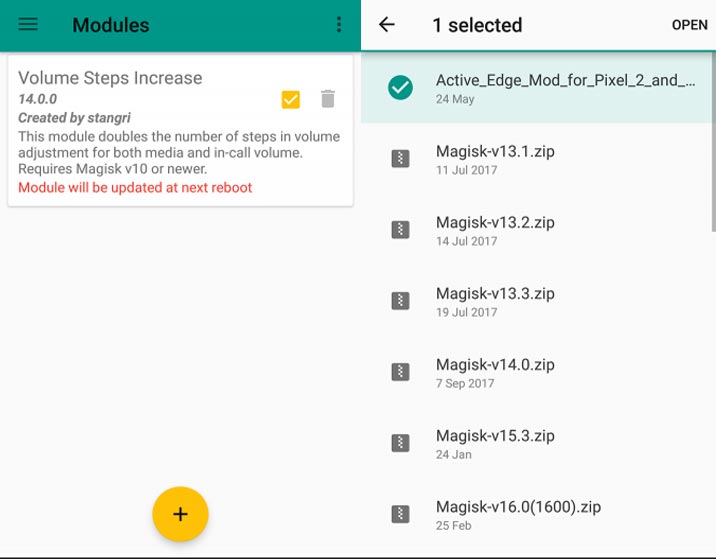
- Download Magisk Manager (Download Latest version) and Install it on your mobile.
- Download Soli Magisk Module.zip.

-
Open Magisk Manager Sidebar and go to Modules, Press Add (Plus Symbol), Select the downloaded zip file. Reboot your phone.
Wrap Up
Google is slowly getting approvals in a lot of countries. Currently, Soli can be accessed in 53 Regions. This method is based on Root. When you have root access, you should be more careful when installing third-party apps. When you purely depend on Soli for a lot of tasks or If you are a Regular Traveler, You can use this method to Configure. We can expect more countries in the upcoming year. Or Google may add some extra features to access in any country. We will wait for the Google move. If you face any problem during this setup, comment below.

Selva Ganesh is the Chief Editor of this Blog. He is a Computer Science Engineer, An experienced Android Developer, Professional Blogger with 8+ years in the field. He completed courses about Google News Initiative. He runs Android Infotech which offers Problem Solving Articles around the globe.


Leave a Reply