Sony Xperia 1 comes with Powerful Specs. It is a flagship phone. So, in the Software also, Sony focusing a lot. It comes with Pie 9.0 version. We go for root for two reasons. One is We hate our Manufacturer Custom Skin OS and want to use near Stock Android Custom ROM. And another reason is. We wish to Remove bloatware apps and use Root required apps. Sony UI is not that much lousy compare with other Custom Skins. They provide regular patch updates and significant upgrades. After root, you will lose official updates from Sony. If you are a regular user, you don’t need rooting. Trust me, Snapdragon 855 and 6 GB RAM is powerful specs than you think. You will not affect by the bloatware apps and background apps.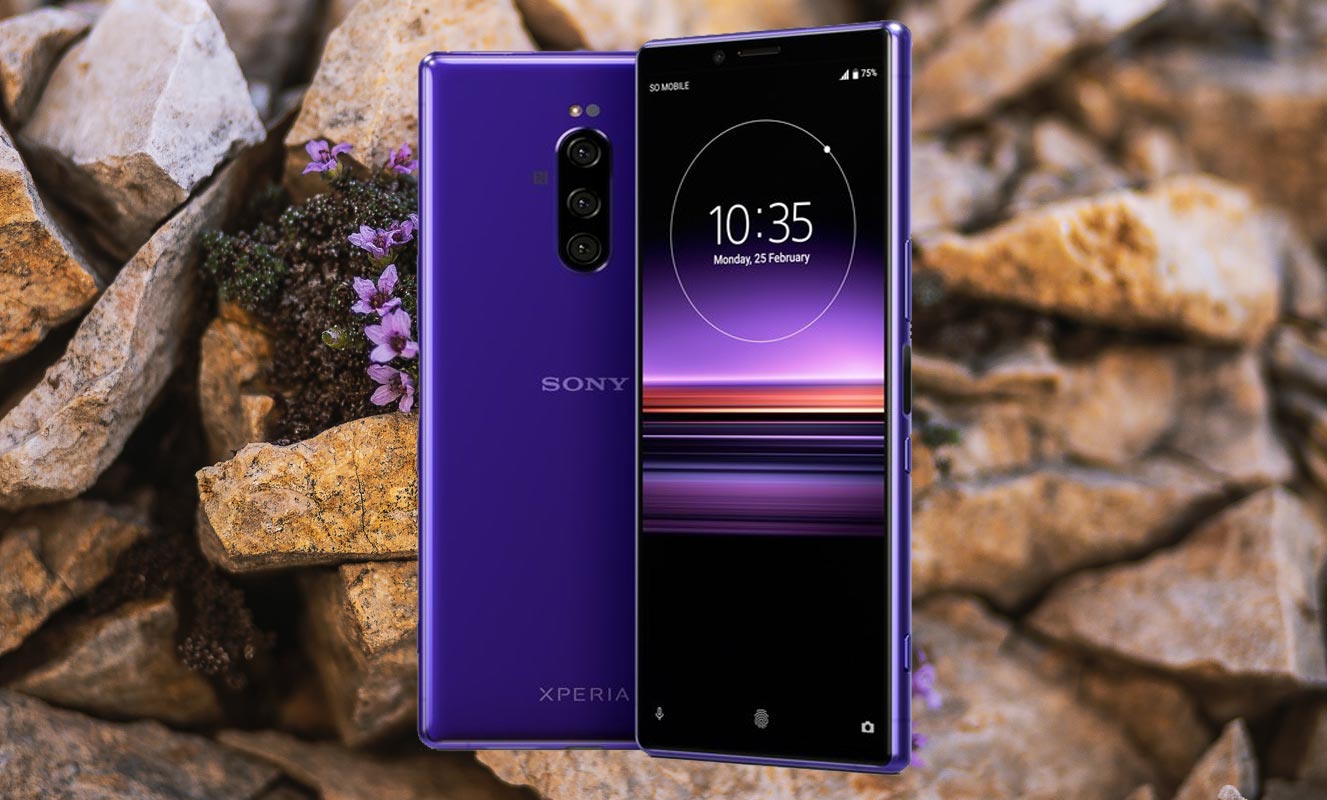
If you are a Developer or regular root apps user, you can follow the below guide to root your device. Read the article thoroughly before starting the process. It will give some ideas for the preparation. If you planned to flash Custom ROMs, you should check what will work and whatnot. Unofficial ROMs may contain a lot of significant bugs. If you want to install the update using TWRP, after the firmware flash, you should flash Magisk every time.
Why should you Root Sony Xperia 1?
We thank XDA Developer- topjohnwu, Sjll (Who successfully tested this method) and linckandrea (For the Kernel file) Without their hard work, We can’t make this method. Coming to root, you should have a proper reason, and you know what you are doing. Yes, with a minimum of 6 GB RAM and Qualcomm SDM855 Snapdragon 855 processor, You can use this mobile for regular tasks without root for 2-3 Years If you use correctly. Software is better compared with other manufacturers, Custom skin OS. Don’t root because everybody is saying when root your mobile it can become fastest. No. Rooting is to extract some performance from the device. But, you already have Powerful specs and software. So, If you are addicted to some root apps, you can root. But, if you want to test, I won’t recommend it.
How to Root Sony Xperia 1 Pie 9.0
Sony Xperia 1 International Variants comes with a flexible bootloader other than some carrier locked devices. This means that different smartphone variants can be easily rooted. Also, the device can accept to install TWRP recovery or any other custom recovery file/app alike.
TWRP recovery is a custom recovery file that must be installed on your devices because you can root them successfully. In this article, we explained the easiest method to follow and install TWRP recovery on Sony Xperia 1. However, the tool required for rooting this device is the Magisk App.
With the help of TWRP Recovery, you can quickly flash the latest version of Magisk into your Xperia 1 to gain root access. Before sharing the tutorial, you may want to know that, with the TWRP recovery present on your device, you can easily install any custom ROM or firmware. Does it seem complicated? Relax, everything will be explained succinctly in bullets.
Things to check out for;
-
Make sure your device battery is charged above 50%
-
Backup your current files and data, full data loss process (save them on external storage).
Supporting versions
International Variants
- J8110
- J8170
- J9110 Dual
Pre-Requirement Steps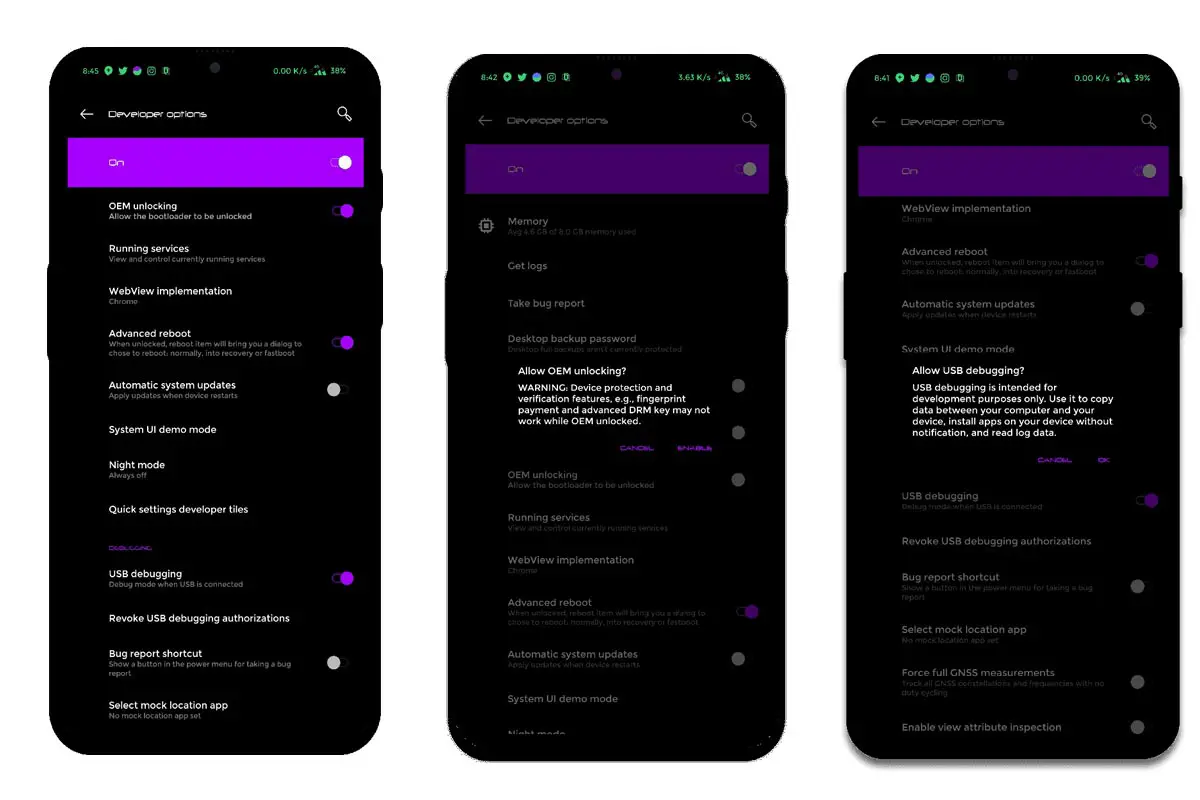
-
Enable USB Debugging Mode and OEM Unlock on your mobile. To do this; go to settings >>> about >>> Tap on the “Build Number” 7-10 times consistently to enable “Developer Options,” then go to the “Developer Options” and enable USB Debugging Mode, OEM Unlock. There is no complicated process in Sony Xperia 1.
- Download and Install the Sony PC Companion (Windows) or Sony PC Companion for (Mac)
-
Also, download the ADB drivers. Install it on your PC.
- Download Magisk.Zip (Latest Version) and Copy it to Your mobile SD card or Pendrive OTG Cable.
- Pie Kernel, Camera Fix (Both are Optional) Download and Copy it to Your mobile SD Card. This file helps you to maintain the Bootloader unlock and debug some Root issues in your device.
-
Download, extract, and save the TWRP File in your PC and your External mobile storage and rename it to recovery.img. You should keep the file in both locations. On the other hand, copy this file to the Mobile External SD Card.
- Based on your model number, Download, extract and save the VB meta Files in your PC and rename it to vbmeta.img.
- Copy all the above files into the Fastboot folder.
Unlock the bootloader using ADB and Fastboot
Your mobile should be supported to get the unlock code. Check this using the below step. If your mobile supported, get the code and unlock using unlock stages.
Check Compatibility
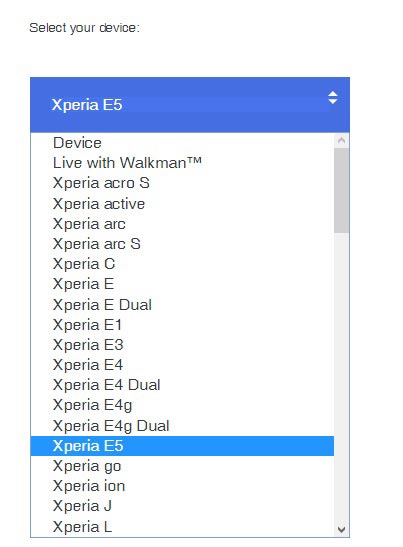
- Go to Sony Developers Official Page to check if your device model is accepted for this.
-
You should signup to a new Sony Xperia account or login with details to an existing account. Alternatively, you can use your Gmail account.
-
The device must be connected to the internet
-
Dual SIM Sony devices have two IMEI numbers. Use the IMEI 1 to get the exact unlock code for your device
-
This action works for all Sony Android devices. However, you still have to check out if your device model supports such action (unlocking the bootloader);
If your device is supported, then go ahead with the steps below to unlock the boot loader.
Unlock Steps
-
Open your phone dialer and dial this code – *#*#7378423#*#*
-
Go to Service Info >>> configuration >>> rooting status >>> Check to see if bootloader unlocking is allowed or not. If it is allowed, then continue below.
-
Get the “download_inf.zip” file and paste it into the folder where you installed ADB and Fastboot.
-
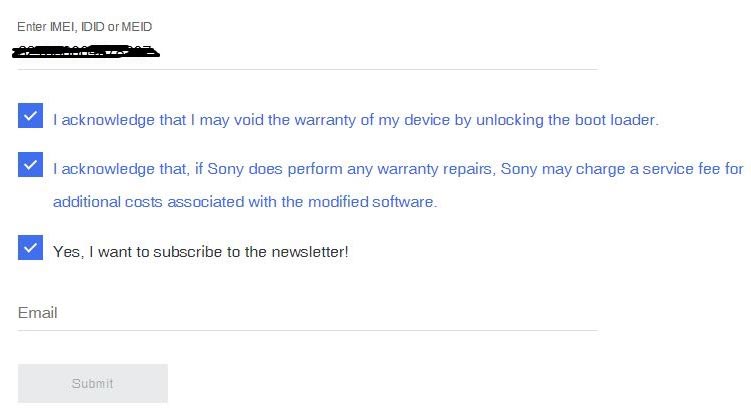
Dial *#06# and copy down your Sony Mobile IMEI number.
-
Return to the Sony Official page, select your device model, and provide your Email Id.
-
You will receive a link to your Email id, click on the link to get the Unlock code to use and unlock your bootloader.
- Switch off your device. Then, enter into Fastboot mode. To do this; press and hold down the Volume Down button connect mobile to your PC using USB Cable.
-
Go to the ADB and Fastboot folder, Launch the fastboot on your computer. Open a Command prompt on your PC and type below command.
- fastboot devices
- It should display the connected devices. If you didn’t get the device, restart the command prompt and Disconnect and Connect your Sony Xperia 1. If you are detected, type below command and Hit Enter.
- fastboot oem unlock 0x<insert your unlock code>
Note: you have to replace the key with your own generated Key
-
Tap “Enter” and wait for some time
-
Your mobile bootloader is now unlocked, reboot the device. Move to flash TWRP steps.
Flash TWRP
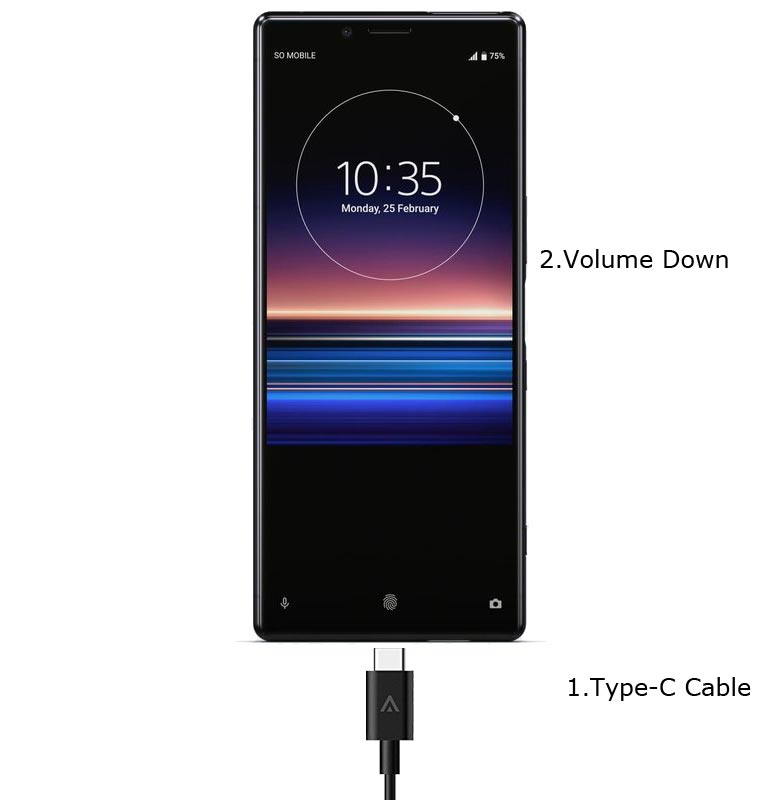
- Switch off your device. Then, enter into Fastboot mode. To do this; press and hold down the Volume Down button connect mobile to your PC using USB Cable.
-
Launch the fastboot on your computer. Open a Command prompt on your PC and type below command.
- fastboot devices
- It should display the connected devices. If you didn’t get the device, restart the command prompt and Disconnect and Connect your Sony Xperia 1. If your device detected type below commands one by one and Hit Enter.
- fastboot flash boot recovery.img
- fastboot –disable-verity –disable-verification flash vbmeta vbmeta.img
- After the flash of the above file, type below command and hit Enter.
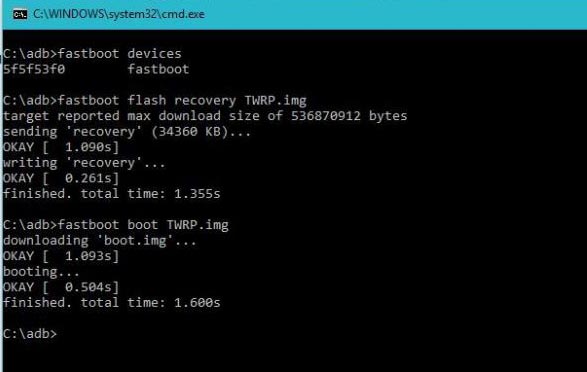
- If you can’t reboot your mobile using the above command, Press Volume Down+ Power button to exit Fastboot mode. When the screen goes off, Immediately Press Volume Up + Power buttons to boot into Recovery mode.
- It will boot into the temporary TWRP. Don’t Boot into standard OS until we flash magisk.
Install TWRP, Magisk, and Kernel in your Sony Xperia 1 using TWRP
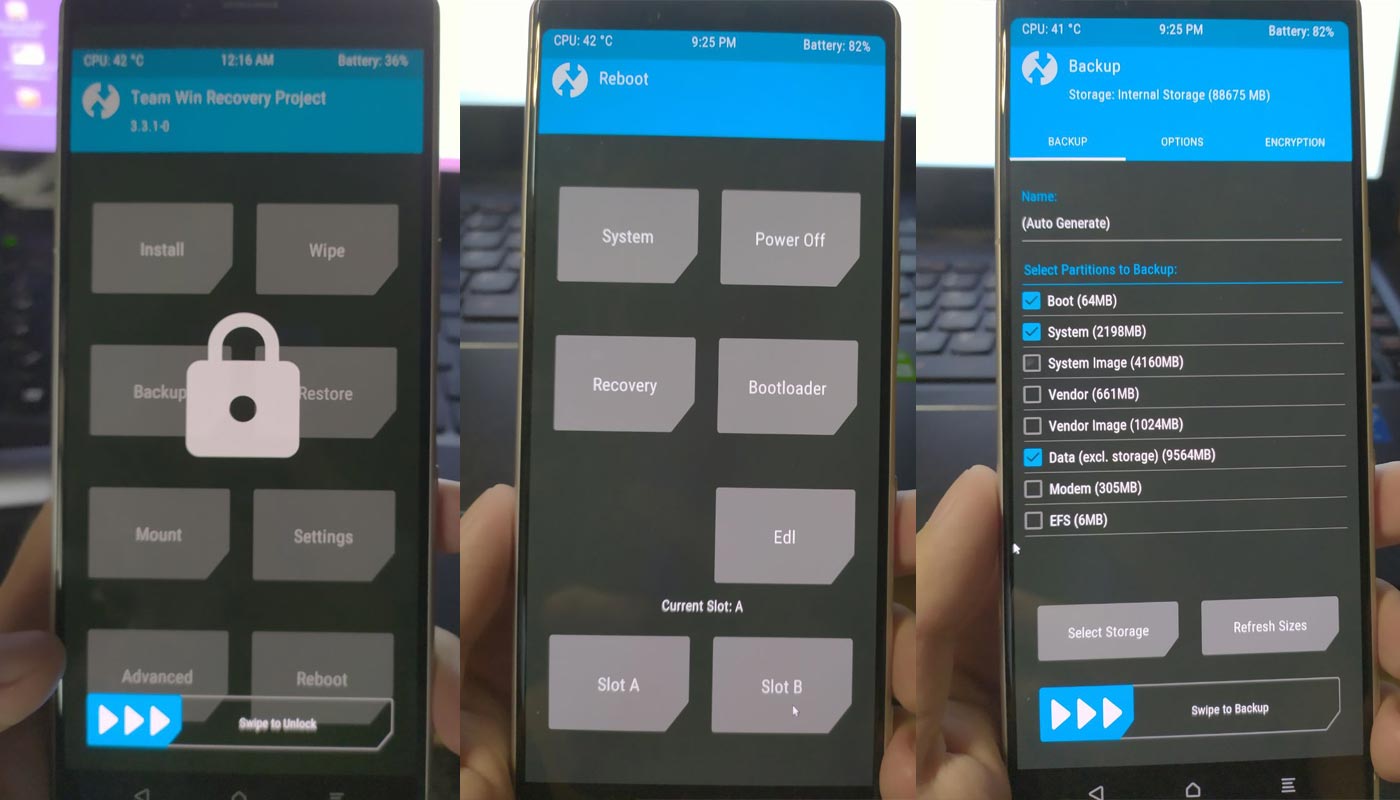
- In TWRP, Make a full Backup on External SD Card or Pendrive using OTG Cable.
- After the process complete, Reboot to Bootloader using TWRP Option. Reboot->Reboot Bootloader.
- Go to the TWRP menu. Select Advanced Menu->Install recovery ramdisk->recovery.img. This file is what we stored in the SD card before.
- Return to Home of TWRP select Install.
- Select Magisk.Zip.
- Again Return to Home of TWRP select Install.
- Select Kernel.Zip. The same process goes for Camera Fix. Don’t use Add more Zips in TWRP. Install one by one.
- After the Installation Reboot Your Mobile.
- You can also install Magisk Manager in your Mobile Applications. Download Root Checker to check your mobile root status.
What More?
In my opinion, you don’t need rooting for your Sony Xperia 1. If you thought you could Improve Performance By root; With the Qualcomm Snapdragon 855 Octa-Core processor and 6 GB RAM, your device can perform well. If you don’t know how much RAM you need, You will never use this much RAM. Don’t Install any apps other than trusted sites on rooted devices. Third-party site apps can contain some background codes. So, Check twice before installing those apps. If you want to return to stock firmware, flash Sony Xperia 1 Pie 9.0 firmware. During this process, If you face any problem, comment below.

Selva Ganesh is the Chief Editor of this Blog. He is a Computer Science Engineer, An experienced Android Developer, Professional Blogger with 8+ years in the field. He completed courses about Google News Initiative. He runs Android Infotech which offers Problem Solving Articles around the globe.


Leave a Reply