Samsung Galaxy J7 Prime is still a great phone with 3 GB RAM. But the problem is Software; It can’t survive even with this amount of RAM. The Major problem is unnecessary background apps. You can get rid of them by Rooting. Here below article, We will provide Lot of TWRP for Variants. In Some Countries, this mobile called On NXT, On 7 2016 Models. So, to reduce the confusion, I give the name and Also the Model Numbers. This method Supports Both Nougat and Oreo Android Versions. The TWRP is tested with Oreo and Nougat versions.
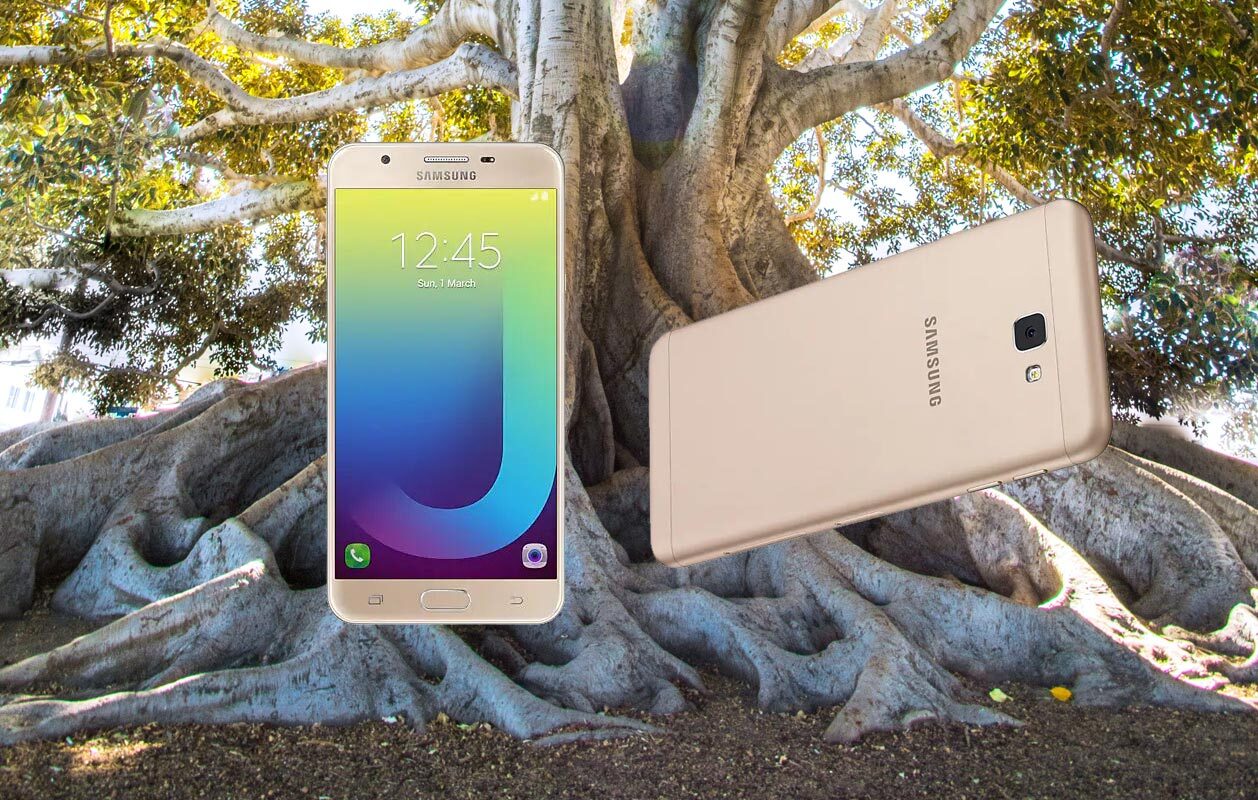
Why root your Samsung Galaxy J7 Prime?
First of all, you can Uninstall unwanted apps like Samsung Galaxy Store and theme If you Didn’t use. You can use Lite Weight ROMS; they consume 1 GB -1.5 GB RAM. But Normal this Custom UI Skin absorbs 2.2.5-2.5 GB RAM. So with Balance 500-750 MB, you can’t handle the Heavy Weight apps.
Note these Things before Rooting
-
Check your battery percentage above 50% (A fully charged battery is recommended)
-
Backup everything using Samsung Account and External Storage.
-
Download and install the Samsung USB driver software on your computer system.
-
Get the Odin flashing tool, (Select Latest version for best results) extract its entire file, and install it on your PC.
- Download Respective TWRP file and Copy it to your Mobile internal memory. Select the correct file. Flashing the wrong file may brick your device.
- (SM-G610F / SM-G610K / SM-G610M / SM-G610Y). This TWRP can work well with Nougat and Oreo Android versions.
- Download SuperSu file and Copy this in your mobile Internal Memory. It should be flash after the TWRP flash for Managing SuperUser Permissions.
-
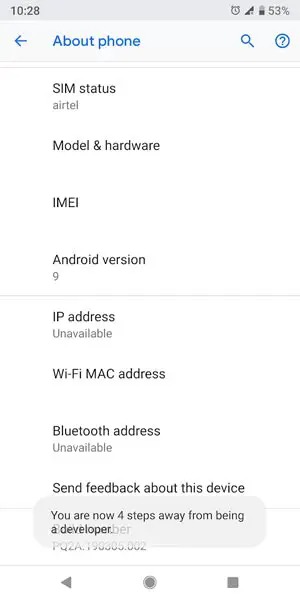
Enable USB Debugging Mode and OEM Unlock; you’ll find these options at Settings >>> Developer options. If you didn’t see the developer options on your settings menu, then go to about >>> build number; click on the “Build Number” row for about ten times constantly to activate “Developer Option” on your device.
Rooting Process in Samsung Galaxy J7 Prime
Flashing TWRP using ODIN
- Switch off the mobile device.
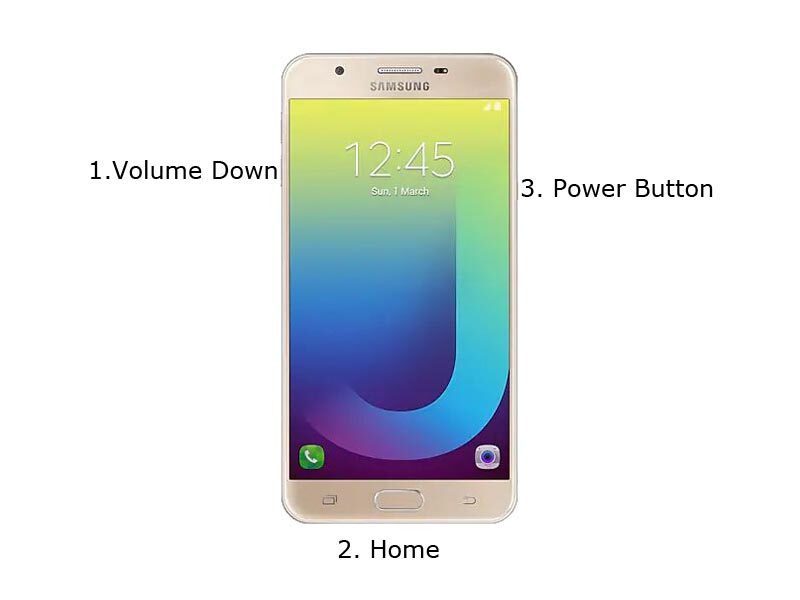
- Boot into download mode by holding down the Volume Down + Home + Power Button at the same time.
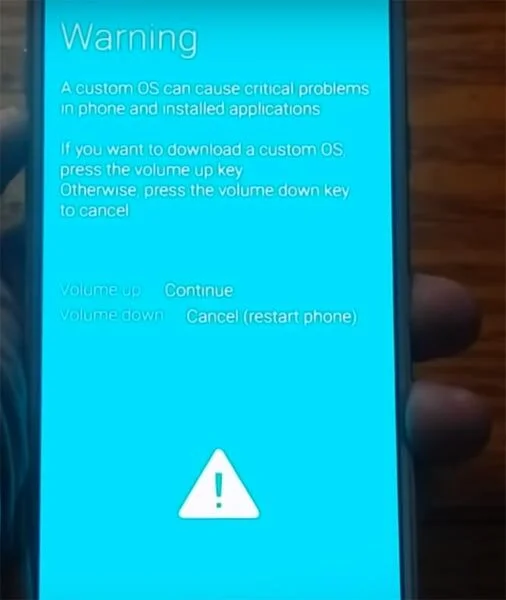
-
Press the Volume Up button when you see the warning message to continue
-
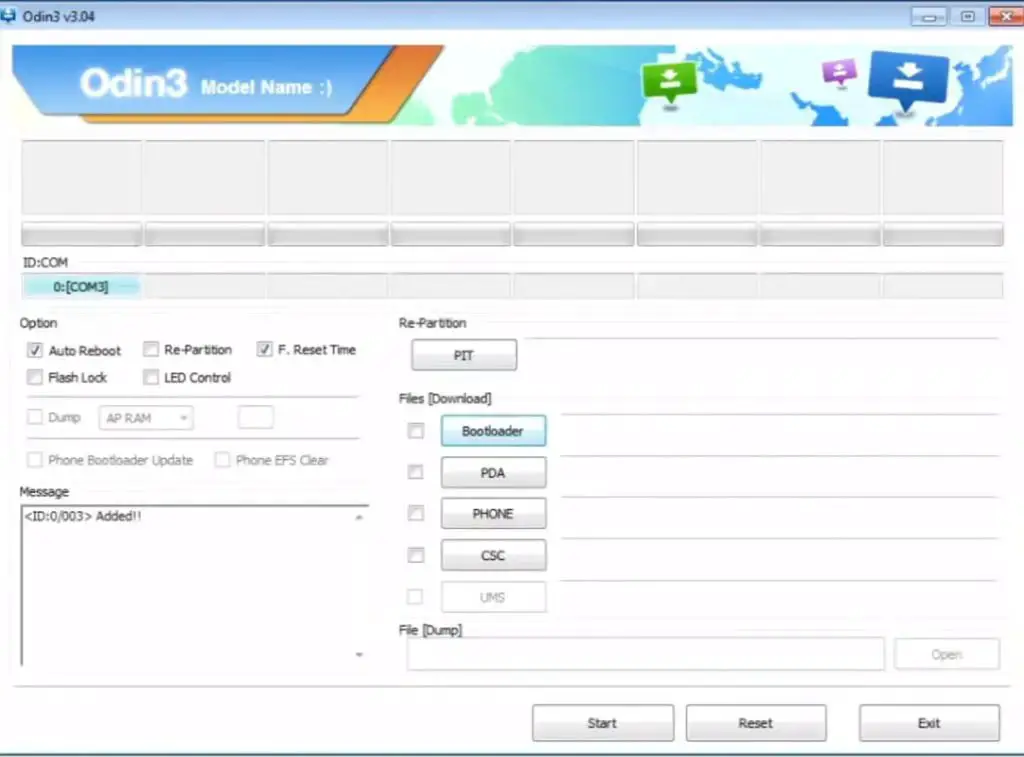
Now, launch the Odin app which you must have installed to your computer, then, connect the Samsung Galaxy J7 Prime using a USB Cable.
-
Usually, you should see an “Added!!” message to prove that your device is successfully connected to the Odin app. Retry the steps above if you don’t see this “Added” message.
-
Click on the PDA or AP to get out the TWRP Recovery file from your computer and send/install it to Samsung Galaxy J7 Prime.
-
Also, navigate to the “Options” tab and un-tick on “Auto-reboot.”
-
Click “Start” for the TWRP Recovery File to be installed on your device.
-
You are DONE.
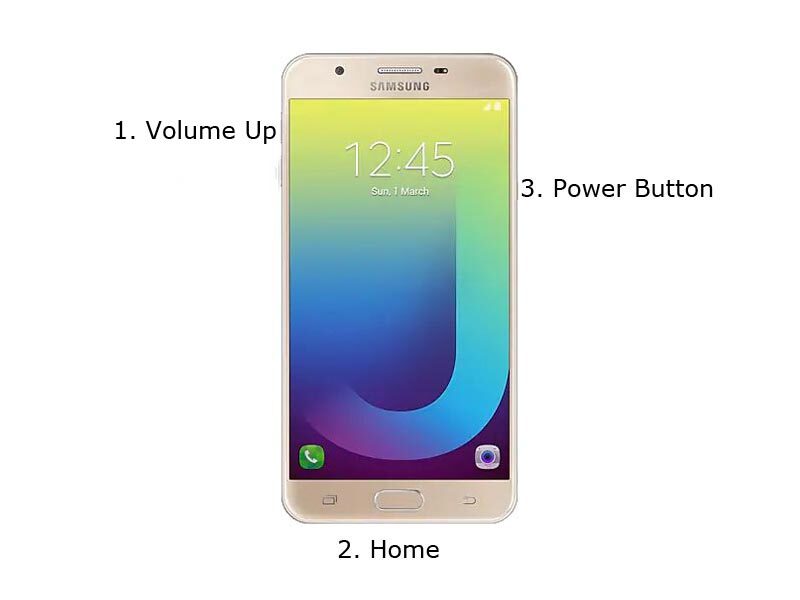
However, to confirm if the TWRP Recovery installed currently, the switch of the device and reboot it in recovery mode by holding down the Volume up + Home + Power button. If you checked and the TWRP is correctly installed, go ahead to root your device with the SuperSu app following the quick steps below;
Install SuperSu to Root and Manage Super User Permissions
-
Switch off the mobile device and reboot it in recovery mode, if you already in Recovery mode skip this step ->Volume Up + Home + Power Button.
-
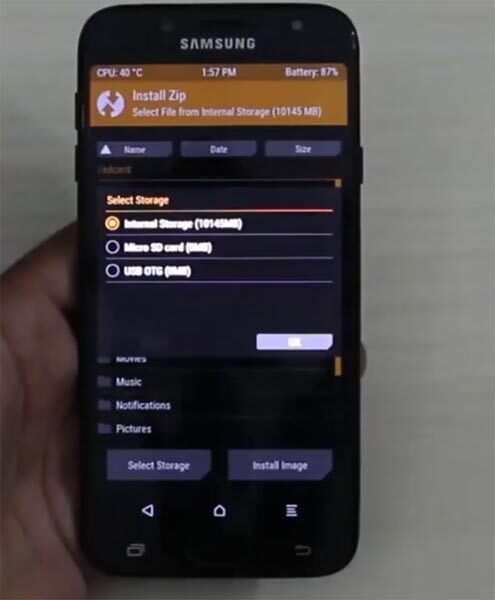
Automatically, the device will boot in TWRP Recovery Mode; tap on Wipe >>> Advance Wipe >>> Select Cache Data.
-
Go back to the main menu (Home) in TWRP recovery mode and tap again on “Install.”
-
Now choose SuperSu.Zip and install it. If you want to install other versions, try other SuperSu versions.
-
After Installation, go ahead to reboot you Galaxy J4 plus smartphone.
-
You have just rooted the device.
You will find the SuperSu app icon on your apps menu. So, you can manage the root access from the SuperSu app by taping on the icon.
Install Magisk Manager instead of SuperSu Manager
If you didn’t like SuperSU Manager, Yep it is old. You can install Magisk Manager.
What more?
There are plenty of Custom ROMs available for Samsung Galaxy J7 Prime. My favorite is Some Lineage OS. They are near to Stock Android. I Love it. To Uninstall unwanted Apps, you can try- System App Remover. Hey, Care about what you uninstall. Don’t mess with com. google apps and UI Apps if you still use Samsung OS. If you install other Custom ROMs, they are already optimized. If you accidentally bricked your mobile during the process, you can flash J7 Prime Stock firmware.

Selva Ganesh is the Chief Editor of this Blog. He is a Computer Science Engineer, An experienced Android Developer, Professional Blogger with 8+ years in the field. He completed courses about Google News Initiative. He runs Android Infotech which offers Problem Solving Articles around the globe.


Leave a Reply