Mobiles are not only used to make calls. Smartphones have a lot of real-time helping features bundled. Your mobile can have the world’s best camera, display, and all other things. But, most of us use the basic things that always help us in real-life situations. The flashlight is one of the features that every people still use. If you have a smartphone, you will use the flashlight at least once daily. Most Android mobiles utilize the Camera flash as a Flashlight. Accessing the flashlight can be a tricky part in some situations. You should use more than one method to turn on flashlight mode when dealing with a dark environment based on your daily routine. Here I will explain various techniques for Android mobiles. Based on your comfort, you can choose the best two ways.
Table of Contents
Different methods to Turn on/off flashlight mode/torchlight in Android Mobiles
In Android mobiles, we can’t trigger all hardware without having root access. But, basic things like a flashlight on-Yes, we can do in multiple ways. Opening the notification bar and toggling the icon may not be comfortable for all users. So, I try to implement the flashlight in various ways.
1. Using a quick Notification toggle
This is a standard and straightforward way. You can always find the flashlight in quick settings if you have an Android mobile above Android version 5.0.
Steps
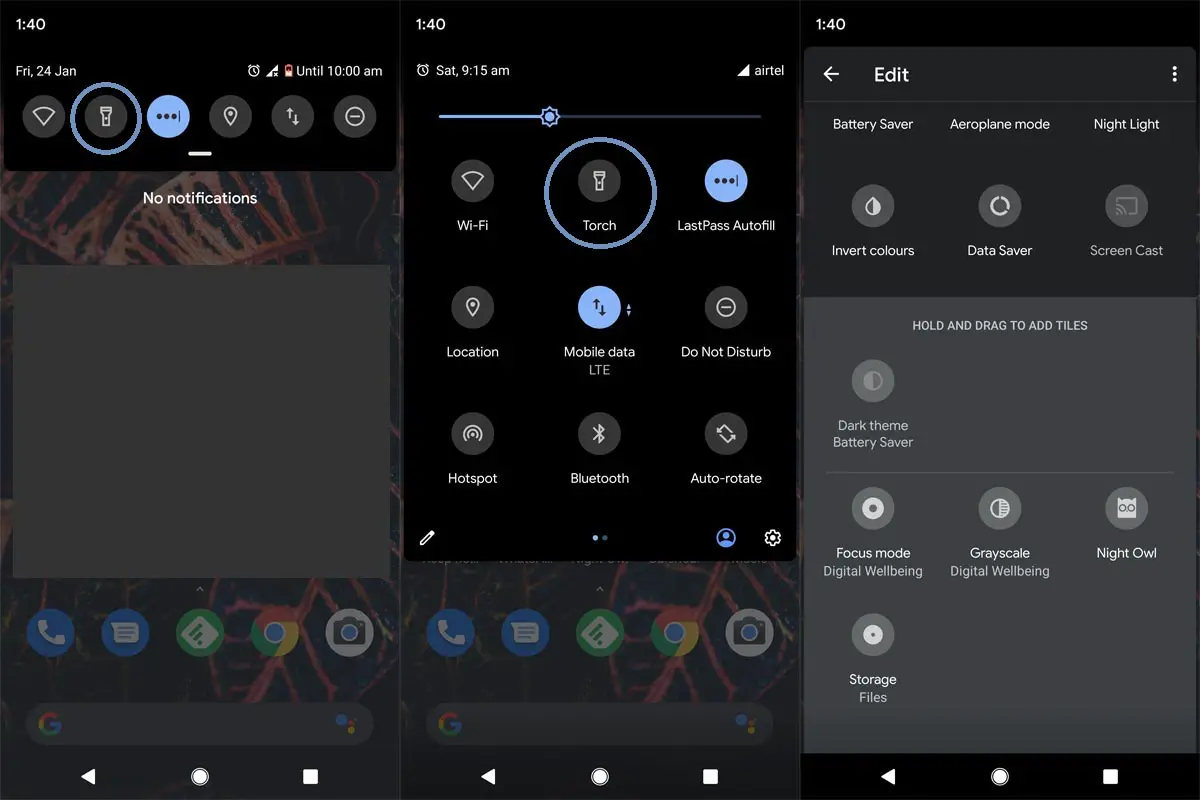
- You swipe the notification bar and find the flashlight icon in the quick settings. When you can’t see the image, lift it further to extend the notification bar.
- Select the edit or pencil symbol if you can’t find the option in both ways.
- You will find the omitted quick settings. You can select the flashlight and drag this setting to the temporary locations.
You may feel confused about the type of setting, and I will explain these terms below.
- Quick Settings– You swipe the notification bar once and get 4-6 quick settings based on your setup.
- Extended Notification Bar– You swipe twice and get 9-12 quick settings in the notification bar.
- Edit Notifications– You have to re-arrange or add/remove the quick settings using this option.
2. Using Google Assistant
You can use Google Assistant for various fast works. Most of the time, it can control the hardware of mobiles. In hardware-wise, it may not be the best like Bixby. But, When you have a data connection, it can perform well with software and limited hardware options. The real problem is you can’t do these things without a data connection like Bixby. I know Bixby can’t even stand Google Assistant. But, it is good with its Samsung devices.
Steps
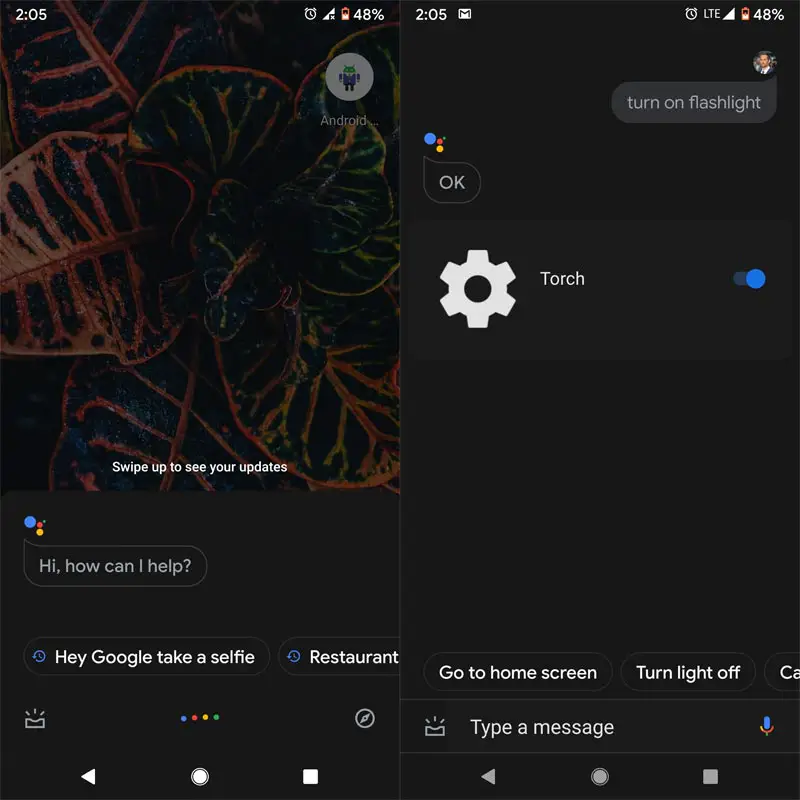
- Trigger Google Assistant by long-press the home button.
- When Google listening says, “Turn on, Flashlight.” It will turn on the flashlight.
- You can also use the “turn off flashlight” command to turn off the light.
3. Use a separate app to turn on the light
You don’t have to install third-party apps when your mobile manufacturer gives you options to use the flashlight with small settings. But, When they don’t work that much, or the apps have some exclusive features that you like or feel convenient, you can use a dedicated app to turn on the flash. You will be confused if you search for this app in the Play Store. So, I filter out some best apps; you can choose the one below. This app doesn’t require any individual permissions other than flashlight access. So you don’t have to worry about your data.
Flashlight – Classic
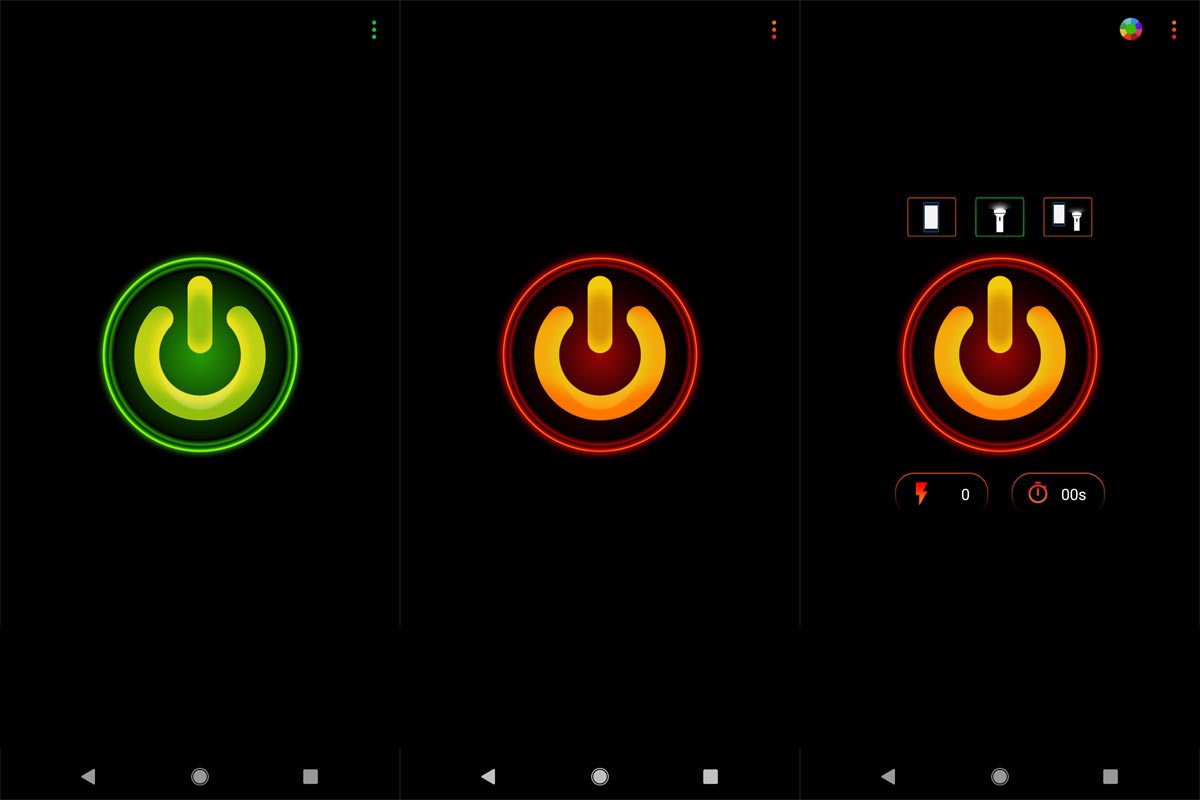
The name itself tells about the app. It has a minimal feature, and the primary purpose of this app is to control the flashlight. Also, it is a lightweight app. You can use this app when you aim to handle flashlights and use the display as light. But, If you want to use different modes, use other apps.
- Download and install Flashlight – Classic app from Play Store.
- Open the app. You will get the Power button like the central display icon. You can use this option to turn on and turn off the flashlight.
- Above this power icon, you will find both a display and torchlight icon ad combination.
- If you select the combination icon, it will turn on both the flash and display light.
Color Flashlight
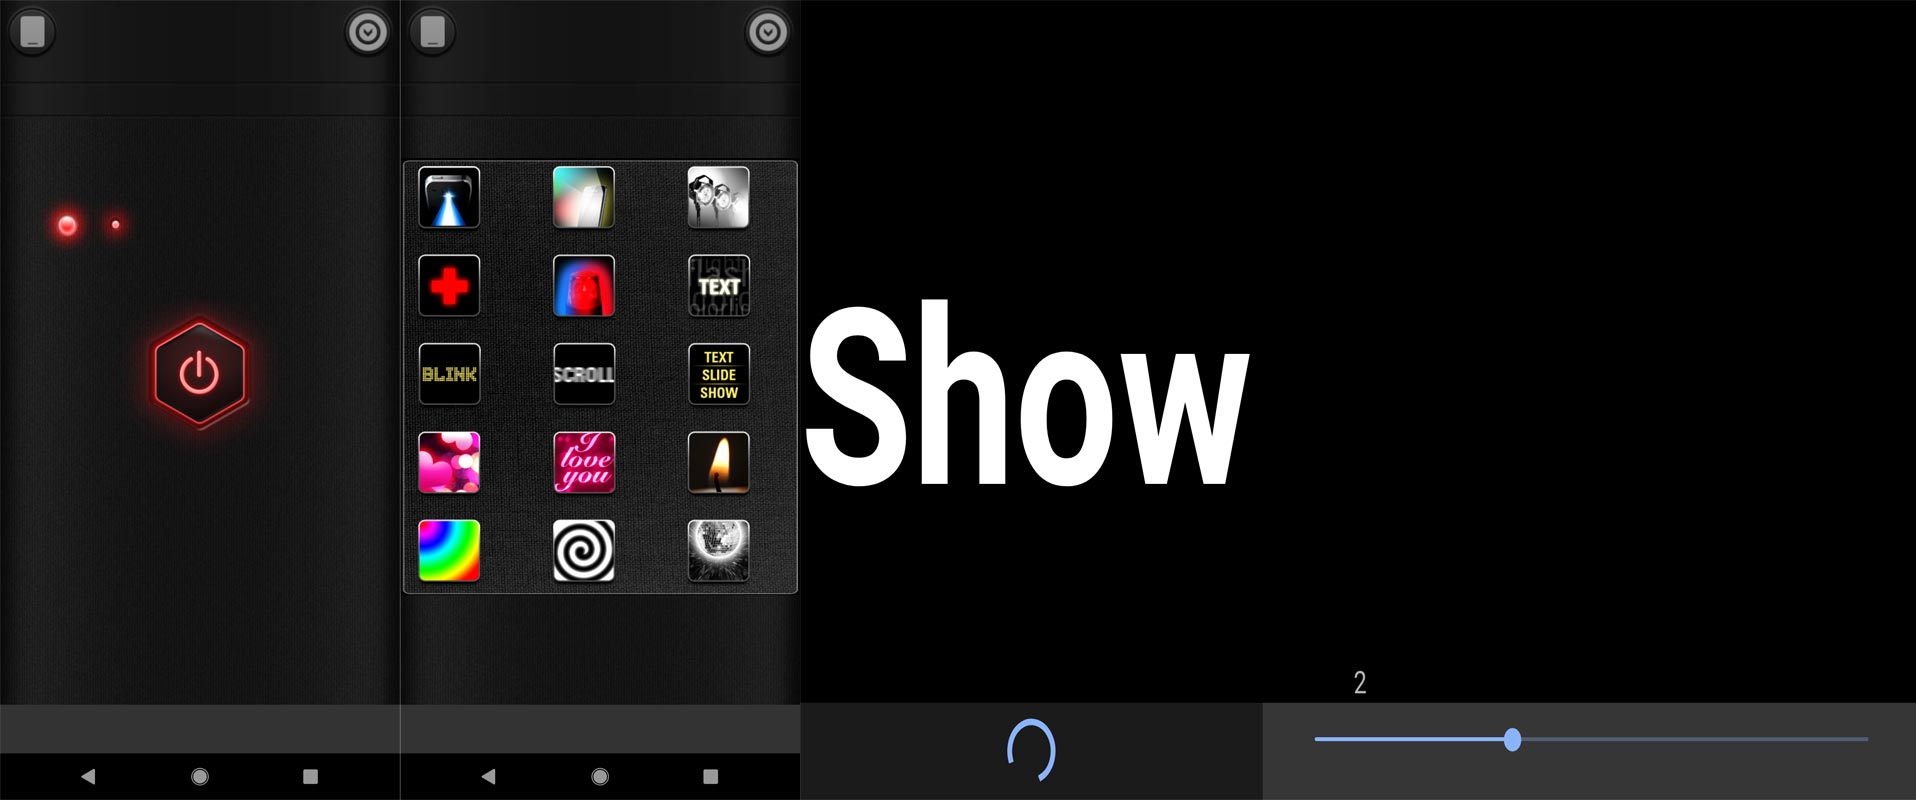
This app not only provides flashlight options, but you can show high-brightness text on your mobile display. It will help you when you are camping and want to convey messages where the network is unavailable.
- Download and install the Color Flashlight app from Play Store.
- Open the app. You will get the Power button like the central display icon. You can use this option to turn on and turn off the flashlight.
- You can find more than 10+ flashlight modes in the top right corner. Some methods use your display.
Flashlight HD LED
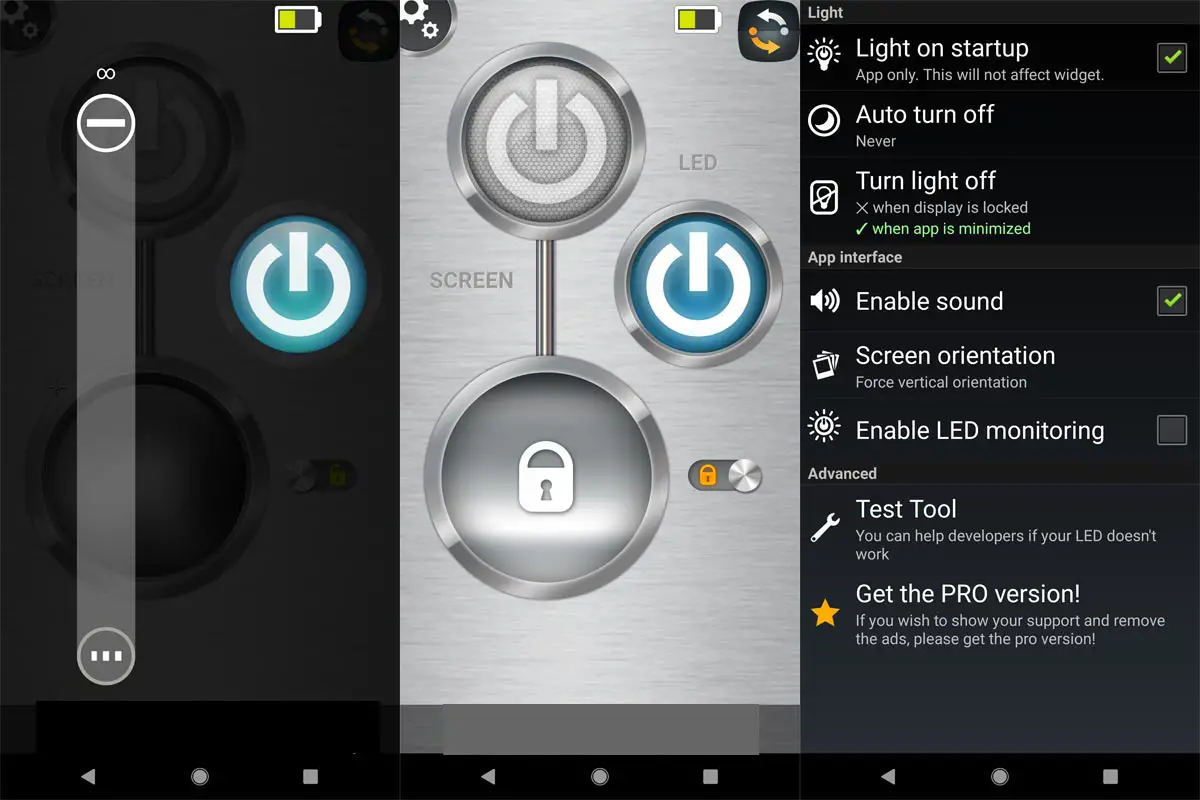
This app has some exclusive features like time interval blink. Instead of setting the numbers, you can use the slider to modify the blink interval. You can also set up the Auto turn-off time.
- Download the Flashlight HD LED app from Play Store.
- Open the app. It will automatically turn on the rear flash. You can find the slider option; the infinite symbol means no delay in a blink (0 ms). You can control the blink delay when you slide the bar from the bottom.
- You can also lock the screen to avoid accidental turn-off or turn on the display light.
4. Using Gestures- One Plus Devices
Everybody knows OnePlus has been utilizing gestures pretty well from the old days. Compared with other manufacturers, OnePlus gestures are grand and valuable. Using those gestures, you can turn your flashlight on and off without awakening the phone display. To do this, follow the steps below.
Steps
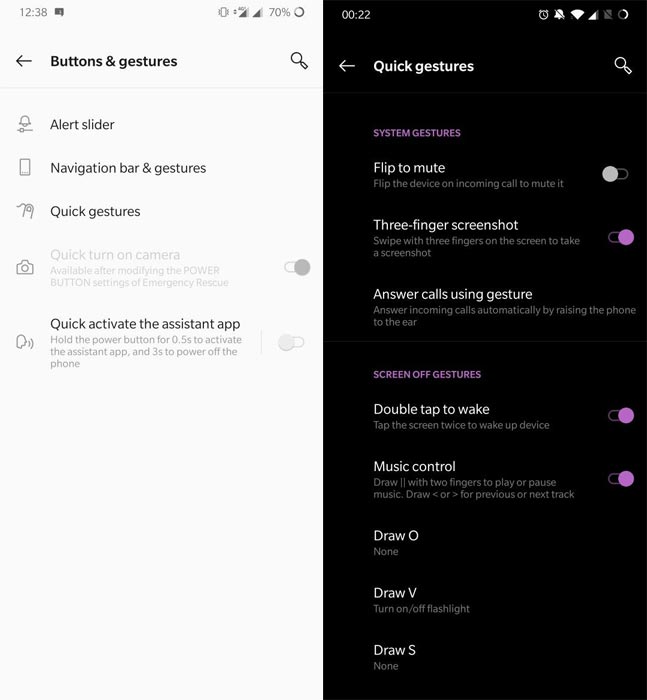
- Go to Settings and Open Buttons and gestures.
- You will get the navigation buttons option and Quick gestures with other options.
- Select Quick Gestures and the “Draw V” option. You set this gesture to turn on/off the flashlight, and you don’t need to wake the display and unlock your device to do this process.
5. Use Button Remapper apps to navigate the flashlight option easily
You can also use your physical keys to turn on/off the flashlight. We can configure the modes using the app called Button Mapper. It will be handy in most situations instead of swiping the notifications and gestures.
Steps- Regular Phones
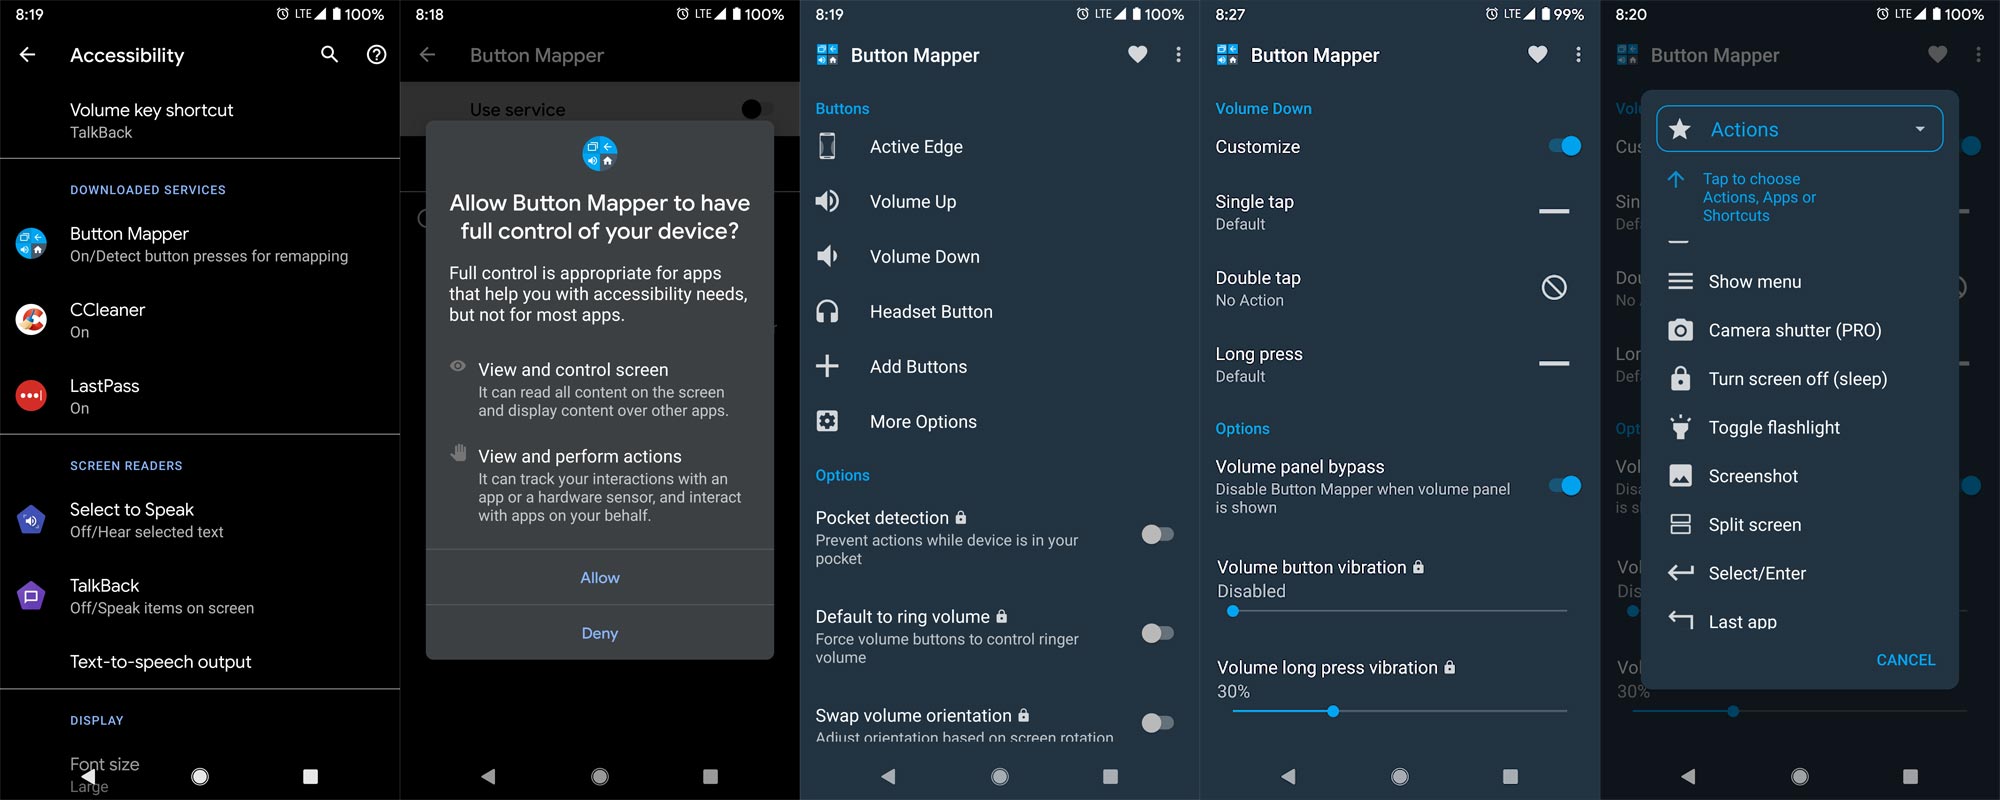
- Download the Button Mapper app from Play Store.
- Open the app. Give necessary permission for Accessibility within the app.
- You will get the multiple physical keys touch based on your mobile. You don’t need individual permissions when you use other buttons like Volume keys. If you have Pixel devices, they have Active Edge function, and you can also configure them using adb settings.
- Select volume Up/Down and select customize. You will receive Single tap, Double-tap options. In my experience, Double-tap works better and doesn’t mix with the volume. You can reduce the sound by long pressing the volume down button. When you select the Double-tap, you will receive a lot of options. Select a flashlight from those options.
- That’s all. Now, if you double-tap the volume down button, It will turn on/off the flashlight. Some devices, like Samsung, have an extra key for Bixby. Using this app, you can remap the Bixby key to Google Assistant or other functions like turning on the light. Use the “Add button.” After detecting the physical key, you can follow the above steps to configure the key.
Steps- Use Active Edge on Pixel Phones to turn the flashlight/off
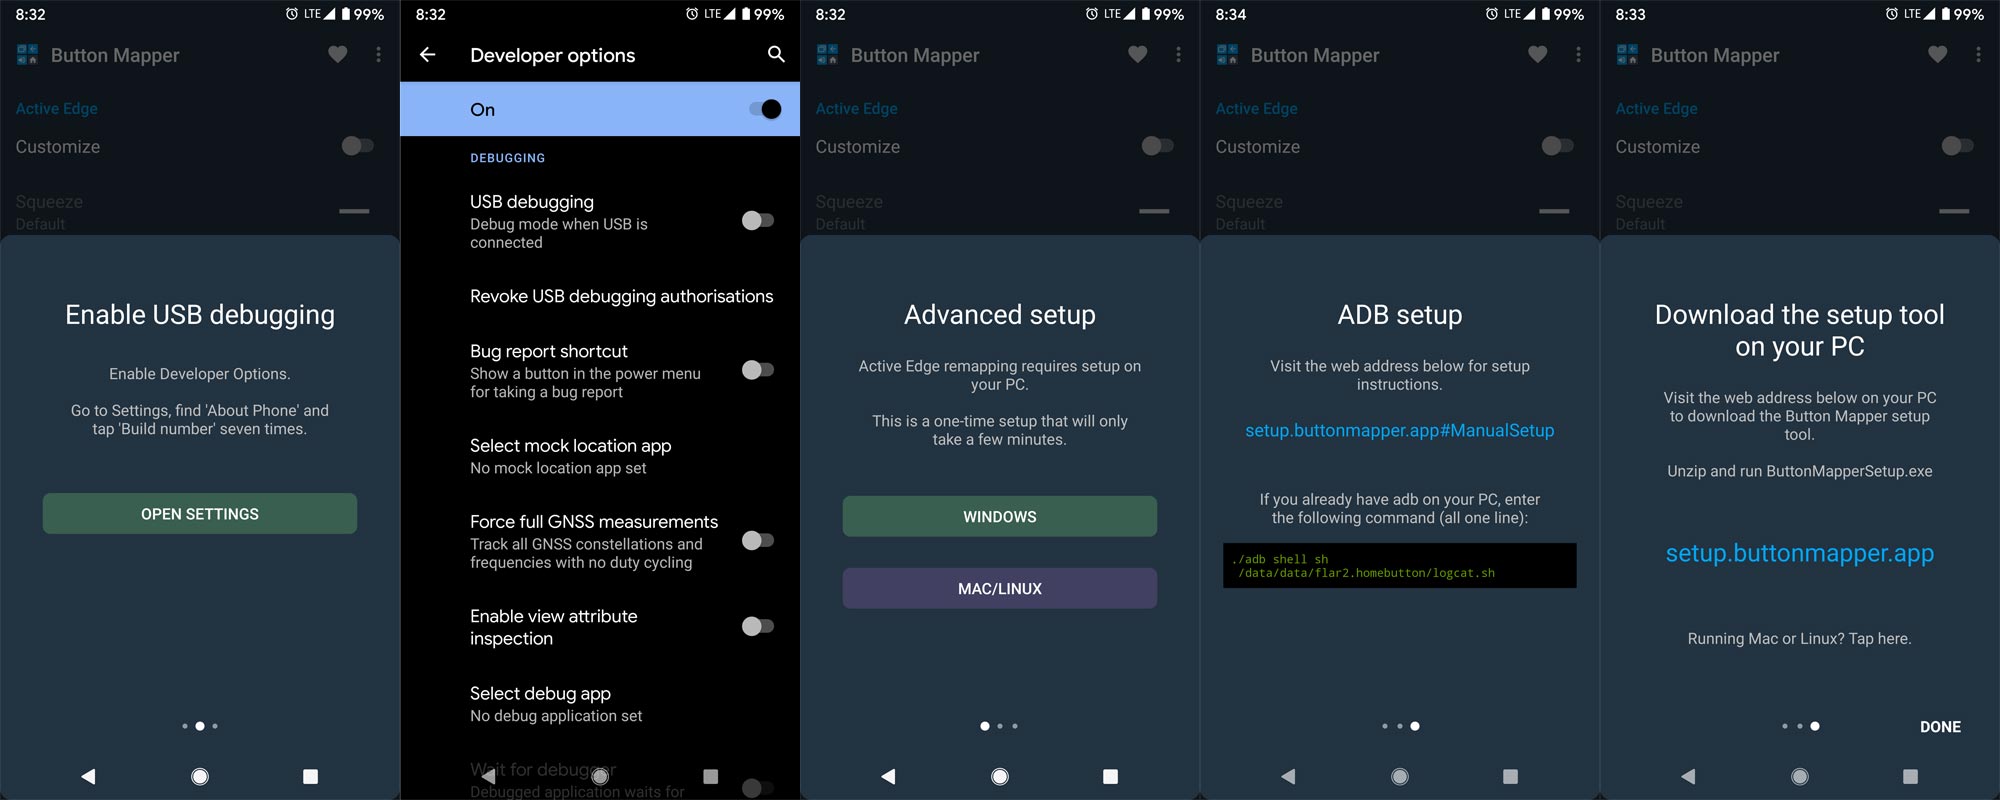
- Open the app. Give necessary permission for Accessibility within the app.
- You will get the multiple physical keys touch based on your mobile. If you have Pixel devices, they have Active Edge functions. Select “Active Edge.”
- You should enable USB Debugging on your mobile. You’ll find these options at Settings >>> Developer options. If you didn’t see the developer options on your settings menu, then go to about >>> build number; click on the “Build Number” row about ten times continuously to activate “Developer Option” on your device.
- After enabling the USB Debugging, Download the official app from setup.buttonmapper. The app, If you use Windows. When you have Mac and Linux, use the adb commands to configure the settings. You can find the commands in the app Instructions itself. Refer- ADB setup for Mac and Linux.
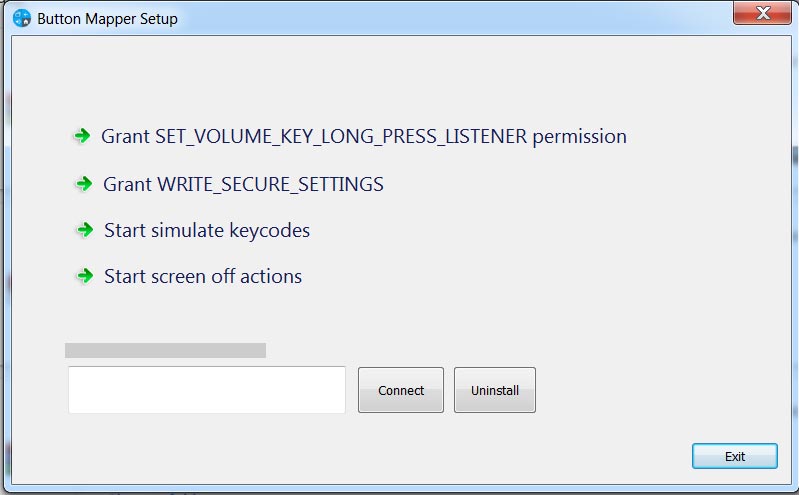
- Open the button mapper app on Windows PC. Enable the permissions one by one. It is a one-time setup, and you don’t have to configure it every time.
- When you select Active Edge on your mobile, you will receive a lot of options- Select Flashlight from those options. After the successful process, You can configure Active Edge to a flashlight. The sensitivity of the edge depends on your default settings. Don’t mix the edge function with your previous setups. Double-tap is handy and doesn’t interfere with other services.
Wrap Up
Most of the time, we use a flashlight in emergencies. So, we should access this feature immediately. When it hides in sub-settings, it will take some time to obtain. But, using the above methods and your current usage, you can choose the best one that suits you. Most apps don’t turn on/off the front flashlight on your mobile. We have an exclusive working app for this. I hope it will help you make video calls in dark environments. These apps need only flashlight and camera permissions. Because the flashlight comes under the camera category, don’t install any third-party apps that require beyond these permissions. Did you use any other apps or methods better than this? Comment below; it will help our friends also.

Selva Ganesh is the Chief Editor of this Blog. He is a Computer Science Engineer, An experienced Android Developer, Professional Blogger with 8+ years in the field. He completed courses about Google News Initiative. He runs Android Infotech which offers Problem Solving Articles around the globe.


Leave a Reply