In the old days, we root our mobile to remove bloatware apps and improve performance slightly. Because of the modern specs, we don’t need to do those tasks. Even if mobile manufacturers heavily installed bloatware apps, it won’t affect our daily performance. But developers to begin releasing some of the useful apps that require root access. So, To use those apps, We have to root our mobile. Some users are love to use custom ROMs. So, If you are one of them, You can Root your Samsung Galaxy J8 Android 10 version using the below method. Since it is a custom recovery method, you can flash your favorite custom ROMs. Compare with TWRP; Sky Hawk Recovery UI looks great and easy to use. So, you won’t get confused even if you are a regular TWRP user.
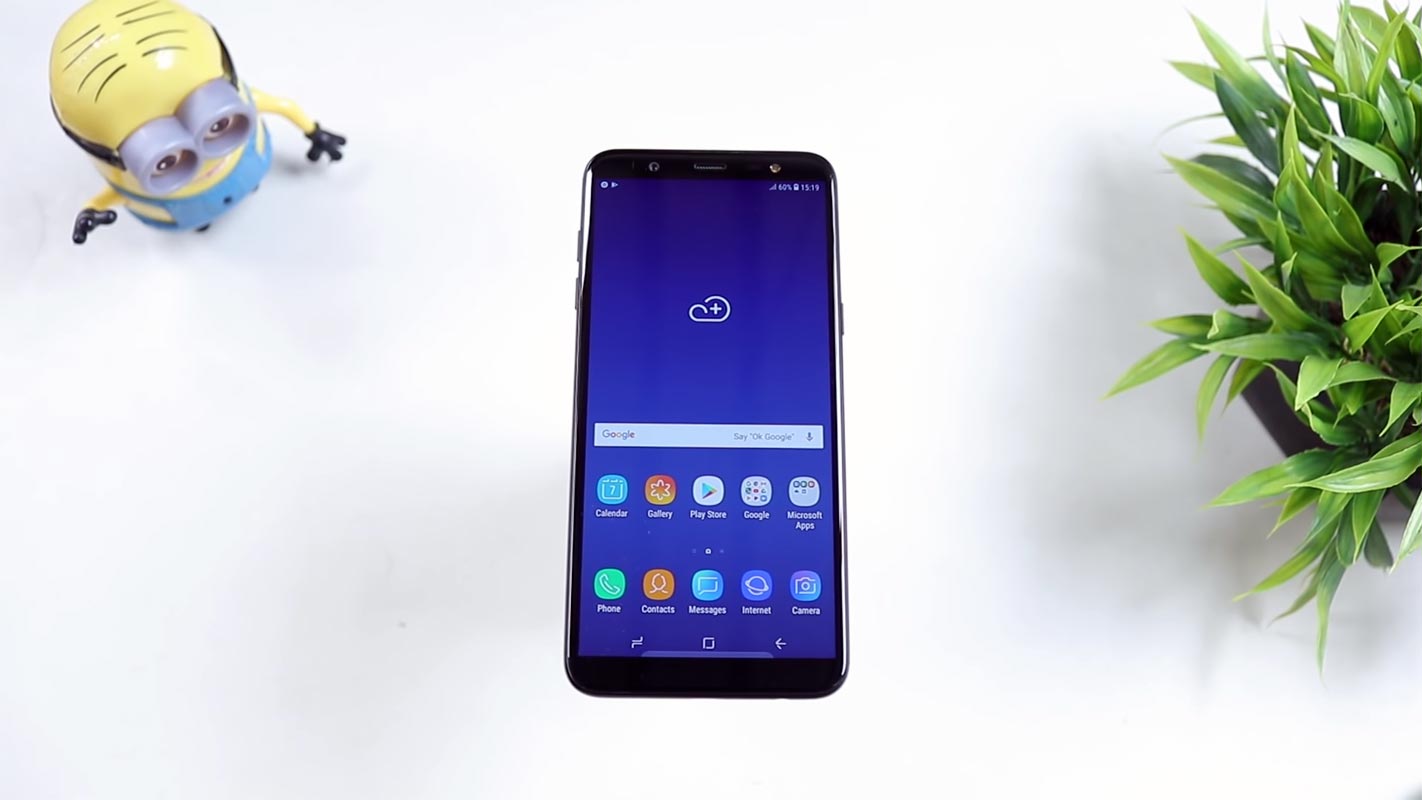
After One UI release Samsung optimized mobiles well with the software. But when you feel you need to use root required apps or more control on your mobile, you can root your mobile using the below method. When you are a regular user, instead of rooting, you can try some alternative apps.
Did you need to Root Samsung Galaxy J8 in the Android 10 version?
It would be best if you had a strong reason for rooting. Samsung Already released One UI 2.0 based on Android 10 and is already optimized. You have More than Enough 4 GB RAM to use daily apps without lag for years. Yes, I Know, RAM maybe looks like not enough because of the Samsung Heavily customized OS. But, Trust me, One UI is far better than other Custom Skin OS. You can use this device without lag for years until Samsung mess with some Bloatware. But beyond, this not go reasons, you are addicted to some root apps, or you are a frequent user of some Custom OS, you can proceed further. But if you want to root because everybody is doing, I advise you, don’t root If you didn’t have any experience. For regular users, It can become a Nightmare.
How to Root Samsung Galaxy J8 Android 10 One UI 2.0 (SM-J810F, SM-J810G, SM-J810M, SM-J810Y)
First of all, thanks to the developer 4yush5663 for the Root method. Also, topjohnwu – this genius is a one who discovered and maintaining Magisk. Samsung Galaxy J8 International variants come with a flexible bootloader. It means that the smartphone can be easily rooted. Also, the device can accept to install Sky Hawk recovery or any other custom recovery file/app alike. Don’t try with US Variants like Verizon devices. They come with a locked Bootloader.
But In the below method, we are going to Root this device by using Magisk. You can install Official Sky Hawk using the official app when it is released. Sky Hawk recovery is a custom recovery file that must be installed on your devices because you can root them successfully. In this article, we explained the easiest method to follow and install Magisk on Samsung Galaxy J8. However, the tool required for rooting this device is the Magisk App.
You can flash Sky Hawk once it is available. With the help of Sky Hawk Recovery, you can quickly flash the Custom ROMs into your Samsung Galaxy J8. Before sharing the tutorial, you may want to know that, with the Magisk present on your device, you can easily install any root apps. Does it seem complicated? Relax, everything will be explained briefly.
Things to check out for;
-
Check your device model number.
- Install Latest Magisk Manager.
-
Make sure your device battery is above 50%.
-
You should Backup your current files and data- Full Data Loss Process (save them on external storage).
- We cannot use Samsung Pay, Secured folder, and some official apps from Samsung.
- You can’t update your firmware, to get new firmware you have to follow the below steps with the latest firmware.
- Read the full tutorial before the process.
1. Pre-Requirement Steps
Unlock Bootloader
-
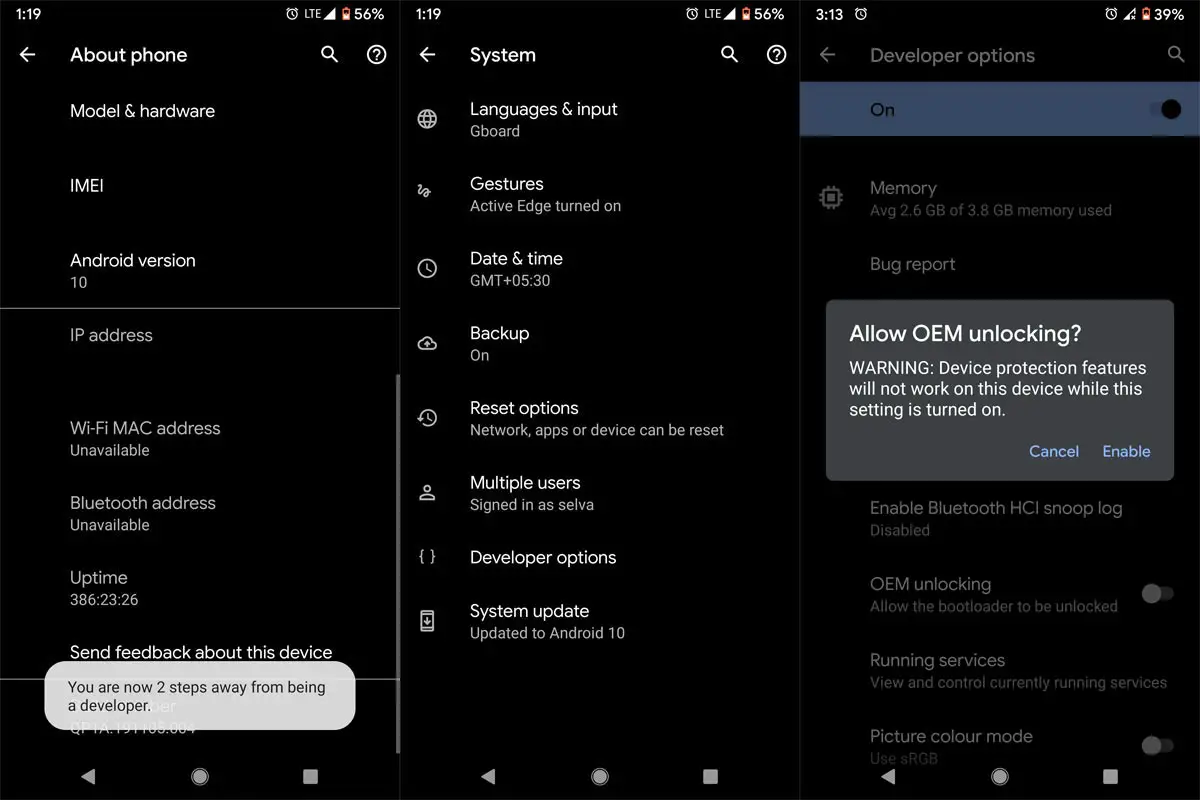
Enable USB Debugging Mode and OEM Unlock on your mobile. To do this; go to settings >>> about >>> Tap on the “Build Number” 7-10 times consistently to enable “Developer Options,” then go to the “Developer Options” and enable USB Debugging Mode and OEM Unlock. There is no complicated process in the Samsung Galaxy J8.
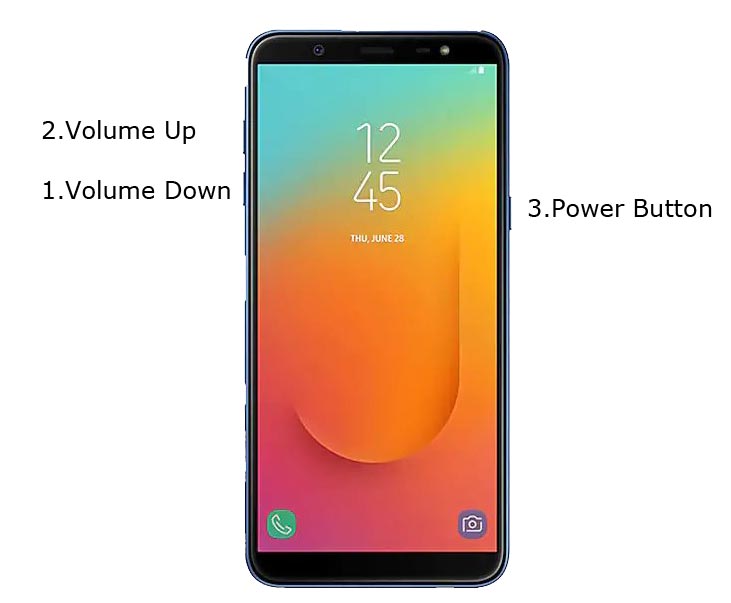
- Switch off your device. Enter into Download Mode-> Volume Down+ Volume Up+ Power and Connect your mobile with PC using USB Cable. When Download mode warning screen Appears, Press Volume Up button to unlock the bootloader.
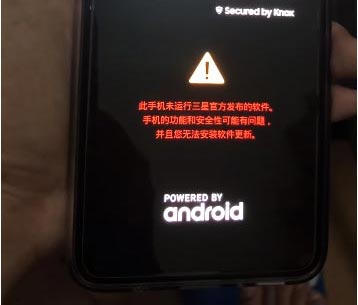
- The above process will wipe your user data. After setup your device, Please recheck the OEM Unlock in the settings. Sometimes It Will Lock Again.
Downloadable files
-
Download and install the Samsung USB driver to your computer system.
-
Also, download the ODIN software. Select the Android 10 version in the ODIN list. Install ODIN on your PC.
- Download OEM Fix (Optional) Copy it to Your Phone external Memory. We Need to flash OEM Fix to avoid OEM Lock automatically in the future after the Root process, and Disable_Dm-Verity_ForceEncrypt.zip, Copy it to Your Phone external memory. We Need to flash encryption disabler to avoid Boot Warnings in the future after the Root process.
-
Download and save the Sky Hawak File on your PC. Select the Correct file from Below. This recovery can support Up to Android 10.
2. Flash Sky Hawk using ODIN

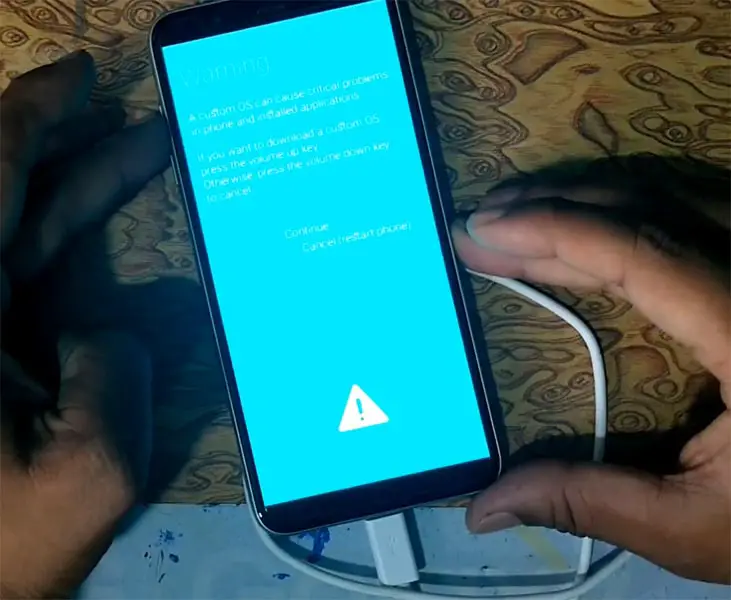
- Connect your USB cable with PC. Switch off your device. Then, enter into Download mode. To do this, press and hold down the Volume Down + Volume Up+ Power buttons and connect your micro USB Cable.
-
Press the Volume Up button to continue when you see the warning message.
-
Now, connect the Samsung Galaxy J8 mobile to the computer via USB cable.
-
Launch the Odin app on your computer. If the device is detected by this app (Odin), it will show you a message that reads – added!!!
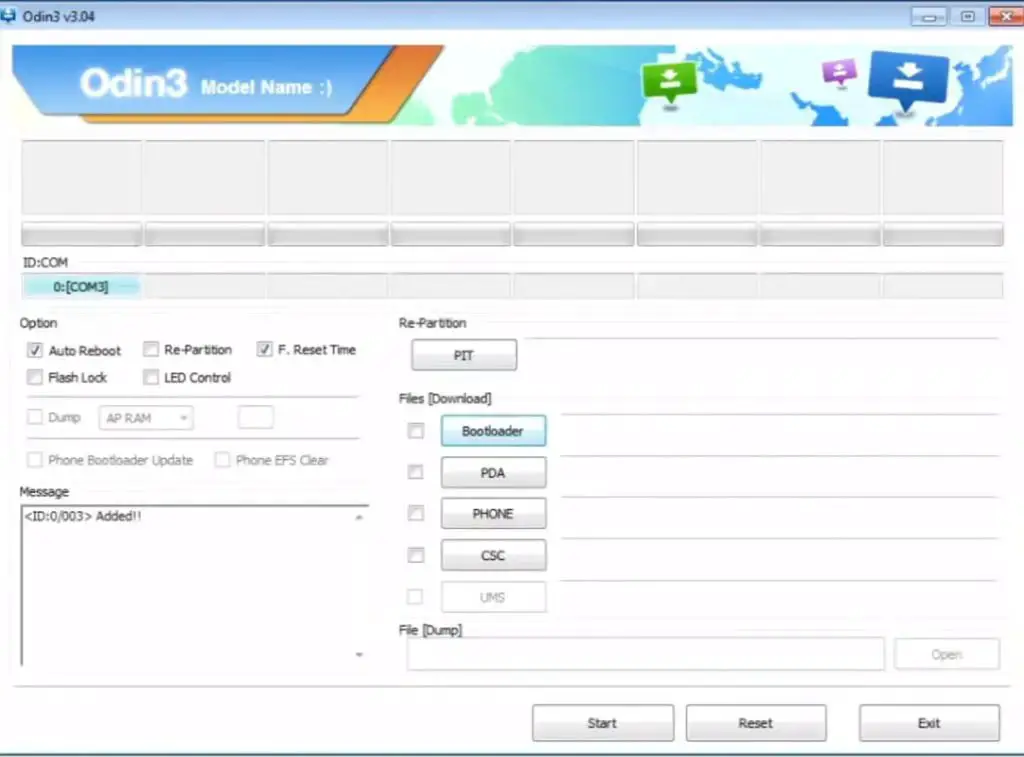
However, if the device is not correctly connected to the PC, you won’t see this message. So, you have to check the USB cable if it is reasonable and reconnect the device.
-
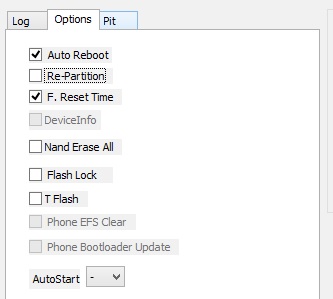
After connecting the Samsung device, click on the PDA/PA button to browse/search and get the Sky Hawk from where you saved it on your PC. Also, navigate to “options” and Un-tick the Auto-Reboot.
-
Click on “Start”
-
Once the file is loaded into the device, Don’t reboot your device.
-
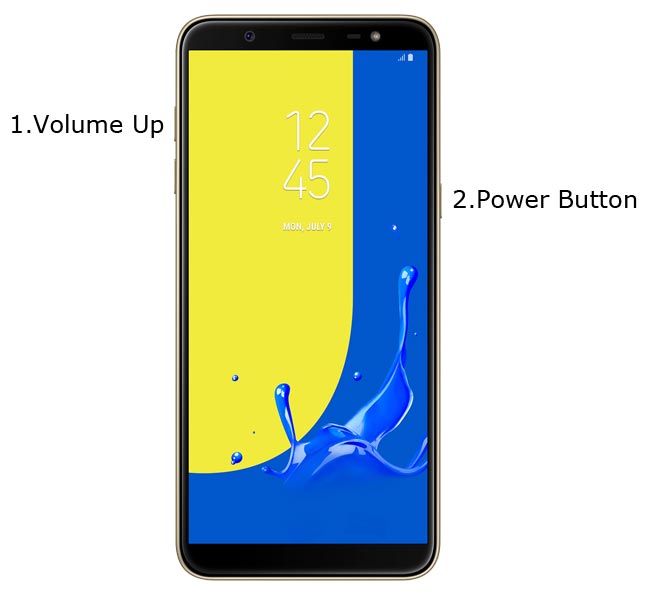
Kudos, you have just Installed the Sky Hawk on your Samsung Galaxy J8. If you installed Sky Hawk, Don’t turn on your mobile. Immediately, move to Magisk Installation steps. You can do this by Pressing Volume Down+Power to exit download mode then Press Volume Up+Power to enter into recovery mode.
3. Install Magisk, OEM Fix and DM-Verity in your Samsung Galaxy J8 using Sky Hawk
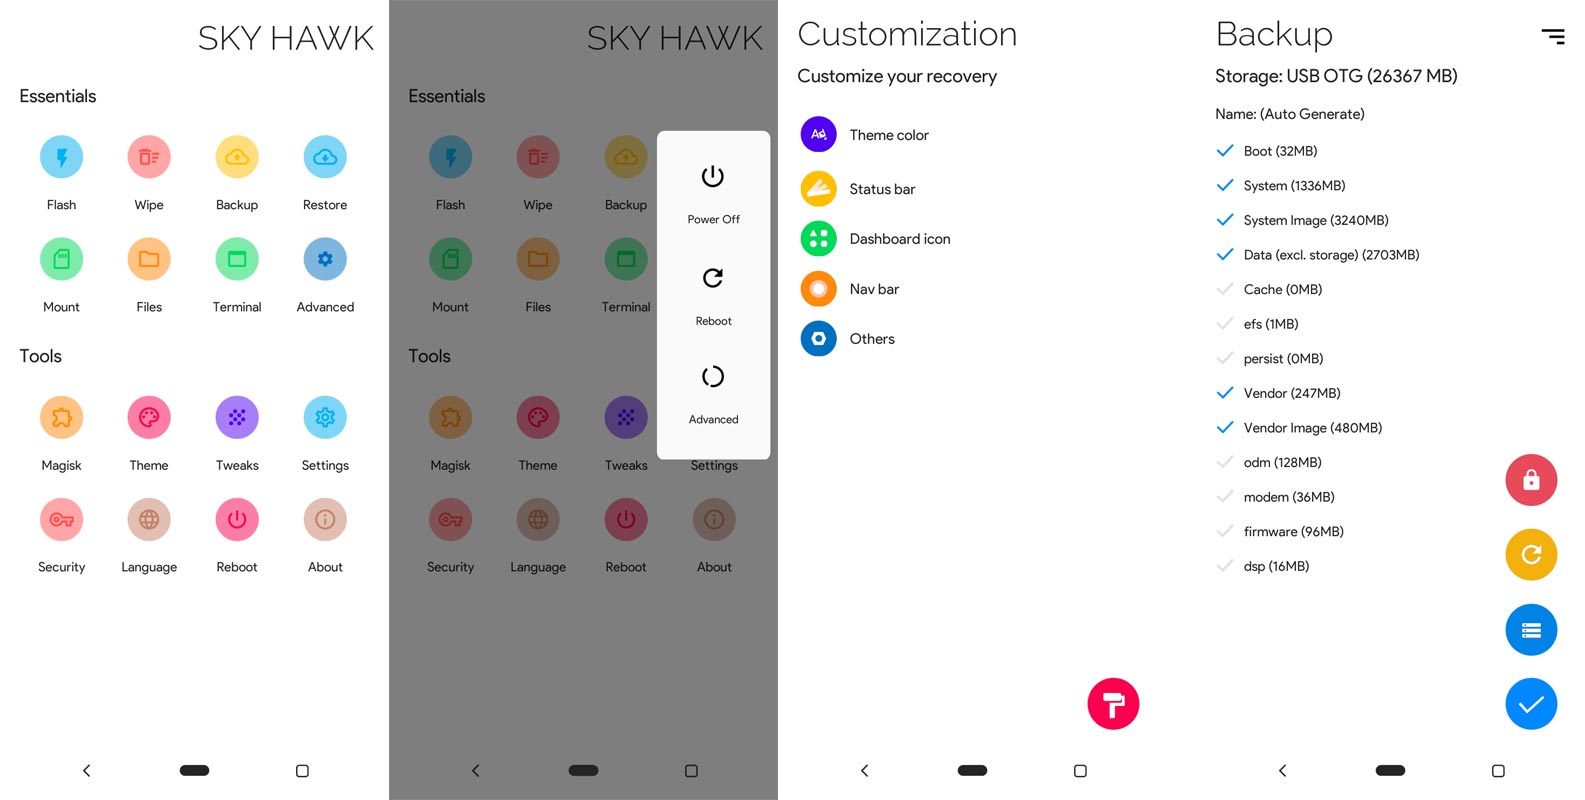
- Boot it into recovery mode->Volume Up + Power Button.
- Now it Will Boot into Sky Hawk Recovery Mode.
- Select Wipe->Advance Wipe->Select Cache and User Data.
- Return to Home of Sky Hawk recovery select Flash.
- Select OEM Fix.zip.
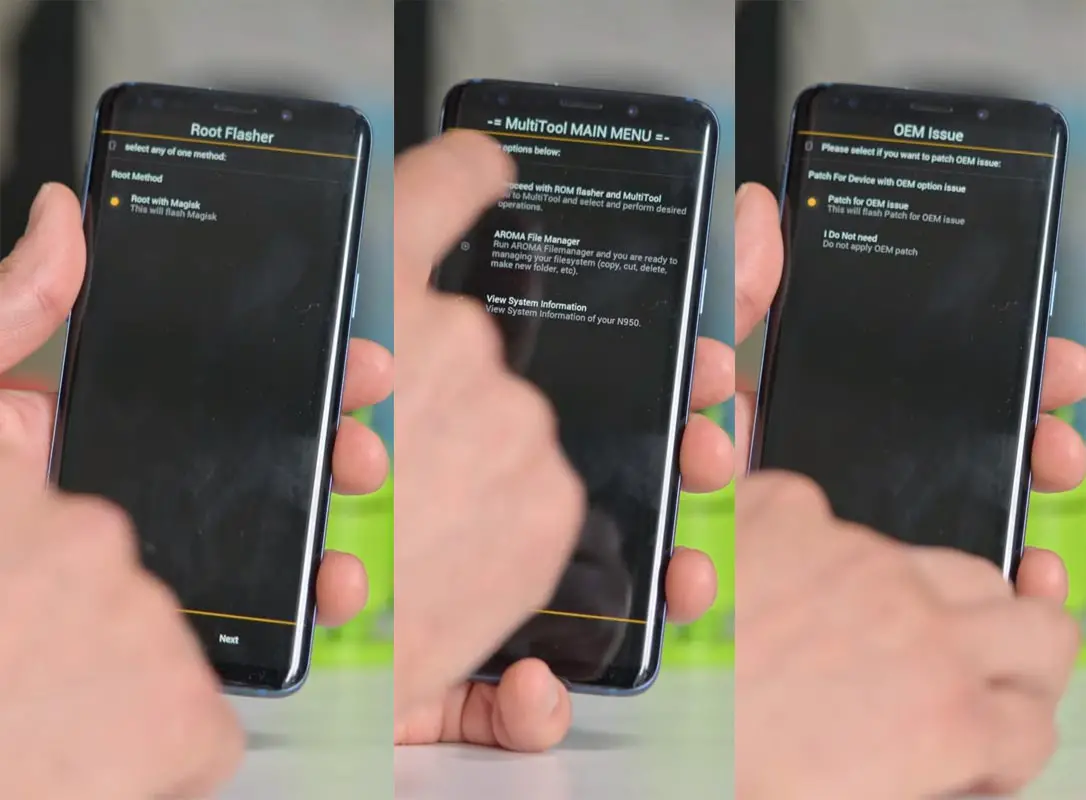
- After the installation, It will Prompt to Root with Magisk, Select Next until you get the Main Menu Screen.
- In Main Menu, Select “Proceed with ROM flasher and Multitool.” Select “Patch for OEM Issue.” We don’t need to Install Magisk Separately. This OEM fix file will Install Magisk.
- Return to Home of Sky Hawk select Install.
- Select DM-Verity.zip file.
- Follow the same way and install Magisk.zip.
- You should Install One by One. Don’t add more zips feature in Sky Hawk. After the Installation Reboot Your Mobile.
- You can also install Magisk.apk in your Mobile Applications. DM-Verity is used to avoid the Encryption issue after rooting. You can check your root status using Root Checker.
- If you didn’t find Magisk in App Drawer, you should repeat the process from the OEM fix installation.
What More?
In my opinion, you don’t need root for your Samsung Galaxy J8 Android 10 version. If you thought you could Improve Performance By rooting; With the Qualcomm SDM450 Snapdragon 450 processor and 4 GB RAM, your device can perform well. If you don’t know how much RAM you need, You will never use this much RAM. It would help if you did not Boot into Normal OS Booting, by pressing the power button, after firmware flash. It will boot you to a Non-Rooted environment.
If you accidentally urged and boot frequently, Don’t panic, after setup everything, switch off your device and boot into Rooted OS using above mentioned keys. If you root your device, because of the battery drain issues, you can optimize your battery without root. Beyond this, if your purpose is to Disable Bloatware apps, you can do that without using this method. When you have any suggestions or doubts, comment below.

Selva Ganesh is a Computer Science Engineer, Android Developer, and Tech Enthusiast. As the Chief Editor of this blog, he brings over 10 years of experience in Android development and professional blogging. He has completed multiple courses under the Google News Initiative, enhancing his expertise in digital journalism and content accuracy. Selva also manages Android Infotech, a globally recognized platform known for its practical, solution-focused articles that help users resolve Android-related issues.


Leave a Reply